Browser metrics
Follow along to learn about:
- Google’s Core Web Vitals and why they are important
- How to analyze the browser metrics output
- How to set thresholds for your browser metrics
- How to use the Performance API to measure web performance.
Google’s Core Web Vitals
The k6 browser module emits metrics based on the Core Web Vitals.
Google introduced these metrics to provided unified signals to assess user experience on the web. The vitals are composed of three important metrics to help user experience when using your web application.
- Loading performance
- Interactivity
- And visual stability
Why web vitals
The Core Web Vitals are one of Google’s Page Experience Signals. A positive page experience naturally leads to better quality and better search engine rankings. These golden metrics help you understand which areas of your frontend application need optimization so your pages can rank higher than similar content.
Existing browser measures, such as Load and DOMContentLoaded times, no longer accurately reflect user experience very well.
Relying on these load events does not give the correct metric to analyze critical performance bottlenecks that your page might have. Google’s Web Vitals is a better measure of your page performance and its user experience.
Browser metrics
The following Core Web Vital metrics are collected when using the k6 browser module.
Additionally, k6 also collects other Web Vital metrics.
To review the complete list of k6 metrics, refer to the Metrics reference.
Understanding the browser metrics output
When a browser test finishes, k6 reports a top-level overview of the aggregated browser metrics output. The following snippet is an example:
Note
As Google also recommends measuring the 75th percentile for each web vital metric, there will still be future tweaks to improve the summary output.
browser_data_received.......: 2.6 kB 2.0 kB/s
browser_data_sent...........: 1.9 kB 1.5 kB/s
browser_http_req_duration...: avg=215.4ms min=124.9ms med=126.65ms max=394.64ms p(90)=341.04ms p(95)=367.84ms
browser_http_req_failed.....: 0.00% ✓ 0 ✗ 3
browser_web_vital_cls.......: avg=0 min=0 med=0 max=0 p(90)=0 p(95)=0
browser_web_vital_fcp.......: avg=344.15ms min=269.2ms med=344.15ms max=419.1ms p(90)=404.11ms p(95)=411.6ms
browser_web_vital_inp.......: avg=8ms min=8ms med=8ms max=8ms p(90)=8ms p(95)=8ms
browser_web_vital_lcp.......: avg=419.1ms min=419.1ms med=419.1ms max=419.1ms p(90)=419.1ms p(95)=419.1ms
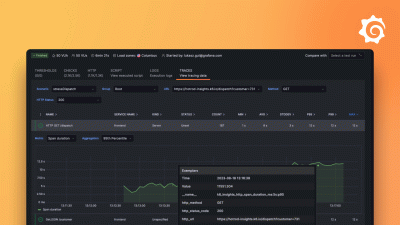
browser_web_vital_ttfb......: avg=322.4ms min=251ms med=322.4ms max=393.8ms p(90)=379.52ms p(95)=386.66msYou can also visualize these results in different ways depending on your team’s needs. For more information, check out our blog post on visualizing k6 results.
Set thresholds for your browser metrics
The browser module can use all key k6 functionalities, such as Thresholds.
To set thresholds for your browser metrics:
- Add the metric you want to check.
- Specify its threshold value.
As the following example shows, you can also pass in different URLs if you’re going to set a threshold for other pages, especially when your script contains page navigations.
Caution
Currently, you can only use URLs to specify thresholds for different pages. If you use Groups, the metrics are not correctly grouped as described in #721.
export const options = {
  thresholds: {
    'browser_web_vital_lcp': ['p(90) < 1000'],
    'browser_web_vital_inp{url:https://test.k6.io/}': ['p(90) < 80'],
    'browser_web_vital_inp{url:https://test.k6.io/my_messages.php}': ['p(90) < 100'],
  },
};
When the test is run, you should see a similar output as the one below.
  browser_web_vital_inp..........................: avg=0s       min=0s       med=0s       max=0s       p(90)=0s       p(95)=0s
  ✓ { url:https://test.k6.io/ }..................: avg=0s       min=0s       med=0s       max=0s       p(90)=0s       p(95)=0s
  ✓ { url:https://test.k6.io/my_messages.php }...: avg=0s       min=0s       med=0s       max=0s       p(90)=0s       p(95)=0s
✓ browser_web_vital_lcp..........................: avg=460.1ms  min=460.1ms  med=460.1ms  max=460.1ms  p(90)=460.1ms  p(95)=460.1ms
  browser_web_vital_ttfb.........................: avg=339.3ms  min=258.9ms  med=339.3ms  max=419.7ms  p(90)=403.62ms p(95)=411.66ms
Measure custom metrics
When using the k6 browser page.evaluate function, you can call the Performance API to measure the performance of web applications. For example, if you want to measure the time it takes for your users to complete actions, such as a search feature, you can use the performance.mark method to add a timestamp in your browser’s performance timeline.
Using the performance.measure method, you can also measure the time difference between two performance markers. The time duration that performance.measure returns can be added as a custom metric in k6 browser using
Trends.
import { browser } from 'k6/browser';
import { Trend } from 'k6/metrics';

export const options = {
  scenarios: {
    ui: {
      executor: 'shared-iterations',
      options: {
        browser: {
          type: 'chromium',
        },
      },
    },
  },
};

const myTrend = new Trend('total_action_time', true);

export default async function () {
  const page = await browser.newPage();

  try {
    await page.goto('https://test.k6.io/browser.php');
    await page.evaluate(() => window.performance.mark('page-visit'));

    await page.locator('#checkbox1').check();
    await page.locator('#counter-button').click();
    await page.locator('#text1').fill('This is a test');

    await page.evaluate(() => window.performance.mark('action-completed'));

    // Get time difference between visiting the page and completing the actions
    await page.evaluate(() =>
      window.performance.measure('total-action-time', 'page-visit', 'action-completed')
    );

    const totalActionTime = await page.evaluate(
      () =>
        JSON.parse(JSON.stringify(window.performance.getEntriesByName('total-action-time')))[0]
          .duration
    );

    myTrend.add(totalActionTime);
  } finally {
    await page.close();
  }
}
After you run the test, you should see a similar output as the one below.
  iteration_duration..........: avg=1.06s    min=1.06s    med=1.06s    max=1.06s    p(90)=1.06s    p(95)=1.06s
  iterations..................: 1      0.70866/s
  total_action_time.............: avg=295.3ms    min=295.3ms    med=295.3ms    max=295.3ms    p(90)=295.3ms    p(95)=295.3ms