Test for performance
In the previous section, you made a working script to test an endpoint functionality.
The next step is to test how this system responds under load.
This requires setting up a few
options to configure the parts of the test that don’t deal with test logic.
In this tutorial, learn how to:
- Use thresholds to assert for performance criteria
- Configure load increases through scenarios
These examples build on the script from the previous section.
Context: meet service-level objectives
To assess the login endpoint’s performance, your team may have defined service level objectives (SLOs). For example:
- 99% of requests should be successful
- 99% of requests should have a latency of 1000ms or less
The service must meet these SLOs under different types of usual traffic.
Assert for performance with thresholds
To codify the SLOs, add thresholds to test that your system performs to its goal criteria.
Thresholds are set in the
options object.
export const options = {
  // define thresholds
  thresholds: {
    http_req_failed: ['rate<0.01'], // http errors should be less than 1%
    http_req_duration: ['p(99)<1000'], // 99% of requests should be below 1s
  },
};
Add this options object with thresholds to your script api-test.js.
// import necessary modules
import { check } from 'k6';
import http from 'k6/http';

// define configuration
export const options = {
  // define thresholds
  thresholds: {
    http_req_failed: ['rate<0.01'], // http errors should be less than 1%
    http_req_duration: ['p(99)<1000'], // 99% of requests should be below 1s
  },
};

export default function () {
  // define URL and request body
  const url = 'https://quickpizza.grafana.com/api/users/token/login';
  const payload = JSON.stringify({
    username: 'default',
    password: '1234',
  });
  const params = {
    headers: {
      'Content-Type': 'application/json',
    },
  };

  // send a post request and save response as a variable
  const res = http.post(url, payload, params);

  // check that response is 200
  check(res, {
    'response code was 200': (res) => res.status == 200,
  });
}
Run the test.
k6 run api-test.jsInspect the console output to determine whether performance crossed a threshold.
  █ THRESHOLDS

    http_req_duration
    ✓ 'p(99)<1000' p(99)=148.21ms

    http_req_failed
    ✗ 'rate<0.01' rate=20.%
The ✓ and ✗ symbols indicate whether the performance thresholds passed or failed.
Test performance under increasing load
Now your script has logic to simulate user behavior, and assertions for functionality (checks) and performance (thresholds).
It’s time to increase the load to see how it performs. To increase the load, use the scenarios property. Scenarios schedule load according to the number of virtual users (VUs), number of iterations, VUs, or by iteration rate.
Run a smoke test
Start small. Run a smoke test to check that your script can handle a minimal load.
To do so, use the
--iterations flag with an argument of 10 or fewer.
k6 run --iterations 10 api-test.jsIf the service can’t receive 10 iterations, the system has some serious performance issues to debug. Good thing you ran the test early!
Run a test against an average load
Generally, traffic doesn’t arrive all at once. Rather, it gradually increases to a peak load. To simulate this, testers increase the load in stages.
Add the following scenario property to your options object and rerun the test.
export const options = {
  // define thresholds
  thresholds: {
    http_req_failed: ['rate<0.01'], // http errors should be less than 1%
    http_req_duration: ['p(99)<1000'], // 99% of requests should be below 1s
  },
  // define scenarios
  scenarios: {
    // arbitrary name of scenario
    average_load: {
      executor: 'ramping-vus',
      stages: [
        // ramp up to average load of 20 virtual users
        { duration: '10s', target: 20 },
        // maintain load
        { duration: '50s', target: 20 },
        // ramp down to zero
        { duration: '5s', target: 0 },
      ],
    },
  },
};
Since this is a learning environment, the stages are still quite short.
Where the smoke test defined the load in terms of iterations, this configuration uses the
ramping-vus executor to express load through virtual users and duration.
Run the test with no command-line flags:
k6 run api-test.jsThe load is small, so the server should perform within thresholds. However, this test server may be under load by many k6 learners, so the results are unpredictable.
Note
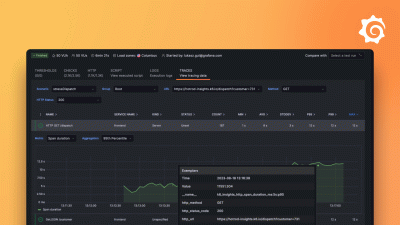
At this point, it’d be nice to have a graphical interface to visualize metrics as they occur. k6 has many output formats, which can serve as inputs for many visualization tools, both open source and commercial. For ideas, read Ways to visualize k6 results.
Ramp up until threshold fails
Finally, run a breakpoint test, where you probe the system’s limits. In this case, run the test until the availability (error rate) threshold is crossed.
To do this:
- Add the
abortOnFailproperty tohttp_req_failed.
export const options = {
  // define thresholds
  thresholds: {
    http_req_failed: [{ threshold: 'rate<0.01', abortOnFail: true }], // http errors should be less than 1%, otherwise abort the test
    http_req_duration: ['p(99)<1000'], // 99% of requests should be below 1s
  },
  // ...
};- Update the
scenariosproperty to ramp the test up until it fails.
export const options = {
  thresholds: {
    http_req_failed: [{ threshold: 'rate<0.01', abortOnFail: true }],
    http_req_duration: ['p(99)<1000'],
  },
  scenarios: {
    // define scenarios
    breaking: {
      executor: 'ramping-vus',
      stages: [
        { duration: '10s', target: 20 },
        { duration: '50s', target: 20 },
        { duration: '50s', target: 40 },
        { duration: '50s', target: 60 },
        { duration: '50s', target: 80 },
        { duration: '50s', target: 100 },
        { duration: '50s', target: 120 },
        { duration: '50s', target: 140 },
        //....
      ],
    },
  },
};
Here is the full script.
// import necessary modules
import { check } from 'k6';
import http from 'k6/http';

// define configuration
export const options = {
  // define thresholds
  thresholds: {
    http_req_failed: [{ threshold: 'rate<0.01', abortOnFail: true }], // availability threshold for error rate
    http_req_duration: ['p(99)<1000'], // Latency threshold for percentile
  },
  // define scenarios
  scenarios: {
    breaking: {
      executor: 'ramping-vus',
      stages: [
        { duration: '10s', target: 20 },
        { duration: '50s', target: 20 },
        { duration: '50s', target: 40 },
        { duration: '50s', target: 60 },
        { duration: '50s', target: 80 },
        { duration: '50s', target: 100 },
        { duration: '50s', target: 120 },
        { duration: '50s', target: 140 },
        //....
      ],
    },
  },
};

export default function () {
  // define URL and request body
  const url = 'https://quickpizza.grafana.com/api/users/token/login';
  const payload = JSON.stringify({
    username: 'default',
    password: '1234',
  });
  const params = {
    headers: {
      'Content-Type': 'application/json',
    },
  };

  // send a post request and save response as a variable
  const res = http.post(url, payload, params);

  // check that response is 200
  check(res, {
    'response code was 200': (res) => res.status == 200,
  });
}
Run the test.
k6 run api-test.jsDid the threshold fail? If not, add another stage with a higher target and try again. Repeat until the threshold aborts the test:
ERRO[0010] thresholds on metrics 'http_req_duration, http_req_failed' were breached; at least one has abortOnFail enabled, stopping test prematurelyNext steps
In this tutorial, you used thresholds to assert performance and Scenarios to schedule different load patterns. To learn more about the usual load patterns and their goals, read Load Test Types
The next step of this tutorial shows how to interpret test results. This involves filtering results and adding custom metrics.