Image, diagram, screenshot, and video guidelines
At Grafana Labs, media are an essential part of helpful, clear, and concise content. Follow the standards in this section when creating images for your documents.
Where to store media assets
All visual assets are stored in Google Cloud Storage, only accessible to Grafana Labs employees. You use the asset upload application to upload assets. The following table lists the steps you take to provide the Grafana Labs technical documentation team with the image.
Note
There is a 10MB limit on the size of assets uploaded through the asset upload application.
For larger uploads, reach out in the #website Slack channel to discuss the best path forward.
| If you are a | Complete these steps |
|---|---|
| Grafana Labs employee |
|
| Grafana Labs community contributor |
|
Add an image to a Markdown file
To add an image to a Markdown file, insert a reference to the image below the associated step and indent it so that the reference aligns with the step text.
The image reference path conforms to the following convention:

For example:
Test images in a local build
Note
This section is relevant to internal Grafana Labs contributors.
It’s important that you generate a local build of your docs so that you can verify that the path to the image, the image size, and the image placement are correct.
Follow the steps in Where to store media assets.
Run
make docson your branch and verify that the image appears.If it doesn’t render as you desire, upload another version and test again.
Alt text
Alt text is an HTML attribute that you can use to provide a concise description of an image. The text is used in situations where the image isn’t visible, such as when people use screen readers or have a low-bandwidth internet connection.
In Markdown, the alt text is the text in square brackets when declaring an image:
Or, if you’re using the figure shortcode, you can use the alt parameter:
{{< figure alt="<ALT TEXT>" src="/media/<PATH TO IMAGE>" >}}Every image that you add to the Grafana documentation should have an alt text.
A good piece of guidance for writing good alt text from HTML: The Living Standard is:
One way to think of alternative text is to think about how you would read the page containing the image to someone over the phone, without mentioning that there is an image present. Whatever you say instead of the image is typically a good start for writing the alternative text.
For more information about how to write good alt text, refer to:
- Google developer documentation style guide
- HTML: The Living Standard
- gov.uk Design102 blog: What’s the alternative? How to write good alt text
- W3C Web Accessibility Initiative: An alt Decision Tree
Screen recordings
The recommended format for screen recordings is .mp4.
Don’t use .gif or .mov formats.
In particular, avoid animated GIFs because they distract users.
For more information about distracting content, refer to Understanding Success Criterion 2.2.2: Pause, Stop, Hide | WAI | W3C.
Screen recordings follow the same upload procedure and file naming convention as other media assets.
Use the video-embed shortcode to embed the video on the page:
{{< video-embed src="/media/<path-to-recording/recording.mp4>" >}}Image and diagram guidelines
Images and diagrams can complement text, enabling readers to quickly grasp a concept and visualize complex processes in a simplified way. However, because translation services and tools for the visually impaired don’t interpret or translate images well, avoid using images to replace text.
When to use images and diagrams
Consider using images or diagrams when you need to:
- Clarify configurations and settings, such as the architecture for virtual servers
- Define a complex workflow within a Grafana product
Do not include images or diagrams when:
- A workflow is simplistic
- There is no interaction with a Grafana product
Image and diagram standards
Use the following standards for images and diagrams:
Size: To reduce page-load time, make images and diagrams as small as you can without compromising their usefulness.
Unless image clarity is critical to understanding, use 65-75 percent quality when saving your image. Use the following recommendations when you size images:
- Horizontal: maximum width 1200px
- Vertical: maximum height 900px
Scope: Limit the contents of an image to the relevant portion.
Don’t include distracting or unnecessary content and whitespace, or your browser window, browser tabs, or other window decoration.
Format: PNG and SVG are the preferred image formats.
Use JPG only for photos.
Copyright: You must determine if an image or diagram is protected by copyright.
If it is, you must obtain permission and acknowledge credit.
File name: Use the naming convention documented in Media asset file naming conventions.
Light mode/Dark mode: If the page you’re adding the image to is white or light colored, use images in dark mode. If the page is black or dark colored, use images in light mode. This ensures sufficient contrast.
Personally Identifiable Information (PII)
Make sure to mask, modify, or remove any PII such as passwords, logins, account details, or other information that could compromise security.
Alt text and figure captions
Make sure to include alt text for every image. Figure captions are optional.
Diagram assets
To create diagrams, you need to access the recommended software and download the required icons and stencils.
Request a diagram from the Creative/Web team
The Creative/Web team at Grafana Labs provides support for diagrams developed by internal Grafana Labs contributors. If you are a Grafana Labs employee, you can contact them in the #design Slack channel. If you’re not a Grafana Labs employee, create an issue for your request.
Screenshot guidelines
When you document a user interface, consider whether you need to include screenshots. Screenshots can be helpful when text alone can’t adequately convey instructions.
Users also like screenshots and find them useful. However, screenshots are difficult and time-consuming to maintain, and can present problems with translation.
As a result, you should minimize the use of screenshots within your content.
When to use screenshots
Consider using screenshots when you want to:
- Provide an example of a visualization
- Show panels populated with a query and settings
- Orient users in a complicated or long procedure
- Show complex relationships among drop-down menus, such as those that contain multiple subsets of information and many options available for selection
- Emphasize a feature or a change in the UI
When not to use screenshots
Do not use screenshots for the following items:
- Simple create operations, such as create a user, a team, an organization, and so on
- Primary or secondary navigation items
- Code samples (instead, show code samples in code blocks)
- Dialog boxes that aren’t complicated
- Message text (instead, show message text within the Markdown)
- Progress bars
- Simple pages, such as Wizard pages and Welcome pages
- Tables created in another authoring tool
- A page that’s likely to change frequently
Screenshot alternatives
Only add screenshots to your documentation when necessary. Instead of screenshots, you can consider being explicit about the user interface elements with which the user interacts. Add the names of buttons, navigation items, toggles, menus, and so on as they appear on the user interface.
For example, don’t include a screenshot to illustrate instructions like, “To add a dashboard, click Dashboard > New Dashboard”.
Screenshots in tasks
Place a screenshot below the step that it illustrates. Don’t rely on the screenshot to convey the information or values that the user must enter. If the user must enter specific information, provide that information in the text of the steps. However, ensure that the screenshot accurately reflects the directions and values in the step text.
Screenshot guidelines
Consult the following guidelines when you create screenshots:
- Size: The recommended width for screenshots is 1600 pixels. This is twice the standard content width (2x) to ensure crisp quality on high DPI displays.
- Resolution: For best quality, follow these guidelines:
- Take screenshots on your highest resolution screen. For Mac users, this is typically your laptop screen.
- Non-Mac users: Take screenshots at twice your max eventual max-width setting to accommodate high resolution screens. If you need to make a screenshot area bigger to accommodate this requirement, use pinch and zoom to double the pixel size. (Macs already take screenshots at 2x DPI).
- Review screenshots on your highest resolution screen for an accurate indication of how they look. Good screenshots can often look bad on lower resolution screens. For Mac users, this is typically your laptop screen.
- Scope: Limit the screenshot to just the portion of the user interface that shows the action, and enough surrounding detail to help the user locate the item. Avoid including elements that may change, such as the navigation sidebar.
- Annotations: To annotate a screenshot, use red, hexadecimal color
FF0000, arrows and boxes. - File name: Use the naming convention documented in Media asset file naming conventions.
- Personal identifiable information (PII): Make sure to mask, modify, or remove any PII such as passwords, logins, account details, or other information that could compromise security.
- Alt text: Make sure to include alt text for every image.
Refer to the next section for examples of good screenshots.
Screenshot examples
Good example of size, with the image constrained to 600 pixels wide: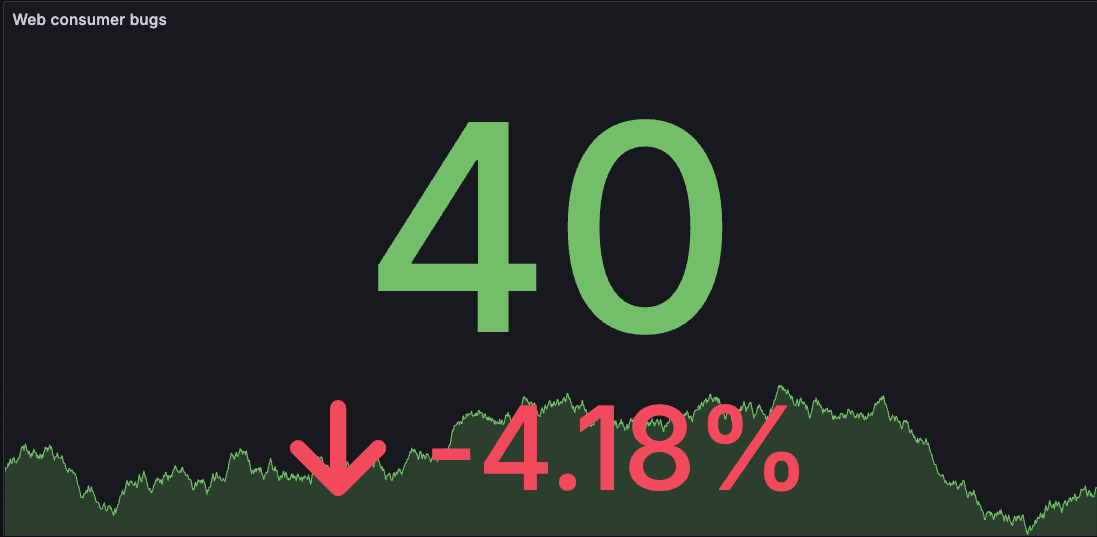
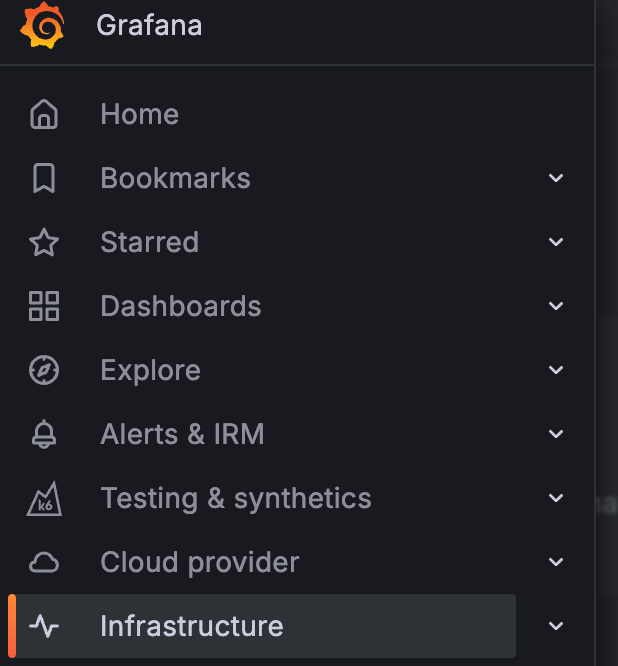
Good examples of scope on smaller scale: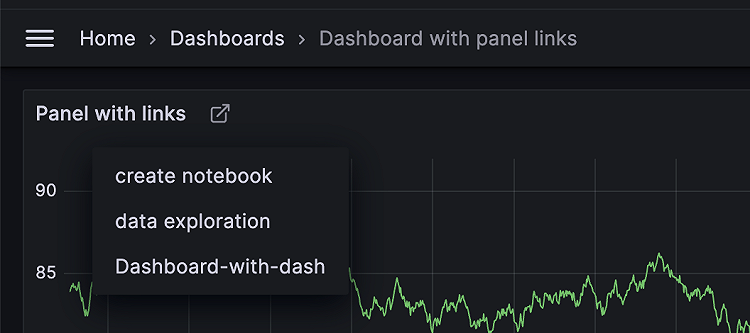
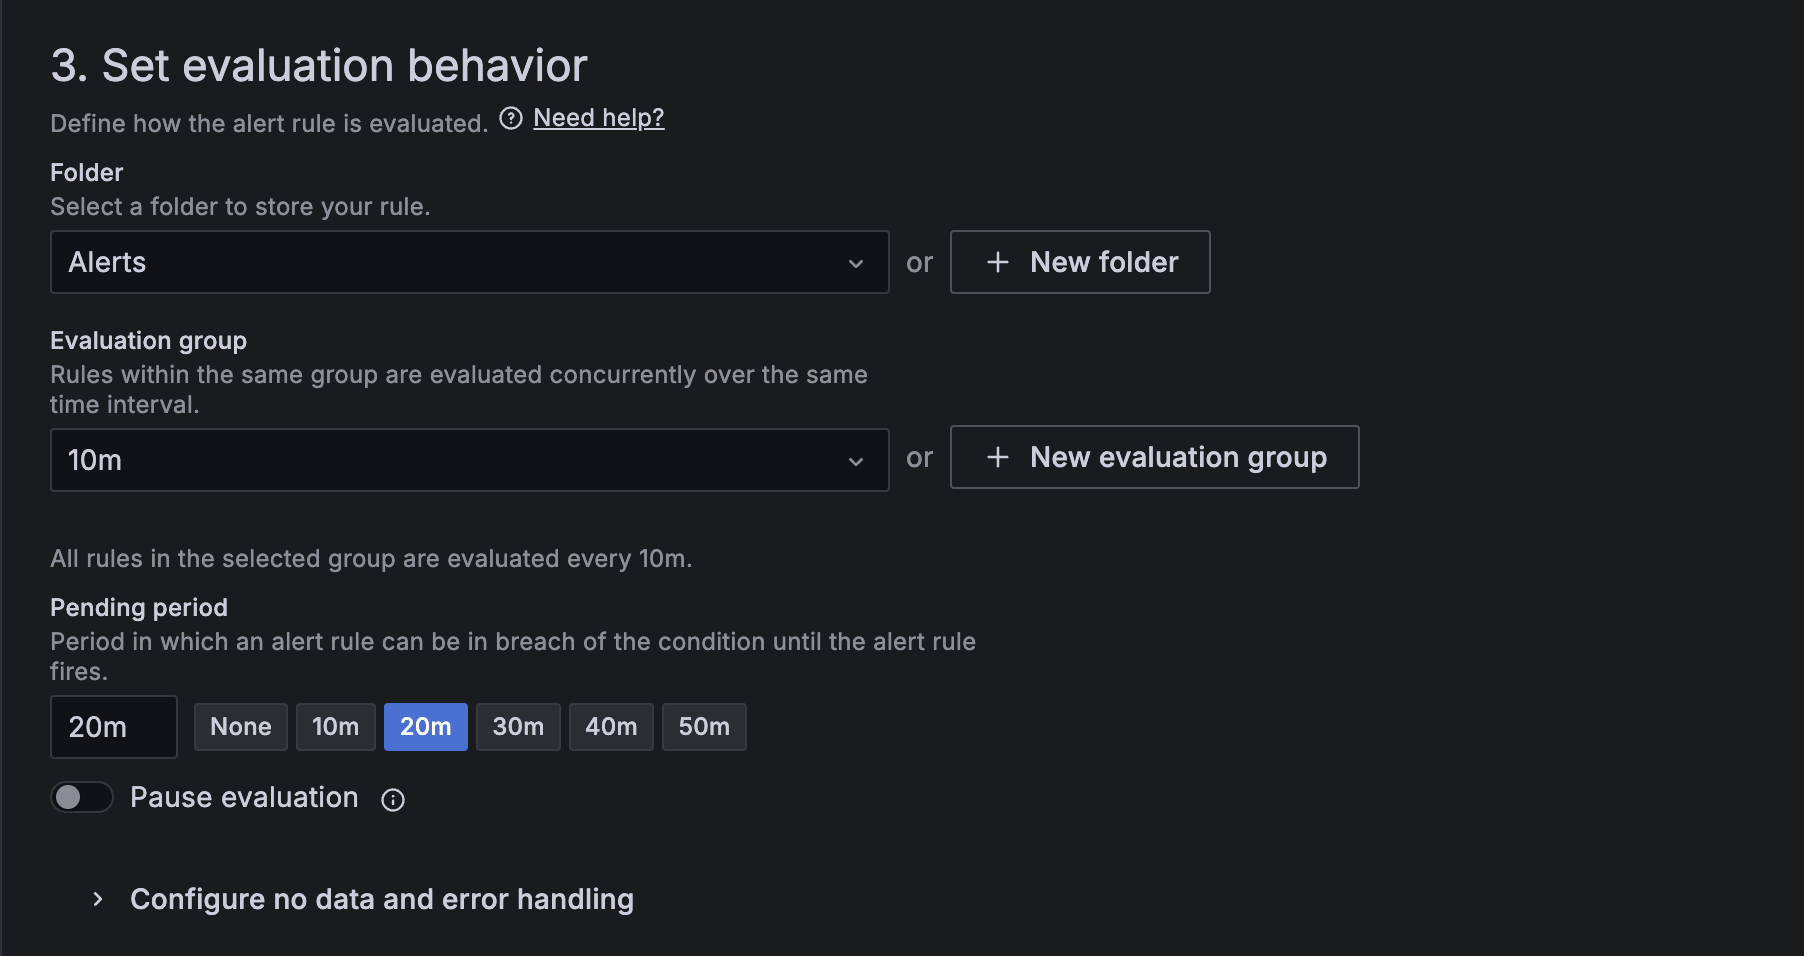
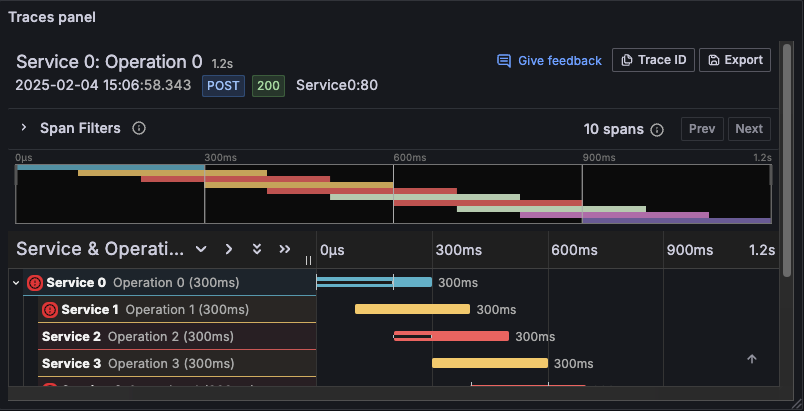
Good examples of scope on a larger scale that allows the user to see all they need to without enlarging or opening the image in a separate tab:
Good example of annotation use: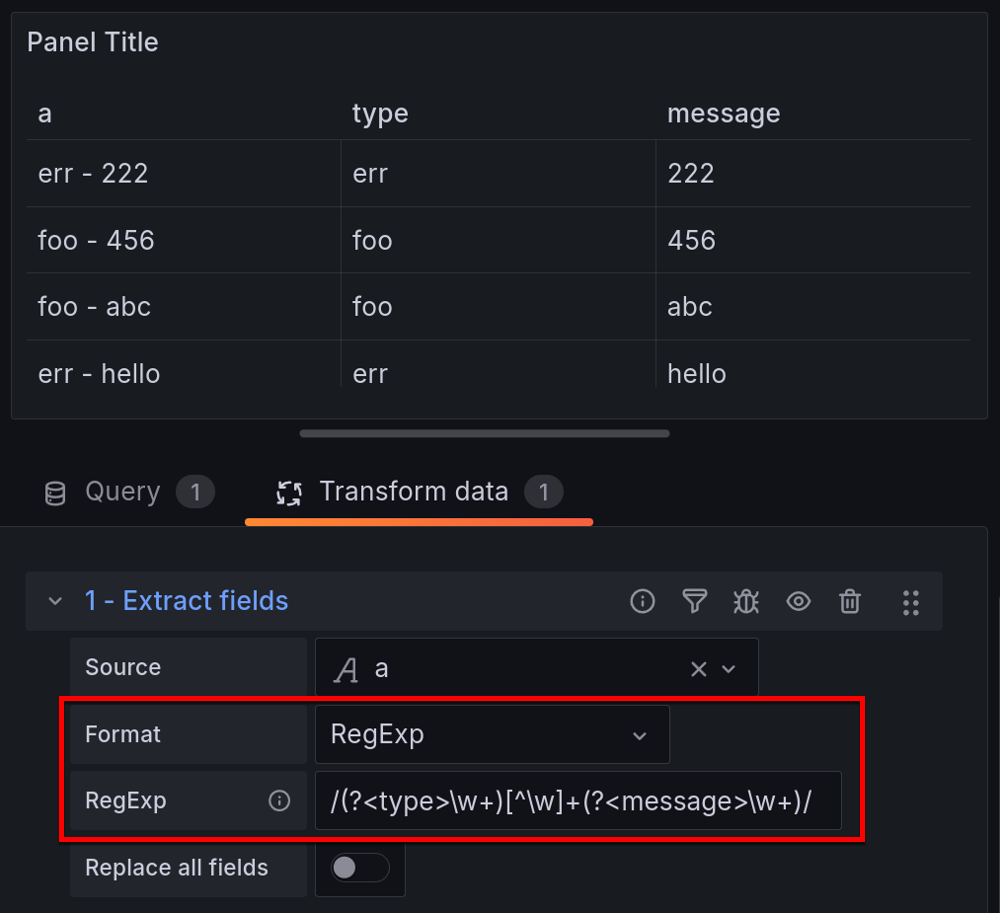
Video guidelines
Use the following guidelines when you add video content:
Use videos only from official Grafana sources.
Use videos that are relevant and specific to the topic.
Include an introduction to the video that explains what readers can expect to find in the video.
This is important for accessibility and to save readers from watching videos that aren’t important to them.
Use videos sparingly.
Video content is much more difficult to update than textual documentation.
The Creative/Web team creates videos for blog posts and other content. They upload these videos to Vimeo or YouTube.
If you need a video for an external-facing project, you can request a video using their Design or video request form.
The Grafana YouTube channel has good, short content that highlights features and specific topics.
You can embed these videos in your pages.
To embed YouTube videos, use the youtube shortcode.
To embed Vimeo videos, use the vimeo shortcode.
Media asset file naming conventions
The table in this section includes file naming conventions for you to follow when you create image assets.
General rules:
- Use lowercase letters in filenames, always.
- Use dashes between words; don’t use spaces or underscores.
- Don’t type special characters or punctuation marks in a filename except for periods in product version numbers. For example:
grafana-9.2.release.png. - Don’t use abbreviations that may cause issues with localization.
- For example, spell out
databaseinstead of usingdb. - When in doubt, don’t use an abbreviation.
- For example, spell out
| Asset type | Naming convention |
|---|---|
| Screenshot |
|
| Icon |
Be as descriptive as possible.
For example, use
|
| Logo |
When you name Grafana logo files, be sure to include the word "Grafana". Examples:
|
| Photo |
|
| Recording |
|