
Important: This documentation is about an older version. It's relevant only to the release noted, many of the features and functions have been updated or replaced. Please view the current version.
Configure the Grafana Pyroscope data source
The Pyroscope data source sets how Grafana connects to your Pyroscope database.
You can configure the data source using either the data source interface in Grafana or using a configuration file. This page explains how to set up and enable the data source capabilities using Grafana.
If you make any changes, select Save & test to preserve those changes.
If you’re using your own installation of Grafana, you can provision the Pyroscope data source using a YAML configuration file. For more information about provisioning and available configuration options, refer to Provisioning Grafana.
Before you begin
To configure a Pyroscope data source, you need administrator rights to your Grafana instance and a Pyroscope instance configured to send data to Grafana.
If you’re provisioning a Pyroscope data source, then you also need administrative rights on the server hosting your Grafana instance.
Add or modify a data source
You can use these procedures to configure a new Pyroscope data source or to edit an existing one.
Create a new data source
To configure basic settings for the data source, complete the following steps:
- Select Connections in the main menu.
- Enter
Grafana Pyroscopein the search bar. - Select Grafana Pyroscope.
- Select Add new data source in the top-right corner of the page.
- On the Settings tab, complete the Name, Connection, and Authentication sections.
- Use the Name field to specify the name used for the data source in panels, queries, and Explore. Toggle the Default switch for the data source to be pre-selected for new panels.
- Under Connection, enter the URL of the Pyroscope instance. For example,
https://example.com:4100. - Complete the Authentication section.
- Optional: Use Additional settings to configure other options.
- Select Save & test.
Update an existing data source
To modify an existing Pyroscope data source:
- Select Connections in the main menu.
- Select Data sources to view a list of configured data sources.
- Select the Pyroscope data source you wish to modify.
- Optional: Use Additional settings to configure or modify other options.
- After completing your updates, select Save & test.
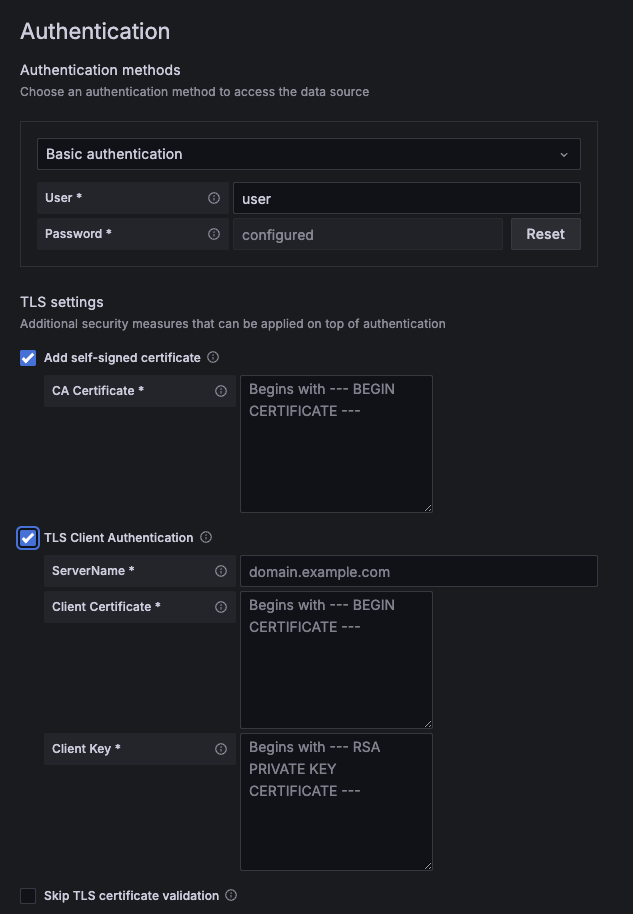
Authentication
Use this section to select an authentication method to access the data source.
Note
Use Transport Layer Security (TLS) for an additional layer of security when working with Pyroscope. For additional information on setting up TLS encryption with Pyroscope, refer to Pyroscope configuration.
To set up authentication:
Select an authentication method from the drop-down list:
- Basic authentication: Authenticates your data source using a username and password
- Forward OAuth identity: Forwards the OAuth access token and the OIDC ID token, if available, of the user querying to the data source
- No authentication: No authentication is required to access the data source
For Basic authentication only: Enter the User and Password.
Optional: Complete the TLS settings for additional security methods.
- TLS Client Authentication
- Toggle on to use client authentication. When enabled, it adds the Server name, Client cert, and Client key fields. The client provides a certificate that is validated by the server to establish the client’s trusted identity. The client key encrypts the data between client and server. These details are encrypted and stored in the Grafana database.
- Add self-signed certificate
- Activate this option to use a self-signed TLS certificate. You can add your own Certificate Authority (CA) certificate on top of one generated by the certificate authorities for additional security measure.
- Skip TLS certification validation
- When activated, it bypasses TLS certificate verification. Not recommended, unless absolutely necessary for testing.
![Authentication section showing the TLS client certificate options]()
Optional: Add HTTP Headers. You can pass along additional context and metadata data about the request and response. Select Add header to add Header and Value fields.
Select Save & test to preserve your changes.
Additional settings
Use the down arrow to expand the Additional settings section to view these options.
Advanced HTTP settings
The Grafana Proxy deletes forwarded cookies. Use the Allowed cookies field to specify cookies that should be forwarded to the data source by name.
The Timeout field sets the HTTP request timeout in seconds.
Querying
Minimum step is used for queries returning time-series data. The default value is 15 seconds.
Adjusting this option can help prevent gaps when you zoom in to profiling data.
Private data source connect
Note
This feature is only available in Grafana Cloud.
Use private data source connect (PDC) to connect to and query data within a secure network without opening that network to inbound traffic from Grafana Cloud.
Refer to Private data source connect for more information on how PDC works and Configure Grafana private data source connect (PDC) for steps on setting up a PDC connection.
Use the drop-down list to select a configured private data source. If you make changes, select Test & save to preserve your changes.
Use Manage private data source connect to configure and manage any private data sources you have configured.


