Visualize log data
Grafana Loki does not have its own user interface. Most users install Grafana in order to visualize their log data. Grafana versions after 6.3 have built-in support for Grafana Loki and LogQL.
There are several different options for how to visualize your log data in Grafana:
- Logs Drilldown lets you automatically visualize and explore your logs from your Loki data source without having to write LogQL queries.
- Grafana Explore helps you build and iterate on queries written in LogQL. Once you have a query that finds the data you’re looking for, you can consider using your query in a Grafana dashboard.
- Loki Mixins include a pre-built set of dashboards, recording rules, and alerts for monitoring Loki.
- Grafana Dashboards let you query, transform, visualize, and understand your log data. You can create your own custom dashboards, or import and modify public dashboards shared by the community.
Logs Drilldown
Grafana Logs Drilldown lets you automatically visualize and explore logs. Logs Drilldown makes assumptions about what data you might want to see to help you quickly get started viewing your logs without having to learn LogQL and write queries.
If you are a Grafana Cloud user, you can access Logs Drilldown from the Grafana Cloud main navigation menu: select Drilldown > Logs.
If you are an open source or Grafana Enterprise Logs user, you can install the Logs Drilldown plugin. For more information, refer to the Logs Drilldown documentation.
Note
Starting with Grafana v11.3, the plugin for the Logs Drilldown app is installed in Grafana by default.

Grafana Learning Paths provide a clear, structured path that leads you from beginner concepts to advanced use cases. Learn about this Grafana feature on Explore logs using Logs Drilldown.
Tip
There is a link to Grafana Explore available on every panel in Logs Drilldown. Click the menu icon (three stacked dots) to access the link to Explore.
Grafana Explore
Grafana Explore helps you build and iterate on a LogQL query outside of the dashboard user interface. If you just want to explore your data and do not want to create a dashboard, then Explore makes this much easier.
- Log into your Grafana instance. If this is your first time running Grafana, the username and password are both defaulted to
admin. - In the Grafana main menu, select Connections > Data source.
- Click the + Add new data source button.
- Search for, or choose Loki from the list.
- On the Settings tab, the URL field should be the address of your Loki server.
For example, when running locally or with Docker using port mapping, the address is likely
http://localhost:3100. When running with docker-compose or Kubernetes, the address is likelyhttp://loki:3100. When running Grafana (with Docker) and trying to connect to a locally built Loki instance, the address (for the URL field) is: On Mac:docker.for.mac.localhostOn Windows:docker.for.win.localhost - If your Loki server has multi-tenancy enabled, then you must provide your tenant ID in the
X-Scope-OrgIDheader. Click the + Add header button under HTTP headers, enterX-Scope-OrgIDin the Header field, and your tenant ID in the Value field. Multi-tenancy is enabled by default when running Loki with Helm on Kubernetes. - To view your logs, click Explore in the main menu.
- Select the Loki datasource in the top-left menu.
- You can click Kick start your query to select from a list of common queries, or use the Label filters to start choosing labels that you want to query. For more information about the Loki query language, refer to the LogQL section.
If you would like to see an example of this live, you can try Grafana Play’s Explore feature.
Learn more about the Grafana Explore feature in the Grafana documentation.
Loki mixins
The Loki mixin provides a set of Grafana dashboards, Prometheus recording rules and alerts for monitoring Loki itself. For instructions on how to install the Loki mixins, refer to the installation topic.
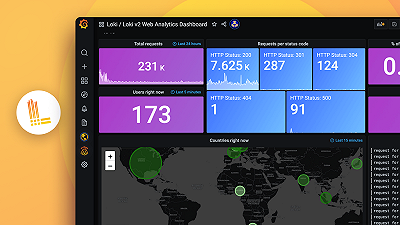
Using Grafana dashboards
With Grafana Play, you can explore and see how it works, learning from practical examples to accelerate your development. This feature can be seen on Loki Example Grafana Dashboard.
Because Loki can be used as a built-in data source, you can use LogQL queries based on that data source to build complex visualizations that persist on Grafana dashboards.
To configure Loki as a data source via provisioning, refer to the documentation for Loki data source.
Read more about how to build Grafana Dashboards in build your first dashboard.
Grafana Learning Paths provide a clear, structured path that leads you from beginner concepts to advanced use cases. Learn about this Grafana feature on Visualize logs in a Grafana Cloud dashboard.