

Honeycomb query editor
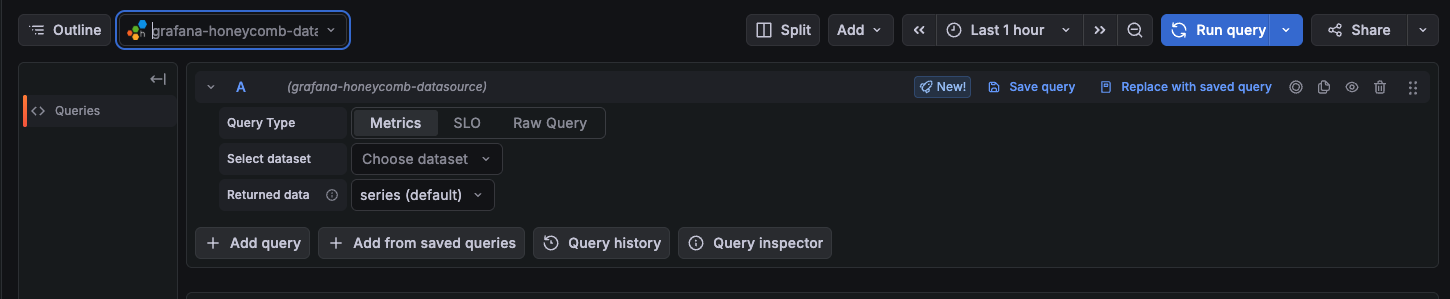
The query editor lets you query Honeycomb data and open related queries in the Honeycomb UI. You can choose from three query types: Metrics, SLO, and Raw Query.
Tip
Use the Query with Assistant button above the query type selector for AI-powered help building and refining queries. For more information, refer to Grafana Assistant.
Before you begin
- Ensure you have configured the Honeycomb data source.
- Verify your Honeycomb API key has Manage Queries and Columns and Run Queries permissions.
Returned data
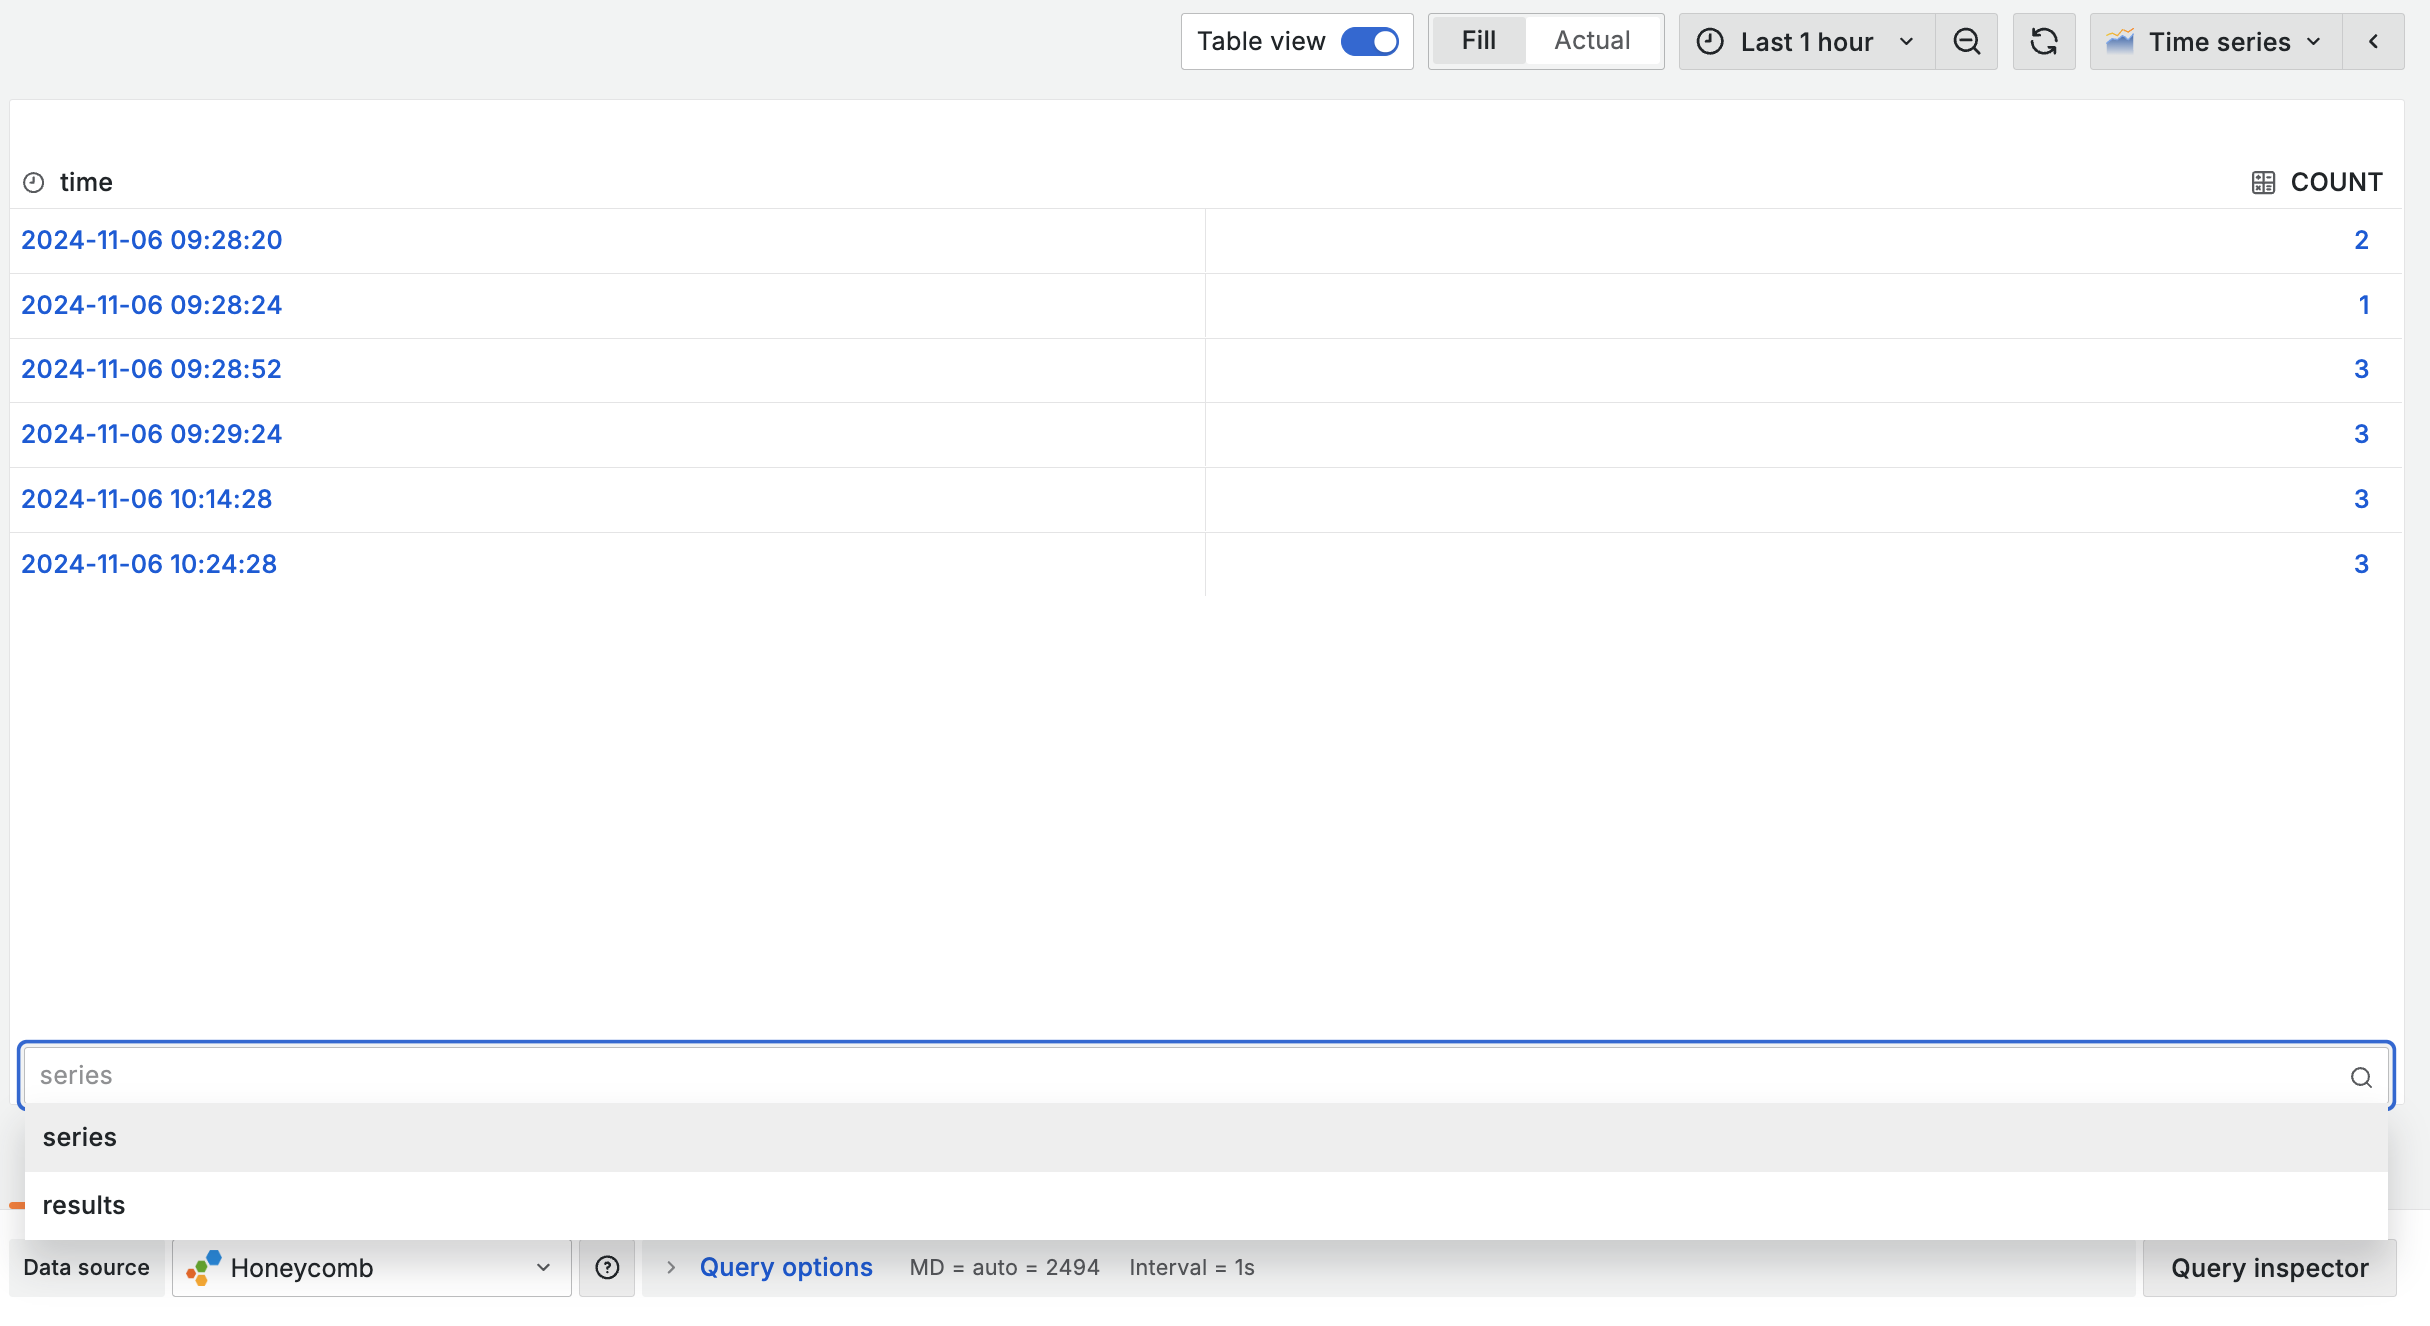
Use the Returned data drop-down to select your query output. The UI options are:
- series (default): Time-series data for graph visualizations. This is the default.
- result: Tabular data equivalent to the Overview in the Honeycomb UI.
- both: Series and result frames together.
Select dataset
Select a dataset from the Select dataset drop-down. The list is populated from your Honeycomb environment.
- To query across all datasets, select
__all__. This option appears automatically when your environment contains more than one dataset. - You can also type a custom dataset slug directly into the selector if the dataset you need doesn’t appear in the list.
Note
The
__all__cross-dataset option isn’t supported for Honeycomb Classic environments, per Honeycomb documentation.
Metrics query
Query metrics by entering values into the editor fields:
- Select a dataset.
- The default query is a
COUNTover the selected dataset. For Honeycomb Metrics datasets, the default calculation is automatically set toCOUNT_DATAPOINTSinstead. - To refine the query, select values for any of the remaining fields: Visualization, Where, Constraint, Group by, Having, Order by, or Limit.
- Enable Usage Mode to return aggregates without correcting for sample rates. When disabled (the default), the query returns sample-rate-corrected aggregates.
Visualization (calculations)
The Visualization field defines the calculations applied to your data. The following functions are available:
You can add multiple calculations to a single query.
Where (filters)
Use the Where field to filter events before aggregation. Each filter consists of a column, an operator, and a value.
The following filter operators are available:
Constraint (filter combination)
The Constraint field controls how multiple filters are combined. Choose AND to require all filters to match, or OR to match any filter.
Having
Use the Having field to filter results after aggregation, based on calculated values. Select a calculation and column from your Visualization selections, then choose a comparison operator (=, >, >=, <, <=) and a threshold value.
Note
Having clauses aren’t available for HEATMAP calculations. Each Having clause must be unique.
Order by
Use the Order by field to sort result groups by a calculation or breakdown column. For each order entry, choose ascending (ASC) or descending (DESC). You can order by calculations from Visualization or by columns from Group by.
Limit
The Limit field restricts the number of result groups returned. Valid values are between 1 and 1000.
SLO query
Query Honeycomb SLOs by choosing SLO as the query type. Select a dataset, then choose a result type.
SLO List
Returns a table of all SLO definitions in the selected dataset with the following columns:
Single SLO
Returns details for an individual SLO. Select an SLO from the SLO ID drop-down, or type a custom SLO ID directly into the field.
In addition to the columns returned by the SLO List query, the Single SLO query also returns:
Note
To retrieve the Budget Remaining and Compliance details, a Honeycomb Enterprise plan is required.
Note
To view SLO details of multiple SLO items, use multiple queries and then use the merge transform to get them into a single panel view.
Raw query
The Honeycomb data source supports raw queries through a JSON-based interface. This feature provides access to advanced querying capabilities that may not be available through the standard query builder interface.
To use the raw query functionality:
- Select Raw Query from the query type drop-down in the Honeycomb query builder.
- Select a dataset.
- Enter your query in the JSON text area using the same format accepted by the Honeycomb API.
- Click Run query to execute the query.
The feature supports all operations available in the Honeycomb API, including filters, columns, aggregations, transformations, breakdowns, calculations, granularity settings, ordering, and result set filtering with AND/OR logic combinations.
By default, queries use the time range specified in the Grafana panel. You can override this by including explicit start_time and end_time parameters in your JSON query. Similarly, specifying a granularity value in the query overrides the automatic Grafana granularity calculation based on the selected time range.
Raw query example
The following example counts requests and calculates the average duration, filtered by service name and grouped by HTTP status code:
{
  "calculations": [
    { "op": "COUNT" },
    { "op": "AVG", "column": "duration_ms" }
  ],
  "filters": [
    { "column": "service.name", "op": "=", "value": "api-server" }
  ],
  "breakdowns": ["http.status_code"],
  "granularity": 60
}
For a complete list of supported operations and syntax, refer to the Honeycomb Query Specification.
Use variables in raw queries
Raw queries support Grafana template variable substitution. Use the standard $variable or ${variable} syntax within your JSON query values.
For example, to filter by a dashboard variable called service:
{
  "calculations": [{ "op": "COUNT" }],
  "filters": [
    { "column": "service.name", "op": "=", "value": "$service" }
  ]
}
Multi-value variables
Raw queries automatically handle multi-value variables when used with in and not-in operators. You can filter by multiple selected values from a dashboard variable.
For example, if you have a multi-value variable called status_codes with values 200, 201, and 204 selected:
{
  "calculations": [{ "op": "COUNT" }],
  "filters": [
    { "column": "http.status_code", "op": "in", "value": "$status_codes" }
  ]
}
The data source automatically expands the variable into an array for the Honeycomb API.
Alerts and annotations
You can use any Honeycomb query type (Metrics, SLO, or Raw) as the condition for a Grafana alert rule or as an annotation source. No additional configuration is required beyond building your query in the editor. For alert details and examples, refer to Honeycomb alerting. For annotation details and examples, refer to Honeycomb annotations.
Open queries in the Honeycomb UI
You can open your Grafana queries directly in the Honeycomb UI for further exploration.
From the dashboard panel
Each time-series result includes a data link to the corresponding query result in the Honeycomb UI. To use it:
- Click on any point in the graph.
- Click Open in Honeycomb.
From the query editor
To view a query in Honeycomb from the query editor, click the Open in Honeycomb button.
Next steps
Was this page helpful?
Related resources from Grafana Labs


