Create and manage dashboards using Terraform and GitHub Actions
Learn how to create and manage multiple dashboards represented as JSON source code for Grafana using Terraform and GitHub Actions.
Prerequisites
Before you begin, ensure you have the following:
- A Grafana Cloud account, as shown in Get started
- A GitHub repository
Add dashboards to a GitHub repository
This guide shows you how to add dashboards for ElasticSearch, InfluxDB, and AWS EC2. You can use different dashboards according to your configured data sources.
In your GitHub repository, create a folder named
dashboardsin the root directory.In the
dashboardsfolder create three sub-folders. For this guide, we will create three sub-folders namedelasticsearch,influxdb, andaws.Add dashboard JSON source code to each of the three sub-folders.
Terraform configuration for Grafana provider
This Terraform configuration configures the Grafana provider to provide necessary authentication when creating folders and dashboards in the Grafana instance.
Create a service account and token in the Grafana instance by following these steps:
Create a file named
main.tfin the Git root directory and add the following code block:terraform { required_providers { grafana = { source = "grafana/grafana" version = ">= 2.9.0" } } } provider "grafana" { alias = "cloud" url = "<Grafana-instance-url>" auth = "<Grafana-Service-Account-token>" }Replace the following field values:
<Grafana-instance-url>with the URL of your Grafana instance, for example"https://my-stack.grafana.net/".<Grafana-Service-Account-token>with a Service Account token from the Grafana instance.
Terraform configuration for folders
This Terraform configuration creates three folders named ElasticSearch, InfluxDB and AWS in the Grafana instance using grafana_folder (Resource).
Create a file named folders.tf in the Git root directory and add the following code block:
resource "grafana_folder" "ElasticSearch" {
  provider = grafana.cloud

  title = "ElasticSearch"
}

resource "grafana_folder" "InfluxDB" {
  provider = grafana.cloud

  title = "InfluxDB"
}

resource "grafana_folder" "AWS" {
  provider = grafana.cloud

  title = "AWS"
}
Terraform configuration for dashboards
This Terraform configuration iterates through the JSON files in the three folders (elasticsearch, influxdb and aws) you created in the GitHub repository and adds them to the respective folders in the Grafana instance using a Grafana dashboard resource. Available resources include:
grafana_dashboard(Resource).- For Kubernetes-style dashboards in Grafana v13 or later, use the appropriate resource depending on your dashboard’s Kubernetes version. Refer to Grafana resources for details on the available resources, such as
grafana_apps_dashboard_dashboard_v1beta1,grafana_apps_dashboard_dashboard_v1, orgrafana_apps_dashboard_dashboard_v2.
For example, the dashboard represented as JSON source code in the elasticsearch folder in the GitHub repository will be created in the ElasticSearch folder in the Grafana instance.
Create a file named dashboards.tf in the Git root directory and add the following code block:
resource "grafana_dashboard" "elasticsearch" {
  provider = grafana.cloud

  for_each    = fileset("${path.module}/dashboards/elasticsearch", "*.json")
  config_json = file("${path.module}/dashboards/elasticsearch/${each.key}")
  folder      = grafana_folder.ElasticSearch.id
}

resource "grafana_dashboard" "influxdb" {
  provider = grafana.cloud

  for_each    = fileset("${path.module}/dashboards/influxdb", "*.json")
  config_json = file("${path.module}/dashboards/influxdb/${each.key}")
  folder      = grafana_folder.InfluxDB.id
}

resource "grafana_dashboard" "aws" {
  provider = grafana.cloud

  for_each    = fileset("${path.module}/dashboards/aws", "*.json")
  config_json = file("${path.module}/dashboards/aws/${each.key}")
  folder      = grafana_folder.AWS.id
}
GitHub workflow for managing dashboards using Terraform
This GitHub workflow consists of the following steps:
- Using the actions/checkout@v3 action, The GitHub repository is checked out so that the GitHub workflow can access it.
- The Terraform CLI is installed on the GitHub runner using the hashicorp/setup-terraform@v1 action.
terraform initis run as a bash command in the GitHub runner to initialize a working directory containing Terraform configuration files.terraform fmt -checkis run as a bash command in the GitHub runner to check if the Terraform configuration files are properly formatted. If the Terraform configuration files are not properly formatted, the workflow will fail at this step.terraform planis run as a bash command in the GitHub runner to preview the changes that Terraform will make.- Using mshick/add-pr-comment@v1 action, the preview from Terraform plan is posted as a comment on the pull request. This helps in reviewing the changes that Terraform will make before the pull request is merged.
terraform appy -auto-approveis run as a bash command in the GitHub runner to apply the Terraform configuration files.-auto-approveflag is added to the command to skip interactive approval of plan before applying and make the workflow automated. This step is run only when changes are committed tomainbranch. When a pull request is merged, the merge action creates a commit to themainbranch which triggers theterraform apply -auto-approvestep to execute.
In your GitHub repository, create a folder named
.githubin the root directory .In the
.githubfolder create a sub-folder namedworkflows.To add the GitHub workflow to your GitHub repository, create a file named
terraform.ymlin theworkflowsdirectory and add the following code block:name: Terraform on: push: branches: - 'main' pull_request: jobs: terraform: runs-on: ubuntu-latest steps: # Checkout the repository to the GitHub Actions runner - name: Checkout uses: actions/checkout@v3 # Install the latest version of Terraform CLI - name: Setup Terraform uses: hashicorp/setup-terraform@v1 # Initialize a new or existing Terraform working directory by creating initial files, loading any remote state, downloading modules, etc. - name: Terraform Init run: terraform init # Checks that all Terraform configuration files adhere to a canonical format - name: Terraform Format run: terraform fmt -check # Previews the changes that Terraform will make - name: Plan Terraform id: plan continue-on-error: true run: terraform plan -input=false -no-color # Post the preview (terraform plan) from the previous step as a GitHub pull request comment - name: Post Plan to GitHub PR if: github.ref != 'refs/heads/main' uses: mshick/add-pr-comment@v1 with: repo-token: ${{ secrets.GITHUB_TOKEN }} repo-token-user-login: 'github-actions[bot]' message: | Applying: ``` ${{ steps.plan.outputs.stdout }} ``` # Applies the terraform configuration files when the branch is `main` - name: Apply Terraform if: github.ref == 'refs/heads/main' id: apply continue-on-error: true run: | terraform apply -auto-approveCommit the changes made to the
terraform.ymlin the previous step to themainbranch in your GitHub repository. Once the changes are committed, The GitHub workflow you created should start to run automatically as the workflow we defined in the previous step runs when a pull request is created or when changes are committed tomainbranch.
Managing the Terraform state
If you are not using a Terraform backend to store the .tfstate file, add the following code block to the end of the GitHub workflow file to make sure the Terraform state file is stored in Git.
- name: commit the terraform state
  if: github.ref == 'refs/heads/main'
  uses: stefanzweifel/git-auto-commit-action@v4
  with:
    commit_message: Updating Terraform state
    file_pattern: terraform.tfstate
When you run terraform apply, Terraform automatically manages and updates the terraform.tfstate file to store state about your infrastructure and configuration.
This step uses the stefanzweifel/git-auto-commit-action@v4 action to auto-commit the terraform.tfstate file for changes made by running the terraform apply step.
Note
The Terraform state file (terraform.tfstate) shouldn’t be stored in Git to avoid leakage of sensitive data. Instead, store Terraform state files using a remote backend like AWS S3 with proper RBAC. For more information, refer to Terraform state.
Validation
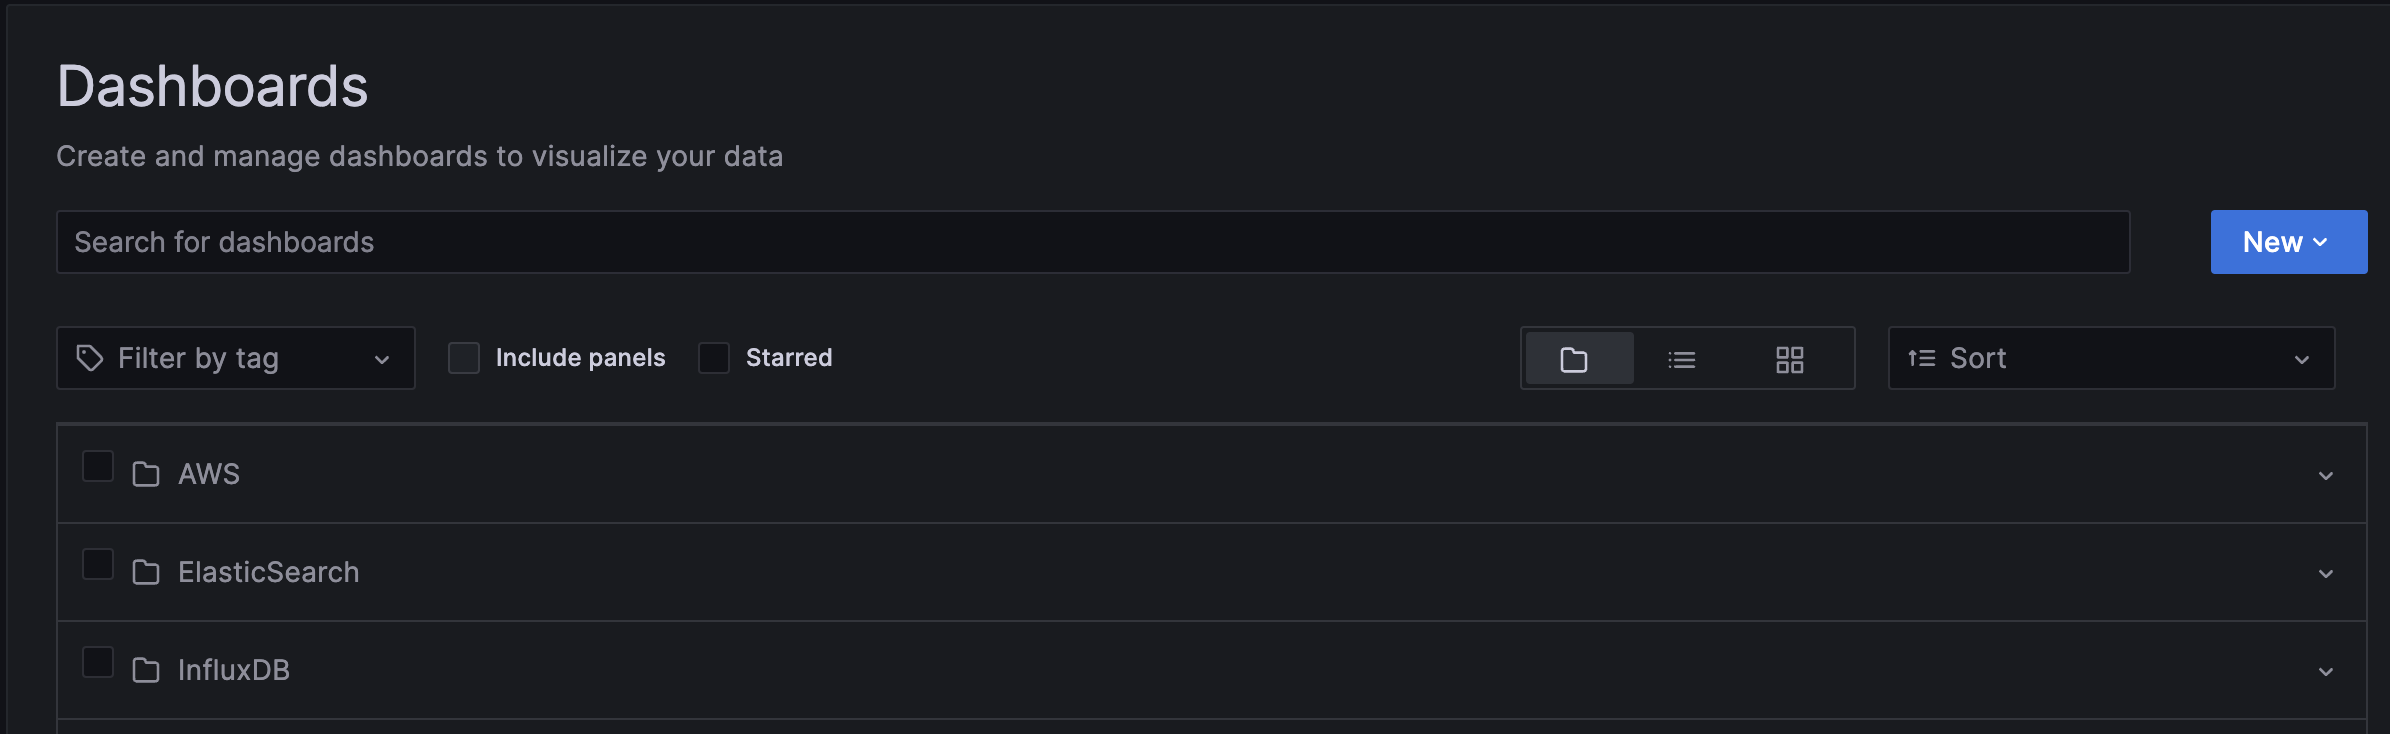
Once the GitHub workflow run is successful, you should be able to verify the following:
ElasticSearch,InfluxDBandAWSfolders are created in the Grafana instance.![Folders in Dashboards]()
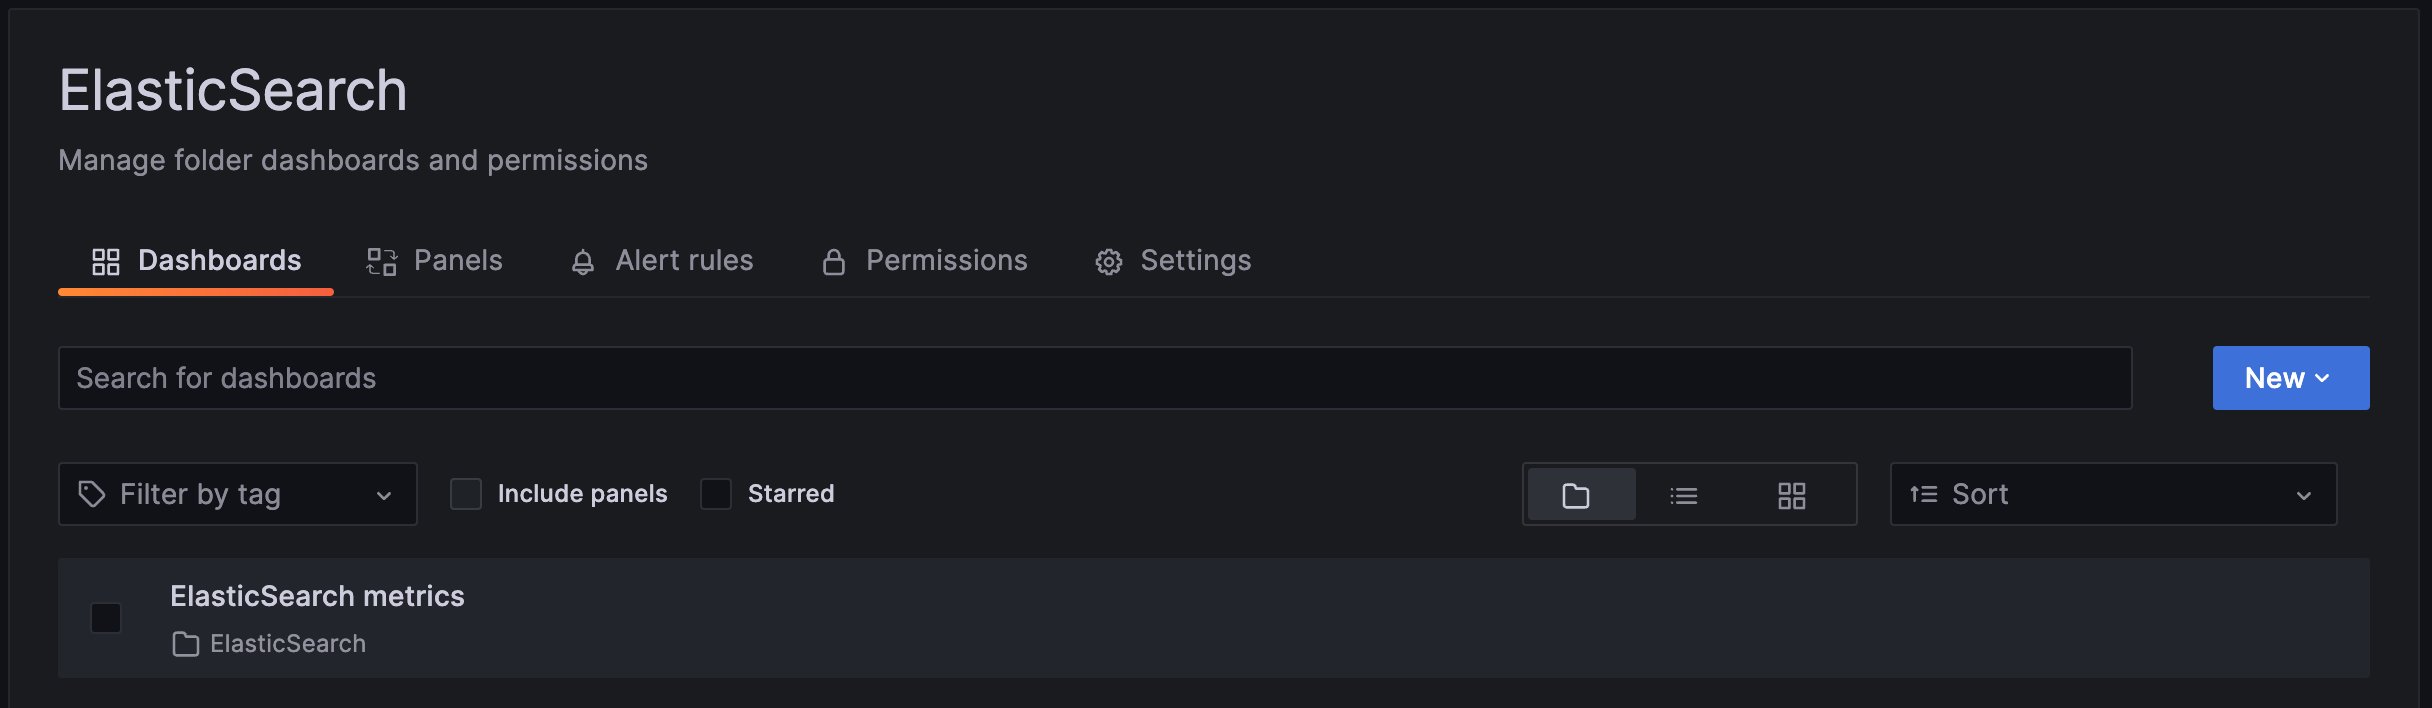
Dashboard represented as JSON source code from
elasticsearchfolder in GitHub are added under theElasticSearchfolder in the Grafana instance.![ElasticSearch Folder]()
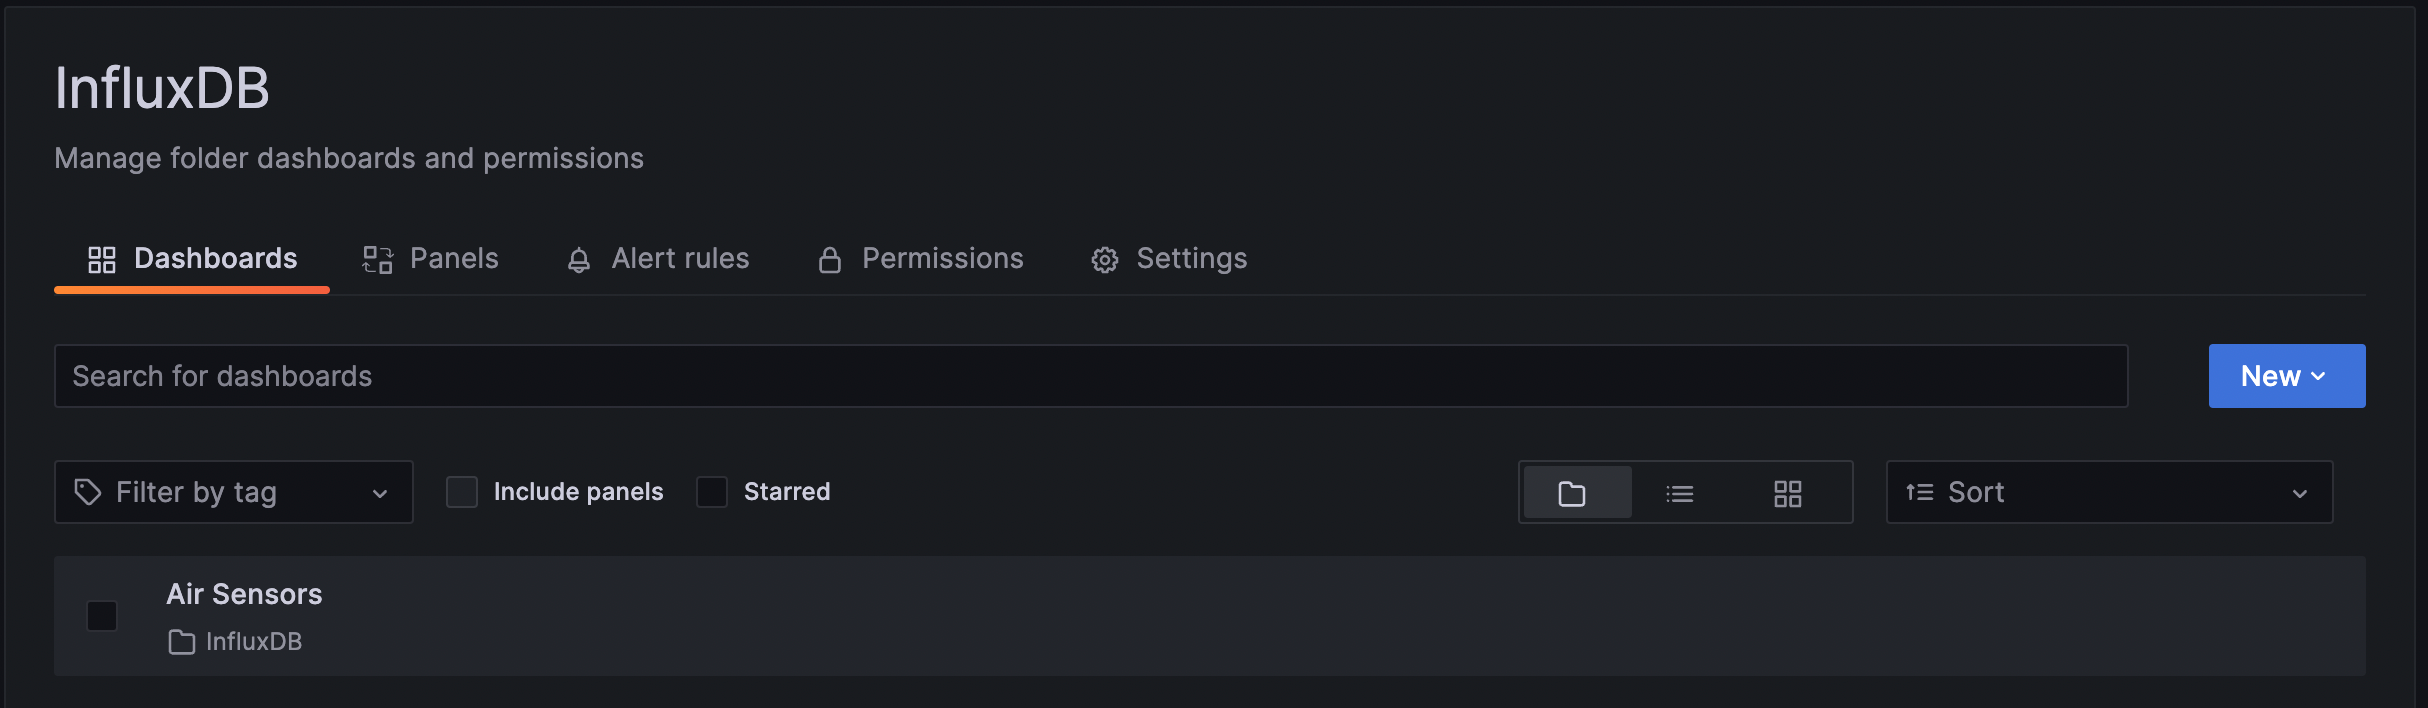
Dashboard source code from the
influxdbfolder in GitHub is added under theInfluxDBfolder in the Grafana instance.![InfluxDB Folder]()
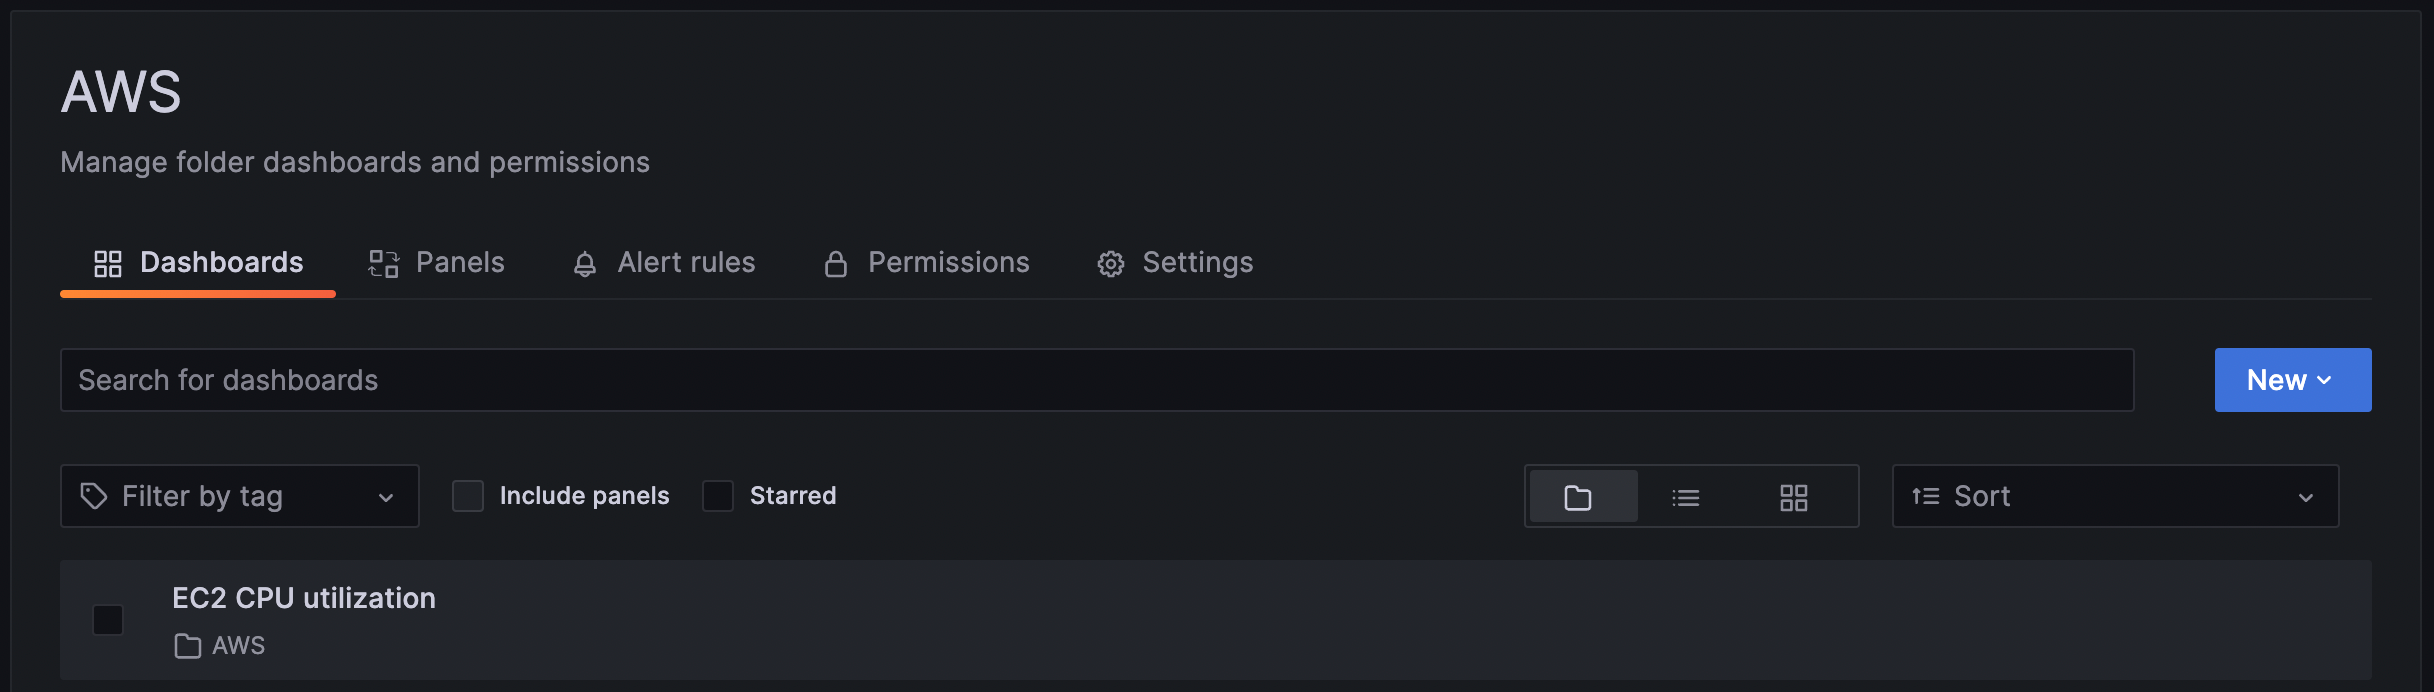
Dashboards from
awsfolder in GitHub are added under theAWSfolder in the Grafana instance.![AWS EC2 Folder]()
Summary
In this guide, you created a GitHub workflow using Terraform to manage dashboard source code. Using this workflow, the dashboards in the Grafana instance are synchronized with the JSON source code files for dashboards in GitHub.
To learn more about managing Grafana Cloud using Terraform, refer to the Grafana provider documentation.


