
Rendering
Two main concepts are essential for successful use of the Business Text plugin:
- Render Template
- Rendering order
Render Template
Note
The Business Text panel supports the All data template starting from version 4.3.0.

The Render Template option instructs the Business Text plugin how to apply your template to the fetched data frame.
- Every row: The template applies to each row returned by your query. Your template renders as many times as there are fetched rows.
- All rows: The query results from the selected data frame are passed as a
datafield to the Content template. Your template renders once. To work with query results as a whole, use the #each built-in helper to iterate through records. - All data: The query results from all data frames are passed as a
datafield to the Content template. Your template renders once.
Below you can find some examples to illustrate further.
Every row
For example, your data source returns a four-column table as follows. To mimic this in the following example, the Business Input data source is used.
| app  | description                  | cluster | tier     |
| ---- | ---------------------------- | ------- | -------- |
| auth | Handles user authentication. | prod    | frontend |
You can apply the following template for each row to display data.
# {{app}}

> {{description}}

{{#if (eq tier "frontend")}}
Link: <a href="https://{{cluster}}.example.com/{{app}}">https://{{cluster}}.example.com/{{app}}</a>
{{/if}}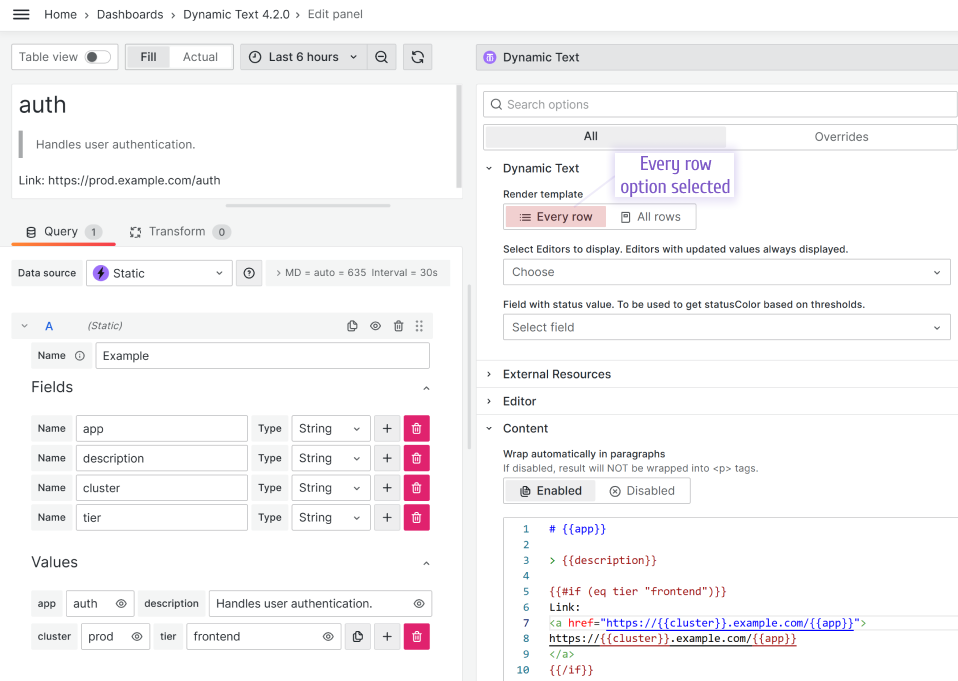
All rows
For example, your data source returns a table with multiple rows as follows. To mimic this in the following example, the Business Input data source is used.
| title | author        | year |
| ----- | ------------- | ---- |
| Dune  | Frank Herbert | 1965 |
| 1984  | George Orwell | 1949 |
With the All rows option selected, your template might look like this:
| Title | Author | Year |
| ----- | ------ | ---- |
{{#each data}}
| {{title}} | {{author}} | {{year}} |
{{/each}}
All data and other render templates
The following images illustrate all three Render templates created using data generated by the Business Input data source. Follow the order numbers in the comments, starting from 1.
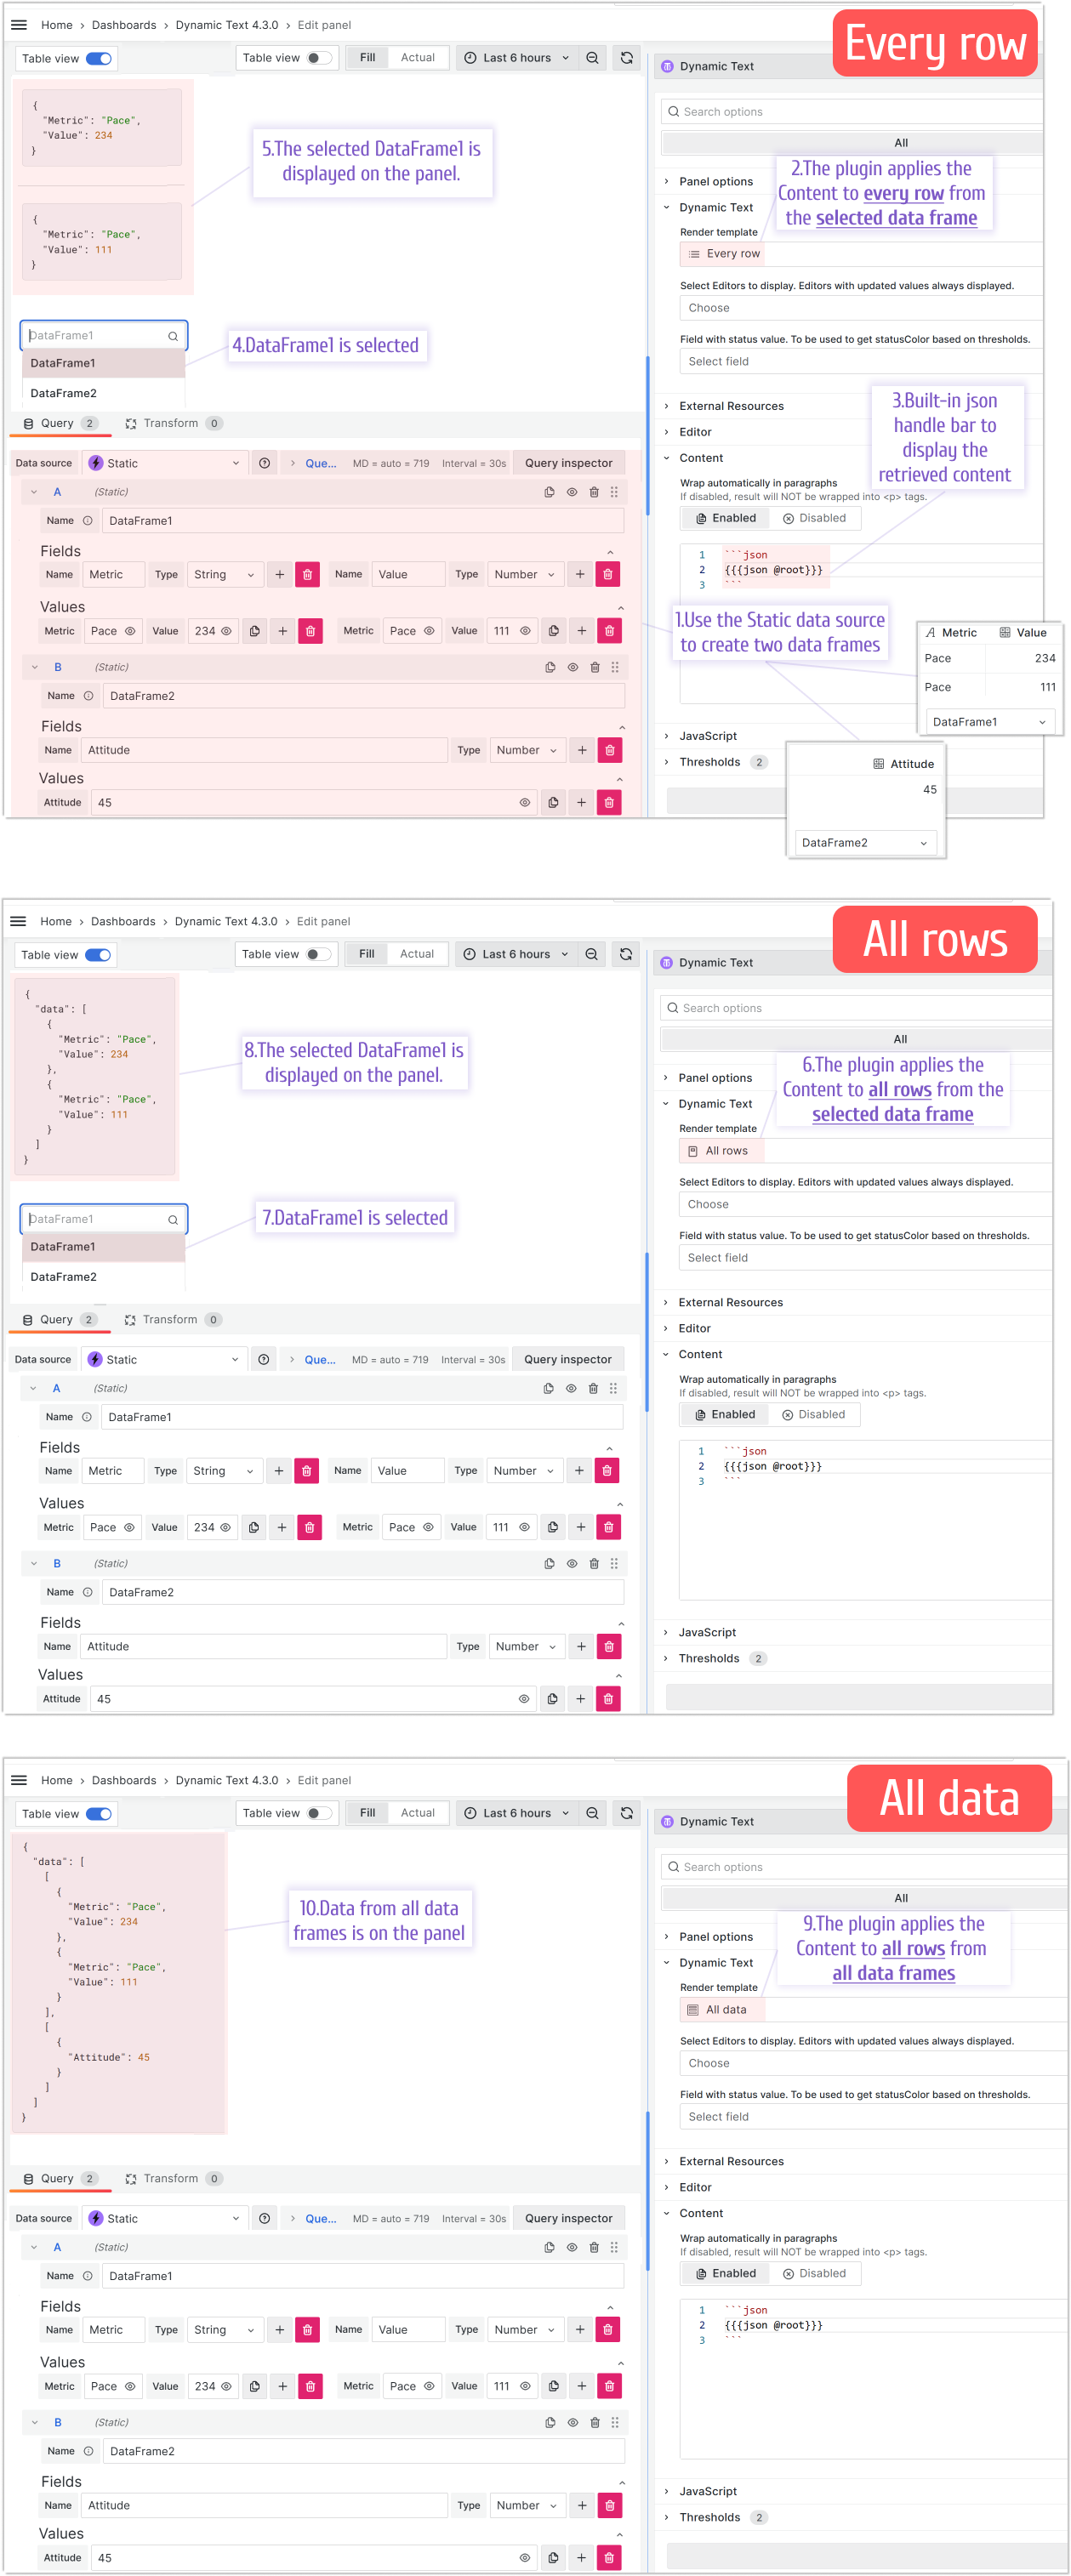
Reference data in the All data template
The following example illustrates how to reference data in the All data template.
If your data looks like this:
{
  "data": [
    [
      {
        "Metric": "Pace",
        "Values": 234
      },
      {
        "Metric": "Pace",
        "Values": 111
      }
    ],
    [
      {
        "Attitude": 45
      }
    ]
  ]
}
You can reference it using the following code:
{{#each data.[0]}}
{{Metric}} - {{#with (lookup ../data.[1] @index)}}{{Attitude}}{{/with}}
{{/each}}
Rendering order
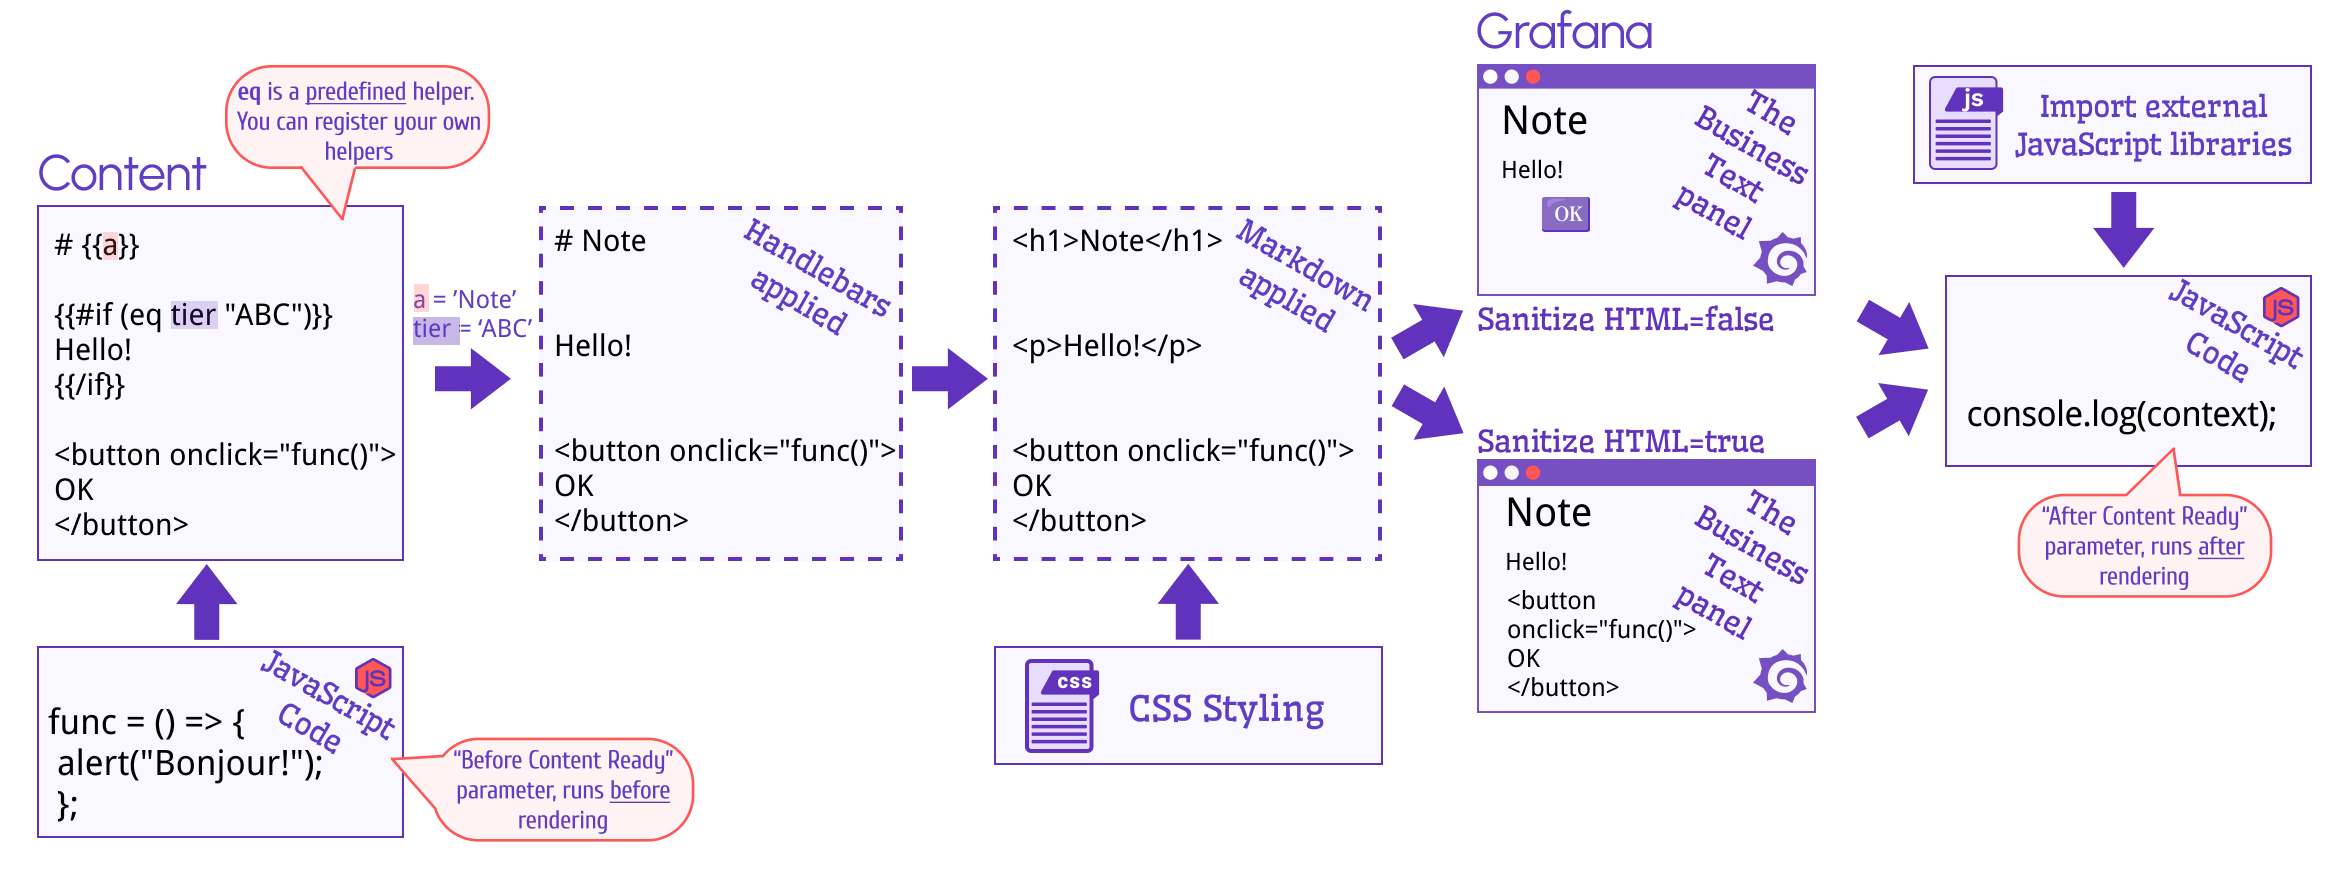
Below are two schemas of the rendering order in the Business text plugin. They represent the same thing.
The first is oriented toward the general public and the second is targeted to answer developers’ questions.
For users
For developers
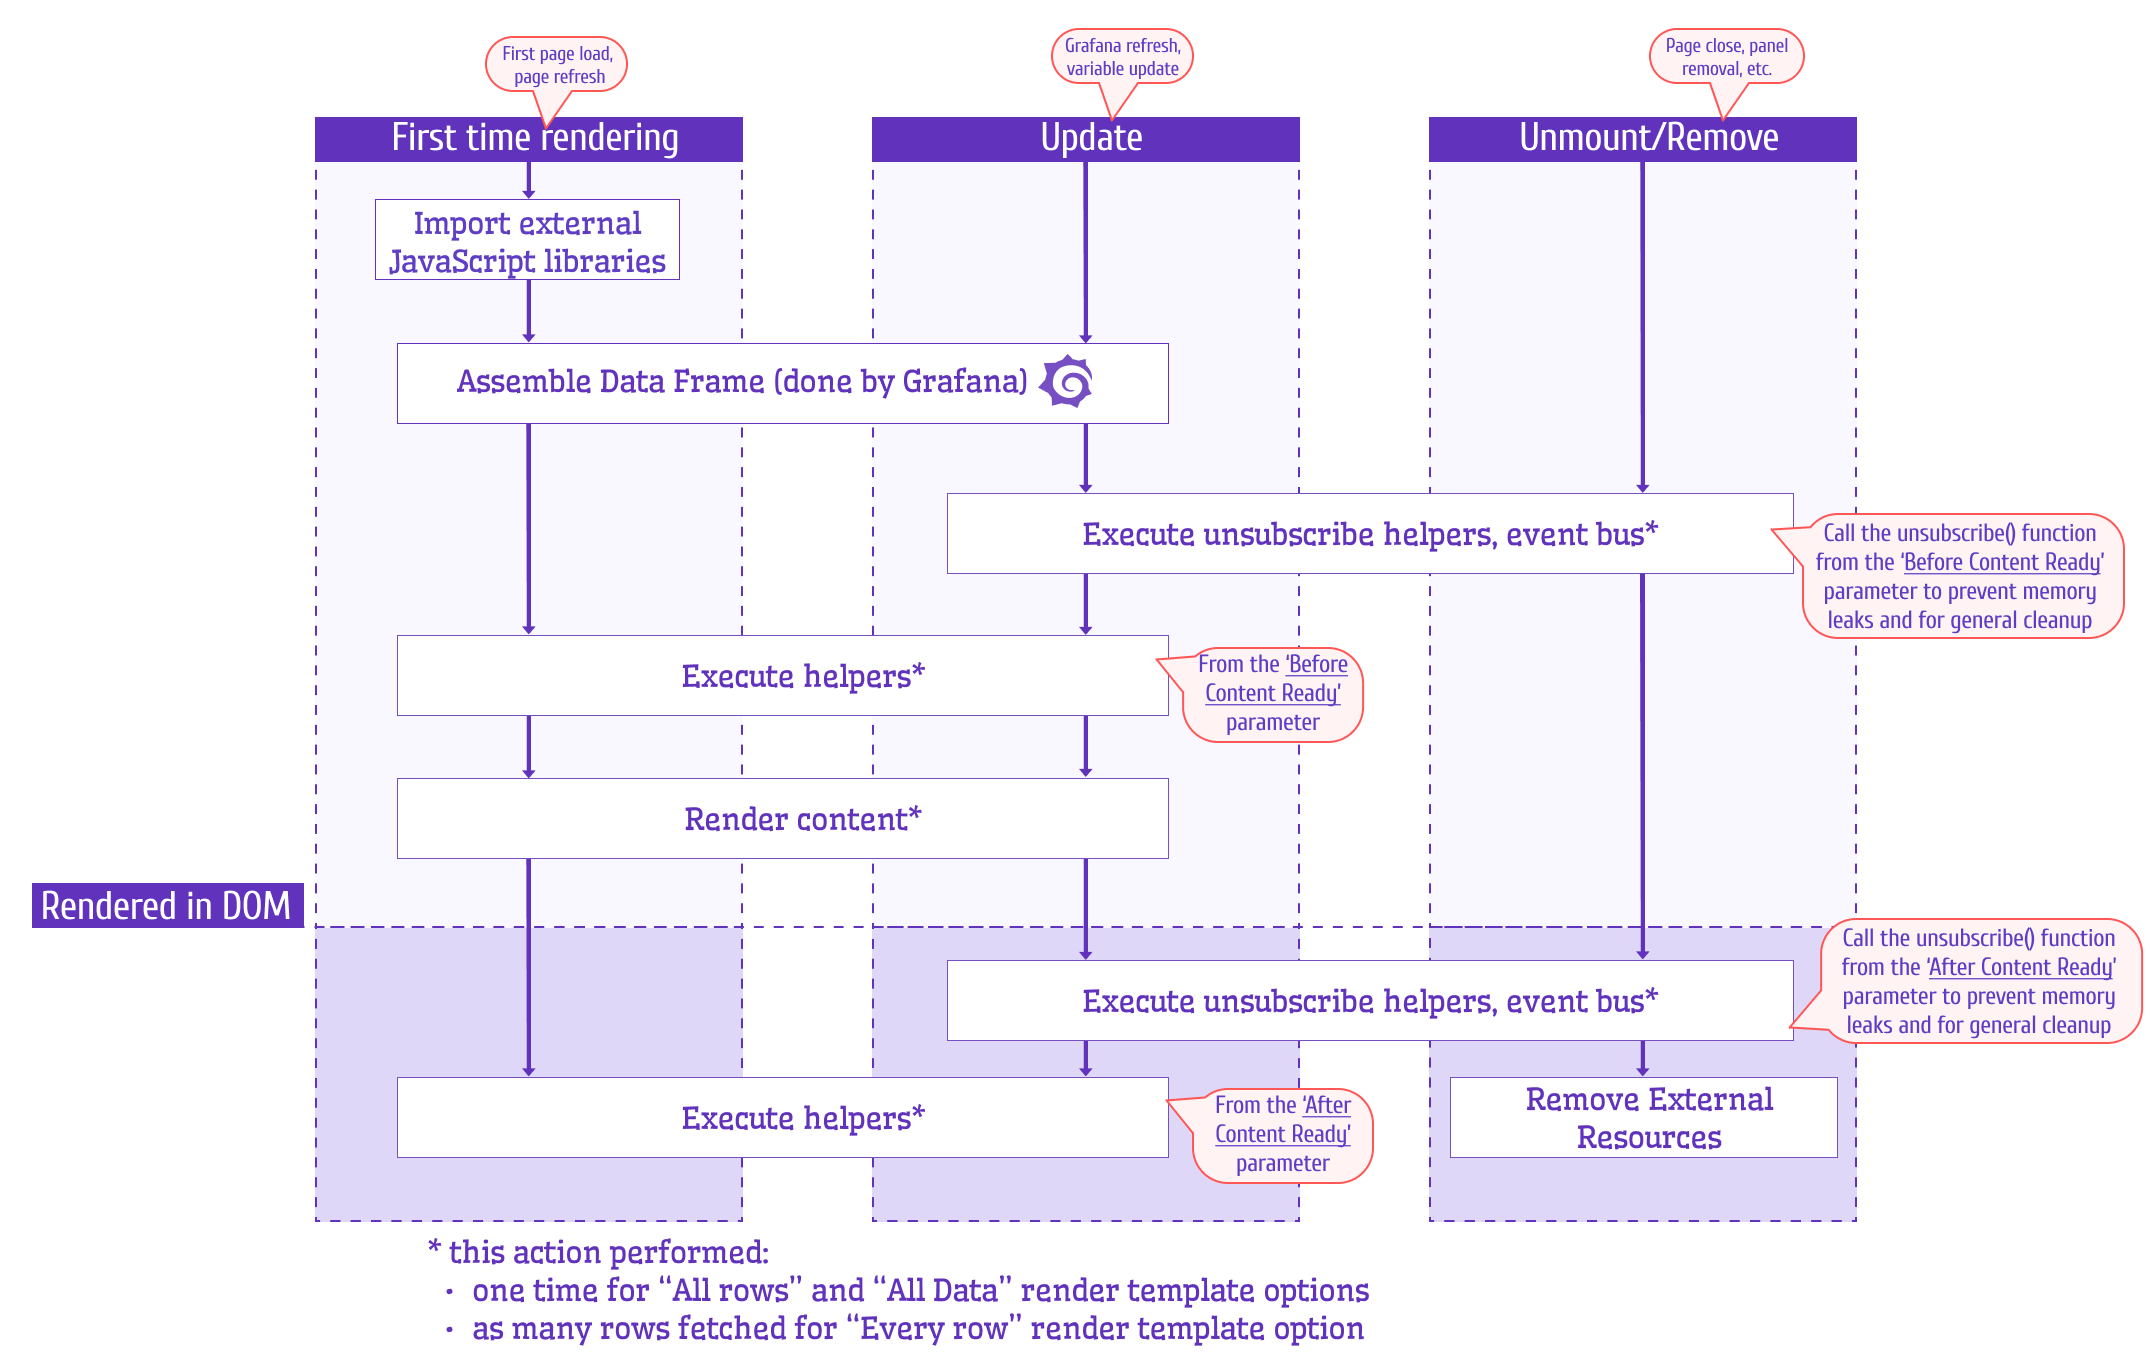
Rendering details
Reference a specific data element
To reference a specific data element in your templates, use double or triple curly braces. For instance, for the extracted app data field, use the following syntax:
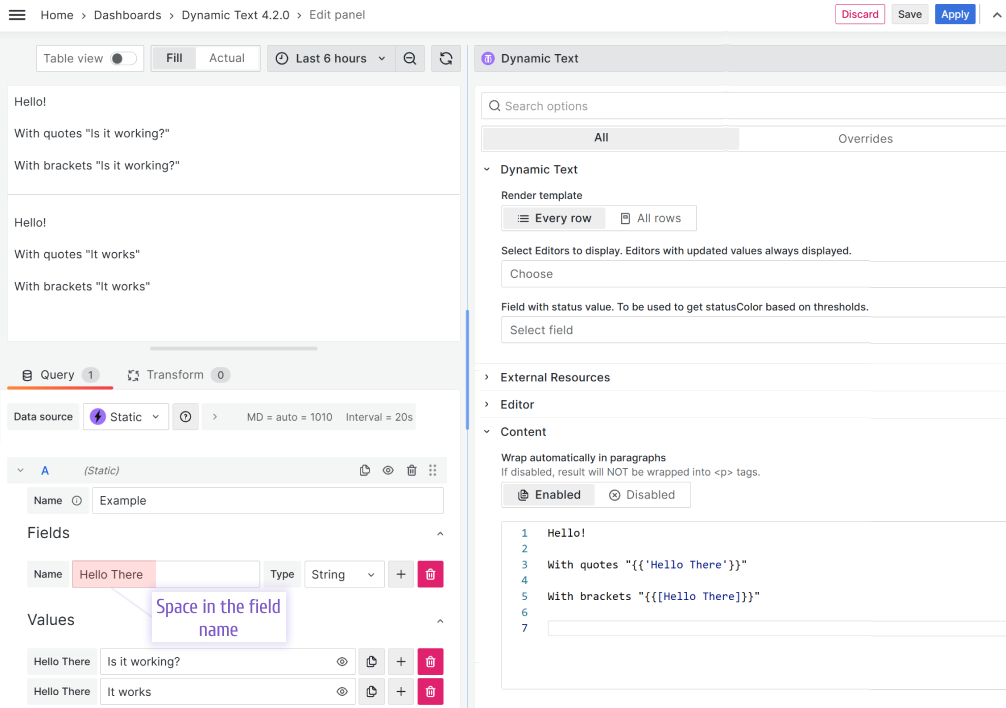
{{app}}Reference field names with spaces
Field names with spaces should be declared using one of the following formats:
{{[Field Name]}}: The field name is surrounded by brackets.{{'Field Name'}}: The field name is surrounded by quotes.
Render HTML from data
To render HTML markup returned by the data source, use triple curly braces with the element reference, such as {{{htmlValue}}}. Otherwise, Handlebars escapes your HTML content.
<ul>
  {{{htmlValue}}}
</ul>
where htmlValue is
<li>foo</li>
<li>bar</li>
Default content
The default content displays when the connected data source returns no data. Use it to provide users with instructions on what to do or who to contact when the query returns an empty result.
Even when your data source returns no data, you can still use the available helpers.
HTML sanitization
HTML sanitization is enabled by default, which makes some elements like <button> unavailable in the content editor.
To disable sanitization, set Grafana’s disable_sanitize_html configuration option to true.
For a Docker container or Docker Compose, use the following:
- GF_PANELS_DISABLE_SANITIZE_HTML=true

