Validate Kubernetes deployment using a test application
Once you’ve set up a Grafana Tempo cluster, you need to write some traces to it and then query the traces from within Grafana. This procedure uses Tempo in microservices mode. For example, if you set up Tempo using the Kubernetes with Tanka procedure, then you can use this procedure to validate your set up.
Before you begin
You’ll need:
- Grafana 10.0.0 or higher
- Microservice deployments require the Tempo query frontend URL, for example:
http://<TEMPO-QUERY-FRONTEND-SERVICE>.<NAMESPACE>.svc.cluster.local:3200/ - OpenTelemetry telemetrygen for generating tracing data
Note
Service names depend on how you deployed Tempo. For Tanka deployments, services use plain names like
distributorandquery-frontend. For Helm deployments, services are prefixed with the release name, for exampletempo-cluster-distributor. Update the service names in the examples below to match your deployment.
Refer to Deploy Grafana on Kubernetes if you are using Kubernetes. Otherwise, refer to Install Grafana for more information.
Configure Grafana Alloy to remote-write to Tempo
Note
You can skip this section if you have already configured Alloy to send traces to Tempo.
This section uses a Grafana Alloy Helm chart deployment to send traces to Tempo.
To do this, you need to create a configuration that can be used by Alloy to receive and export traces in OTLP protobuf format.
Create a new
values.yamlfile which we’ll use as part of the Alloy install.Edit the
values.yamlfile and add the following configuration to it:alloy: extraPorts: - name: otlp-grpc port: 4317 targetPort: 4317 protocol: TCP configMap: create: true content: |- // Creates a receiver for OTLP gRPC. // You can easily add receivers for other protocols by using the correct component // from the reference list at: https://grafana.com/docs/alloy/latest/reference/components/ otelcol.receiver.otlp "otlp_receiver" { // Listen on all available bindable addresses on port 4317 (which is the // default OTLP gRPC port) for the OTLP protocol. grpc { endpoint = "0.0.0.0:4317" } // Output straight to the OTLP gRPC exporter. We would usually do some processing // first, most likely batch processing, but for this example we pass it straight // through. output { traces = [ otelcol.exporter.otlp.tempo.input, ] } } // Define an OTLP gRPC exporter to send all received traces to Tempo. // The unique label 'tempo' is added to uniquely identify this exporter. otelcol.exporter.otlp "tempo" { // Define the client for exporting. client { // Send to the Tempo distributor on port 4317 (OTLP gRPC). endpoint = "distributor.tempo.svc.cluster.local:4317" // Disable TLS for OTLP export. tls { // The connection is insecure. insecure = true // Do not verify TLS certificates when connecting. insecure_skip_verify = true } } }Update the distributor endpoint to match your deployment. The service name and namespace depend on how you deployed Tempo:
- Tanka:
distributor.<NAMESPACE>.svc.cluster.local:4317 - Helm:
<RELEASE-NAME>-distributor.<NAMESPACE>.svc.cluster.local:4317
- Tanka:
Deploy Alloy using Helm:
helm install -f values.yaml grafana-alloy grafana/alloyIf you deploy Alloy into a specific namespace, create the namespace first and specify it to Helm by appending
--namespace=<grafana-alloy-namespace>to the end of the command.
Create a Grafana Tempo data source
To allow Grafana to read traces from Tempo, you must create a Tempo data source.
Navigate to Connections > Data Sources.
Click Add data source.
Select Tempo.
Set the URL to
http://<TEMPO-QUERY-FRONTEND-SERVICE>:<HTTP-LISTEN-PORT>/, filling in the path to the Tempo query frontend service and the HTTP listen port (default3200). For example:- Tanka deployment:
http://query-frontend.tempo.svc.cluster.local:3200 - Helm deployment:
http://tempo-cluster-query-frontend.<NAMESPACE>.svc.cluster.local:3200
- Tanka deployment:
Click Save & Test.
You should see a message that says Data source is working.
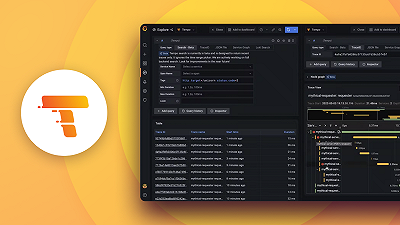
Visualize your data
After you have created a data source, you can visualize your traces in the Grafana Explore page. For more information, refer to Tempo in Grafana.
Use OpenTelemetry telemetrygen to generate tracing data
You can use OpenTelemetry telemetrygen to generate tracing data to test your Tempo installation.
These instructions use the endpoints for both Grafana Alloy and the Tempo distributor, for example:
grafana-alloy.grafana-alloy.svc.cluster.localfor Grafana Alloydistributor.tempo.svc.cluster.localfor the Tempo distributor (Tanka deployment)
Update the endpoints to match your deployment.
Install
telemetrygenusing the installation procedure.Note
You don’t need to configure an OpenTelemetry Collector because this procedure uses Grafana Alloy.
Generate traces using
telemetrygen:telemetrygen traces --otlp-insecure --rate 20 --duration 5s --otlp-endpoint grafana-alloy.grafana-alloy.svc.cluster.local:4317This configuration sends traces to Alloy for 5 seconds, at a rate of 20 traces per second.
Optionally, you can also send traces directly to Tempo without using Alloy as a collector:
telemetrygen traces --otlp-insecure --rate 20 --duration 5s --otlp-endpoint distributor.tempo.svc.cluster.local:4317If you’re running
telemetrygenon your local machine, ensure that you first port-forward to the relevant Alloy or Tempo distributor service, for example:kubectl port-forward services/grafana-alloy 4317:4317 --namespace grafana-alloyAlternatively, you can create a cronjob to send traces periodically based on this template:
apiVersion: batch/v1
kind: CronJob
metadata:
  name: sample-traces
spec:
  concurrencyPolicy: Forbid
  successfulJobsHistoryLimit: 1
  failedJobsHistoryLimit: 2
  schedule: "0 * * * *"
  jobTemplate:
    spec:
      backoffLimit: 0
      ttlSecondsAfterFinished: 3600
      template:
        spec:
          containers:
          - name: traces
            image: ghcr.io/open-telemetry/opentelemetry-collector-contrib/telemetrygen:v0.150.0
            args:
              - traces
              - --otlp-insecure
              - --rate
              - "20"
              - --duration
              - 5s
              - --otlp-endpoint
              - grafana-alloy.grafana-alloy.svc.cluster.local:4317
          restartPolicy: Never
To view the tracing data:
Go to Grafana and select Explore.
Select the Tempo data source from the list of data sources.
Select the
SearchQuery type.Select Run query.
Confirm that traces are displayed in the traces Explore panel. You should see 5 seconds worth of traces, 100 traces in total per run of
telemetrygen.
Test your configuration using the Intro to MLTP application
The Intro to MLTP application provides an example five-service application that generates data for Tempo, Mimir, Loki, and Pyroscope. This procedure installs the application on your cluster so you can generate meaningful test data.
- Clone the Intro to MLTP repository:
git clone https://github.com/grafana/intro-to-mltp.git cd intro-to-mltp/k8s/mythical - In the
mythical-beasts-deployment.yamlmanifest, alter eachTRACING_COLLECTOR_HOSTenvironment variable instance value to point to the Grafana Alloy location. For example, based on Alloy installed in the default namespace and with a Helm installation calledtest:- env: ... - name: TRACING_COLLECTOR_HOST value: grafana-alloy.grafana-alloy.svc.cluster.local - Deploy the Intro to MLTP application. It deploys into the default namespace.
kubectl apply -f mythical-beasts-service.yaml,mythical-beasts-persistentvolumeclaim.yaml,mythical-beasts-deployment.yaml - Once the application is deployed, go to Grafana and select the Explore menu item.
- Select the Tempo data source from the list of data sources.
- Select the
SearchQuery type for the data source. - Select Run query.
- Traces from the application are displayed in the traces Explore panel.