Honeycomb data source for Grafana
The Honeycomb data source for Grafana allows you to query and visualize Honeycomb metrics and link to Honeycomb traces from within Grafana.
Requirements
This plugin has the following requirements:
- An active Honeycomb Enterprise team
- One of the following account types:
- Available for users with a Grafana Cloud Free, Advanced or Trial account or with an activated Grafana Enterprise license.
- To query the SLO report data, Honeycomb enterprise plan is required.
Known limitations
- The Honeycomb API this data source is developed against is not yet generally available. It may cause unexpected behavior in the data source.
- This data source does not yet support or ad-hoc queries.
- Due to API limitations, the variable editor can only return the first 1000 unique values for a selected column.
- Due to API limitations, the data source can only query the last 7 days’ worth of data.
Install the data source plugin
To install the data source, refer to Installation.
Conform to compatibility requirements
For this plugin, there are no compatibility requirements.
Verify that the plugin is installed
- In Grafana Enterprise from the left-hand menu, navigate to Configuration > Data sources.
- From the top-right corner, click the Add data source button.
- Search for
Honeycombin the search field, and hover over the Honeycomb search result. - Click the Select button for Honeycomb.
- If you can click the Select button, then it is installed.
- If the button is missing or disabled, then the plugin is not installed. Check to see if your Grafana Enterprise license is valid, and reinstall the plugin. If you still need help, contact Grafana Labs.
Note: On Grafana Cloud, it can take up to 15 minutes to see the data source plugin within Grafana.
Get an API key from Honeycomb
- Go to https://ui.honeycomb.io/account.
- Set up an API key and copy your application key.
Configure the data source
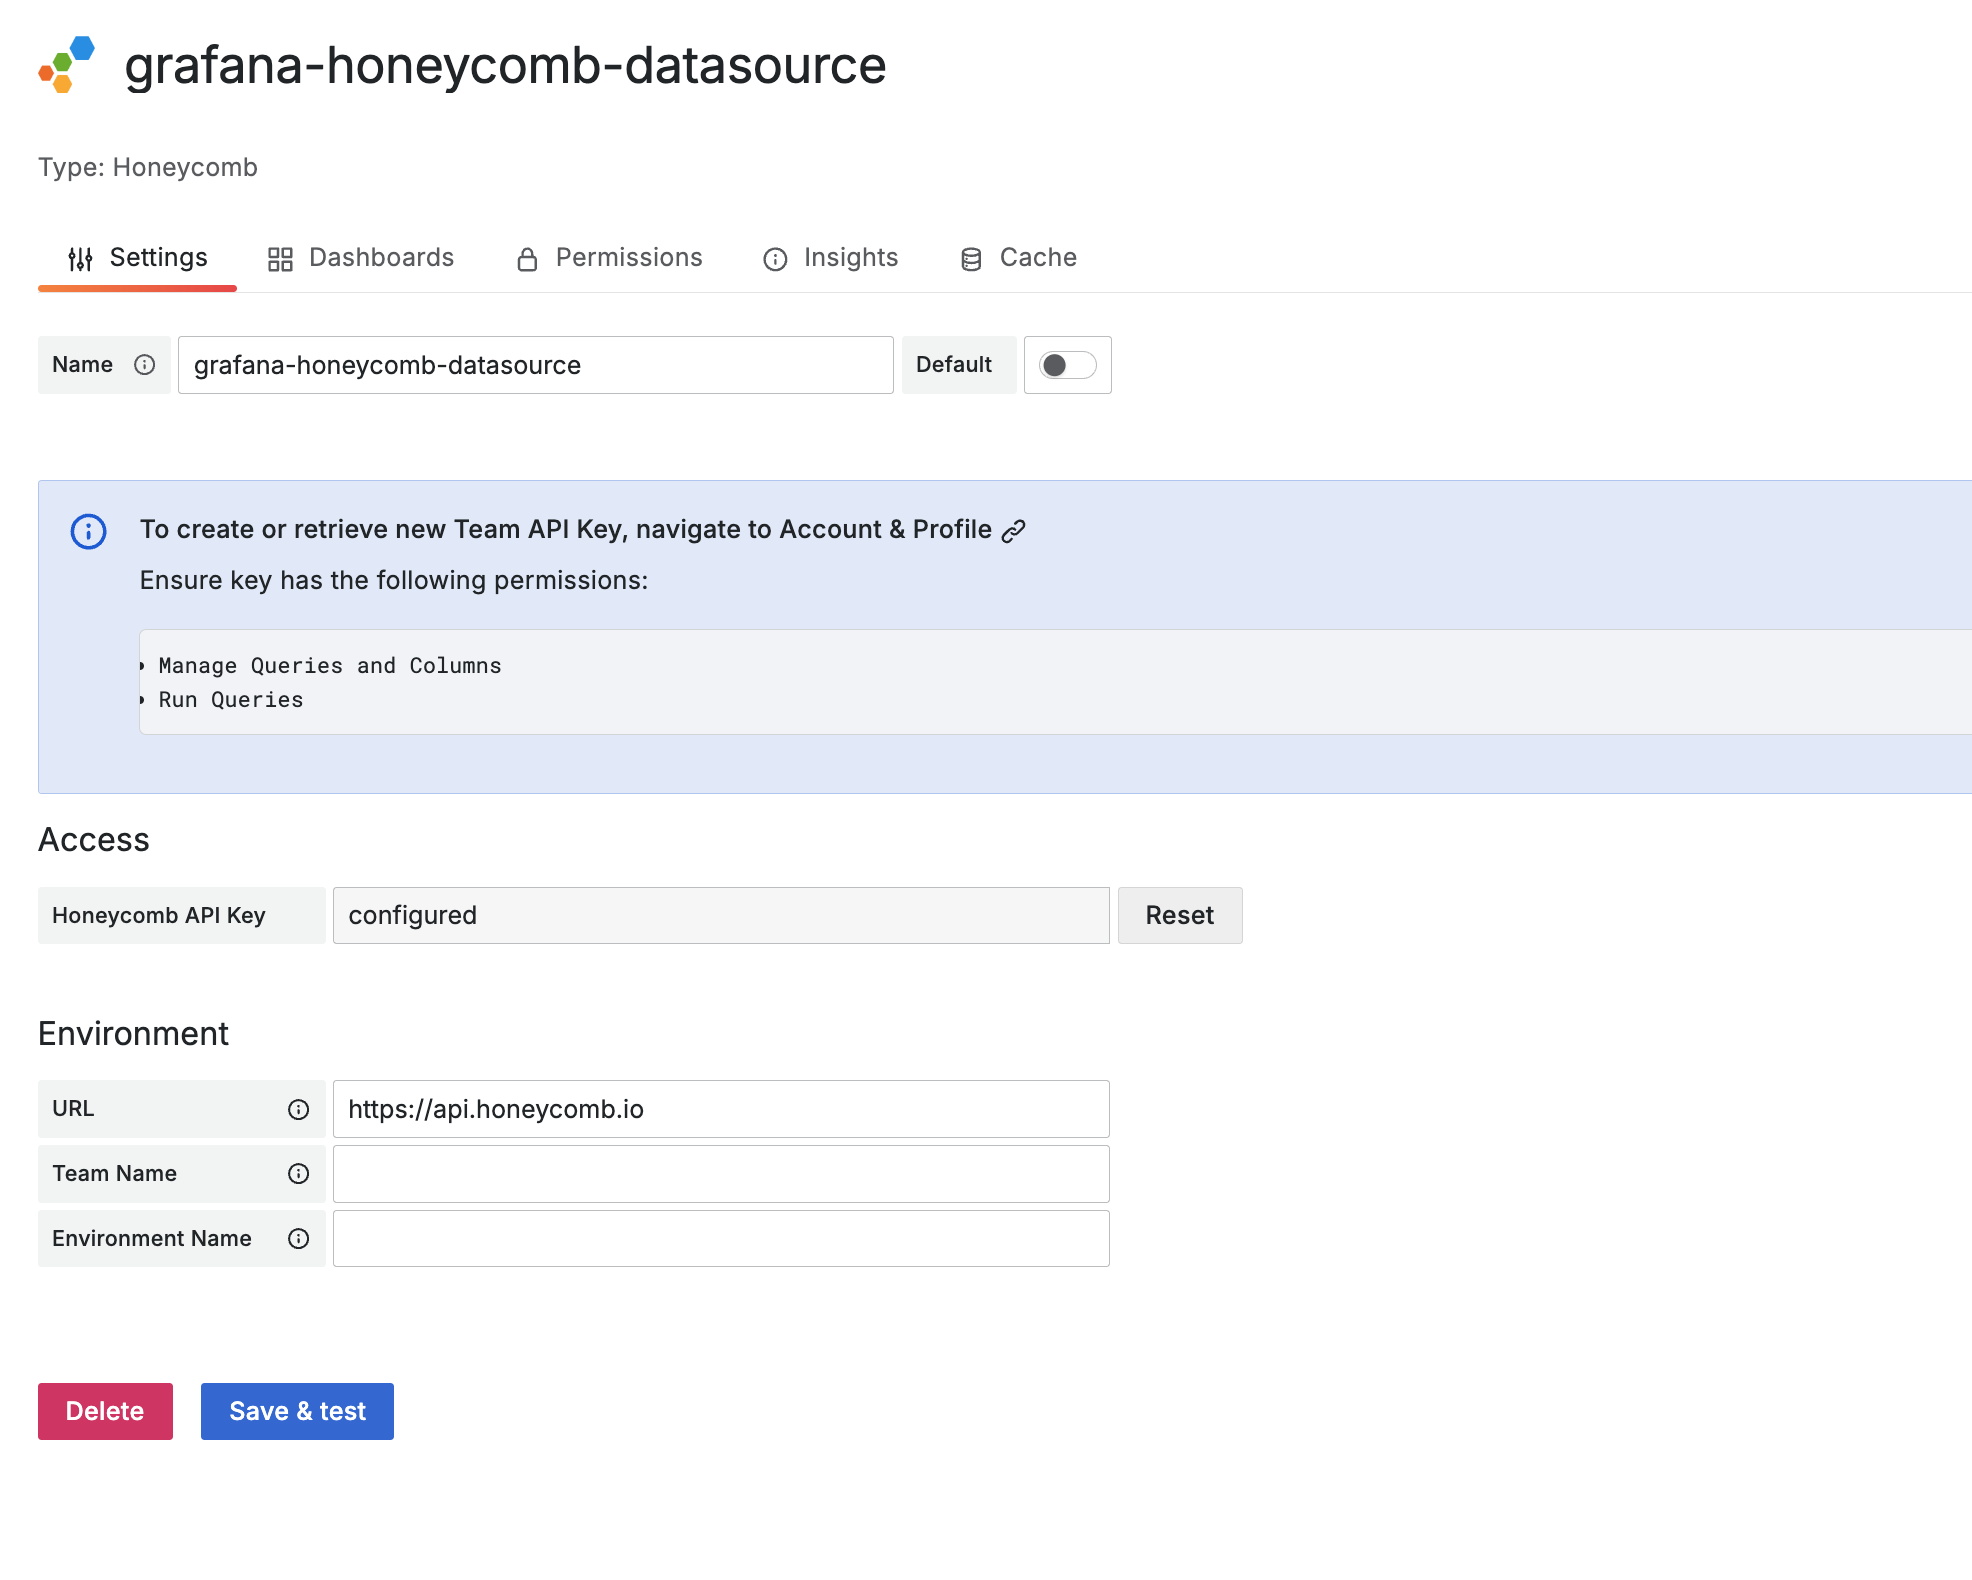
To add a new Honeycomb data source, refer to Add a data source, and fill in the following fields:
Honeycomb settings
| Field | Description |
|---|---|
| Name | A name for this particular Honeycomb data source. |
| Honeycomb API Key | API key from Honeycomb. |
| URL | URL to the Honeycomb API. For example, https://api.honeycomb.io. |
| Team | The Honeycomb team associated with the API key |
| Environment | Honeycomb environment name associated with the API key |
Configure the data source with provisioning
Configure the Honeycomb data source using configuration files with Grafana’s provisioning system. To know more about how the provisioning system works, including all of the data source settings, refer to Provisioning Grafana.
Here is a provisioning example for this data source:
apiVersion: 1
datasources:
  - name: Honeycomb
    type: grafana-honeycomb-datasource
    jsonData:
      hostname: https://api.honeycomb.io
      team: Team
      environment: test
    secureJsonData:
      apiKey: API Key
Query the data source
The query editor allows you to query and link to Honeycomb.
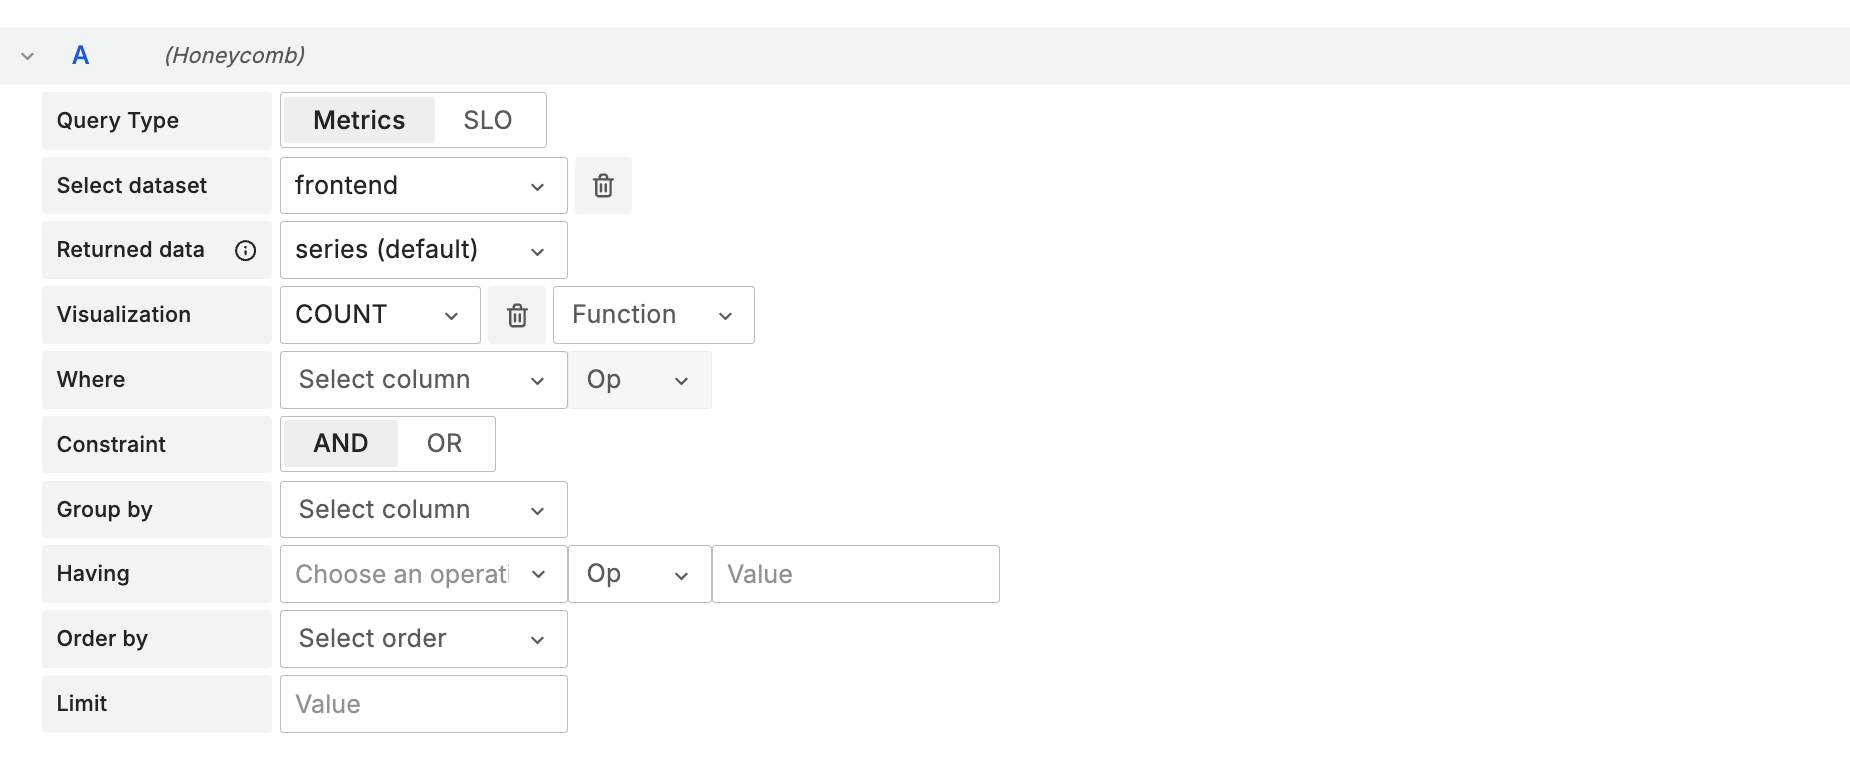
Depending on the value selected for the Returned data dropdown Query will return either timeseries data, results (equivalent to the Overview in the Honeycomb UI below the graph) or both.
Metrics Query
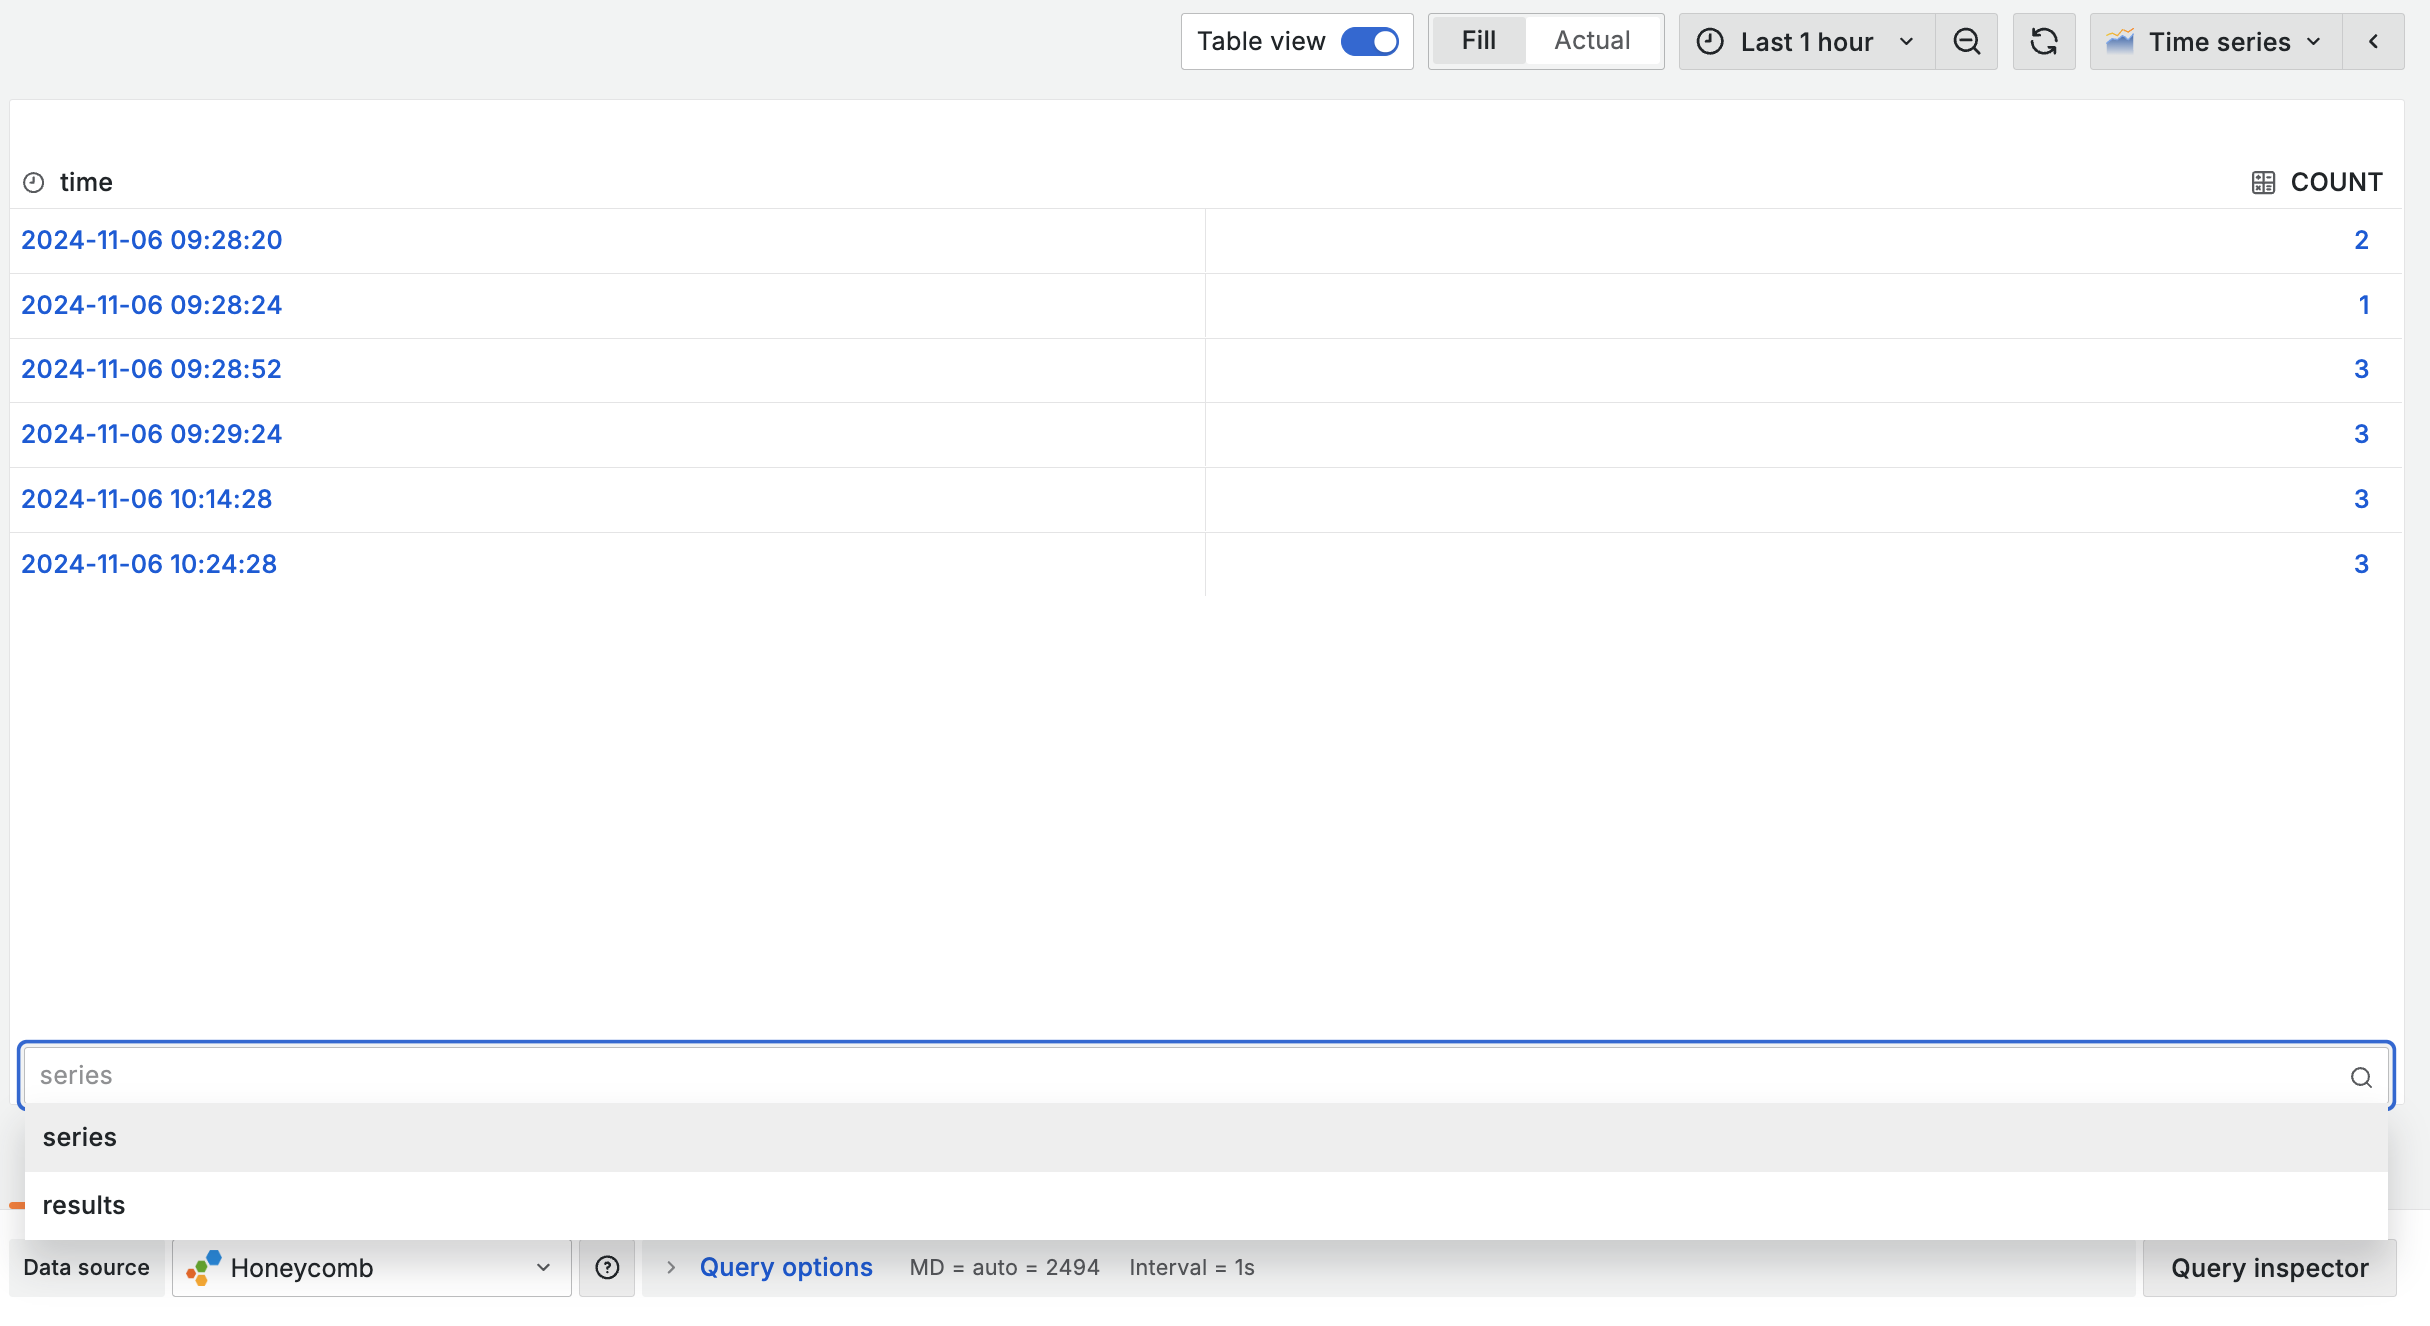
Query metrics by entering values into the editor fields.
- Select a dataset
- The default query is a
COUNTover the selected dataset. - To refine the query, select values for any of the remaining fields: Visualization, Where, Constriant, Group by, Order by, or Limit.
SLO Query
Honeycomb SLOs can be queried by choosing SLO as query type. There are two types of SLO queries you can perform
- List of SLO definitions (SLO List)
- Individual SLO detail (SLO detail)
- This query require a single SLO ID.
- To retrieve the
Budget RemainingandCompliancedetails, Honeycomb enterprise plan is required.
To view SLO details of multiple SLO items, use multiple queries and then use merge transform to get them into single panel view.
Templates and variables
To add a new Honeycomb query variable, refer to Add a query variable. Use your Honeycomb data source as your data source.

You can create variables containing Datasets, Columns, or Column Values:
- If no dataset is selected, the variable will contain datasets
- If only a dataset is selected, the variable will contain column names
- If both a dataset and a column are selected, the variable will contain column values.
- Column values can be further constrained using the
Wherefields in the editor.
- Column values can be further constrained using the
After you create a variable, you can it in your Honeycomb queries. For more information, refer to Variable syntax.
For more information about variables, refer Templates and variables.
View query in Honeycomb UI
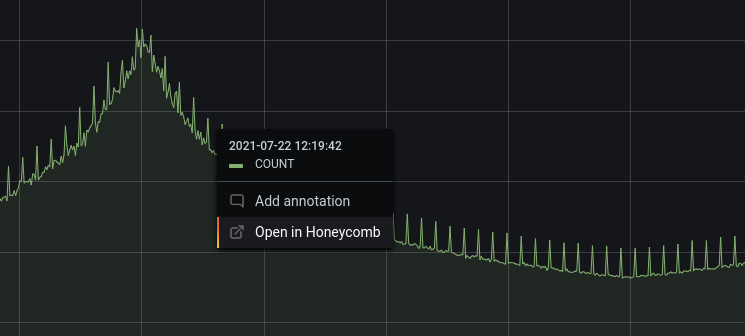
From the Dashboard Panel
To see the query you have created in the Honeycomb UI from the dashboard panel, click on any point in the graph and click Open in Honeycomb
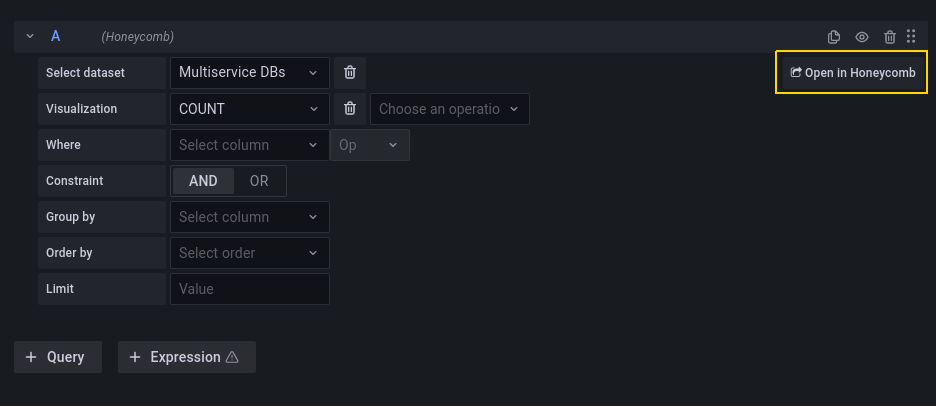
From the Query Editor
To see the query you have created in the Honeycomb UI, click the Open in Honeycomb button.
Import a dashboard for Honeycomb
To import a dashboard, refer to Import a dashboard.
To find your imported dashboards, go to Configuration > Data sources.
To see the available pre-made dashboards, select the Honeycomb data source, and select the Dashboards tab.
Learn more
- Configure and use Templates and variables.
- Add Transformations.

