This is documentation for the next version of Loki. For the latest stable release, go to the latest version.
Visualize log data
Modern Grafana versions after 6.3 have built-in support for Grafana Loki and LogQL.
Using Explore
- Log into your Grafana instance. If this is your first time running
Grafana, the username and password are both defaulted to
admin. - In Grafana, go to
Connections>Data Sourcesvia the cog icon on the left sidebar. - Click the big + Add a new data source button.
- Search for, or choose Loki from the list.
- The http URL field should be the address of your Loki server. For example,
when running locally or with Docker using port mapping, the address is
likely
http://localhost:3100. When running with docker-compose or Kubernetes, the address is likelyhttp://loki:3100.
When running Grafana (with Docker) and trying to connect to a locally built Loki instance, the address (for the URL field) is:
On Mac:docker.for.mac.localhost
On Windows:docker.for.win.localhost - To see the logs, click Explore on the sidebar, select the Loki data source in the top-left dropdown, and then choose a log stream using the Log labels button.
- Learn more about querying by reading about Loki’s query language LogQL.
If you would like to see an example of this live, you can try Grafana Play’s Explore feature
Read more about Grafana’s Explore feature in the Grafana documentation and on how to search and filter for logs with Loki.
Using Grafana Dashboards
Because Loki can be used as a built-in data source above, we can use LogQL queries based on that datasource to build complex visualizations that persist on Grafana dashboards.
Give it a try using Grafana Play
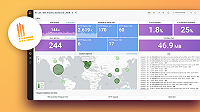
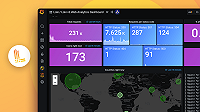
With Grafana Play, you can explore and see how it works, learning from practical examples to accelerate your development. This feature can be seen on Loki Example Grafana Dashboard.
Read more about how to build Grafana Dashboards in build your first dashbboard
To configure Loki as a data source via provisioning, see Configuring Grafana via Provisioning. Set the URL in the provisioning.


