This is documentation for the next version of Grafana. For the latest stable release, go to the latest version.
Create a new correlation
Before you begin
Make sure you have permission to add new correlations. Only users with write permissions to data sources can define new correlations.
Create a correlation in Explore’s correlations editor
To learn more, refer to Explore’s documentation about building correlations in Explore.
Create a correlation in Administration page
- Go to the Administration section in Grafana.
- Under Plugins and data, open the Correlations page.
- Click the “Add” button in the top right corner.
- Provide a label for the correlation.
- Provide an optional description.
- Go to the next page.
- Provide target data source.
- Provide target query using variables.
- Go to the next page.
- Provide source data source.
- Provide results field.
- Add transformations if you need variables that are not fields in the source data source.
- Click “Add” to add a new transformation.
- Select the type of a transformation.
- Configure transformation depending on the selected type.
- Save correlation.
You can edit correlation in the same way, but you cannot change the selected data sources.
Create a correlation with provisioning
Provision correlations by extending provisioned data sources. Correlations are defined as a subsection of the source data source configuration:
datasources:
  - name: Data source name # source data source
    ...
    jsonData:
    ...
    correlations:
      - targetUID: uid
        label: "test"
        description: "..."
        config:
          type: "query"
          target:
            expr: "..."
          field: "name"
          transformations:
            - type: regex
              field: "test"
              expression: /\w+/
              mapValue: "other"
            - type: logfmt
              field: "test"
Description of provisioning properties:
- targetUID
- Target data source UID
- label
- Link label
- description
- Optional description
- config
- Config object
- config.type
- Correlation type. “query” is the only supported type at the moment
- config.target
- Target query model
- config.field
- Name of the field where link is shown
- config.transformations (list)
- List of transformation objects
- transformation.type
- regex, or logfmt
- transformation.field
- The field that will be transformed. If this is not defined, it will apply the transformation to the data from the correlation’s config.field.
- transformation.expression
- Regex expression (regex transformation only)
- transformation.mapValue
- New name of the variable from the first regex match (regex transformation only)
Determine target query model structure
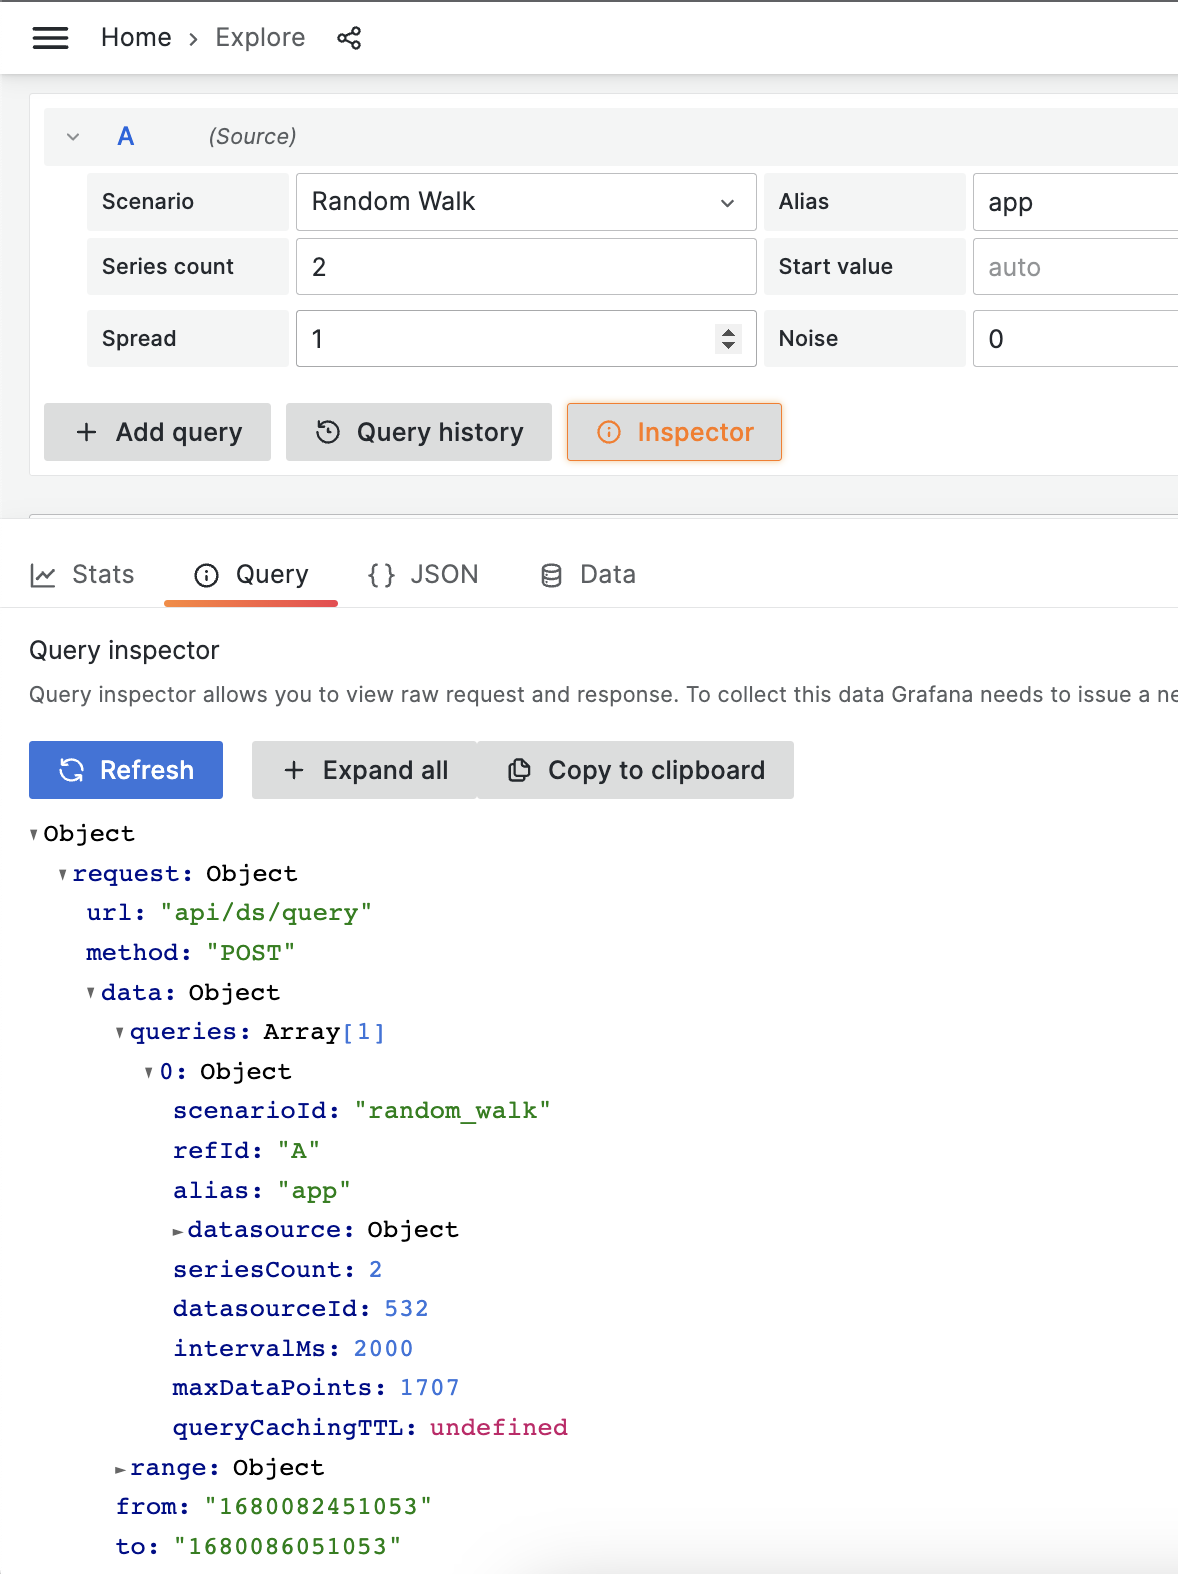
When you set up a correlation with admin page you can use the target query editor. When you use provisioning you may need to know the structure of the target query which may not be well documented depending on the plugin. Here is a quick step-by-step guide on how to determine the target query model:
Open Explore.
Select the data source you want to use as the target of the correlation.
Open the inspector tab and select “Query”.
Run a sample query.
Inspect results.
Look for the “queries” list object. Each object is created using the query model structure defined by the data source. You can use the same structure in your provisioning file.
![Query inspector with target query structure Query inspector with target query structure]()
Query inspector with target query structure The query model in this example is represented by the first entry in the queries list. Properties “refId” and “datasource” are added to all queries in runtime and can be omitted:
{
  "scenario_id": "random_walk",
  "alias": "app",
  "seriesCount: 2
}


