Simplified routing in Grafana Alerting: Easy, secure, and powerful
With great power comes great … complexity?
When we introduced Grafana Alerting a few years ago, it included a powerful routing feature that teams could use to send alerts to various contact points. Unfortunately, this functionality also came with a fair bit of complexity and an unfamiliar UX. This prevented many users from adopting it, but we’re still big believers in how it can help users. That’s why we’re excited to tell you about a new simplified routing feature that preserves all that power while abstracting the corresponding complexity.
In this blog, we’ll walk through how we got here and show you how easy it is to get started with simplified routing today.
Notification policies: the power and the problems
Before we get into the new simplified routing, let’s first look at what’s under the hood (and what’s been there for years). As we alluded to previously, Grafana Alerting introduced a tree-structured routing approach based on notification policies and labels. You can use these policies to route alerts to different receivers (email, Slack, Grafana OnCall, etc.), and when you add a label to a notification policy, you can modify where that alert is delivered.
This provides a lot of advantages over other IRM solutions. For example, let’s say you want to change where you send your notifications. With other tools you’d have to change the alert rule for every single server that relies on that alert rule, which could add up to thousands of changes. But with notification policies, you just add a label and Grafana Alerting takes care of the rest.
We have users who really like this functionality (especially among those well-versed in Prometheus). For example, if you want to provide white-glove support to a big customer, you just add a nested label for that specific customer so that when an alert fires, it gets routed directly to a concierge service or higher-level team. This dynamic routing is very powerful, and it also makes maintenance a lot easier.
However, this approach was confusing to lots of users. Many of them simply bypassed it altogether, while others found themselves mislabeling alert rules and not knowing where those alerts were going. That’s obviously not what we want to see, so we decided to make dynamic alert routing simpler and more intuitive.
Why you should use simplified routing instead
The good news is all that power we just discussed isn’t going anywhere; it’s just being abstracted so you don’t have to worry about it. Now, you simply select the contact point in Grafana Alerting, and we will automatically generate a policy in the background. You can still modify your policies, mute timings, change groupings, and more — the only thing you’re losing is the complexity.
Another great benefit of simplified routing is that it inherits the alert rule RBAC, which gives you increased control over routing. This also helps you avoid the scenario where someone from another team accidentally removes the wrong policy or adds a competing one, and all of a sudden you stop getting your notifications. You can restrict access by team or individual, and only someone with admin status can amend those settings.
Note: Simplified routing is currently only available for Grafana managed alerts and Grafana Alertmanager. For other Alertmanagers, you can continue to use notification policies.
How to use simplified routing
Simplified routing is available for all Grafana Cloud users today, and it’s enabled by default in Grafana 10.4 (though the feature toggle still exists, in case you want to disable it).
To start, go to Configure labels and notifications in the new alert form and click on Select contact point.
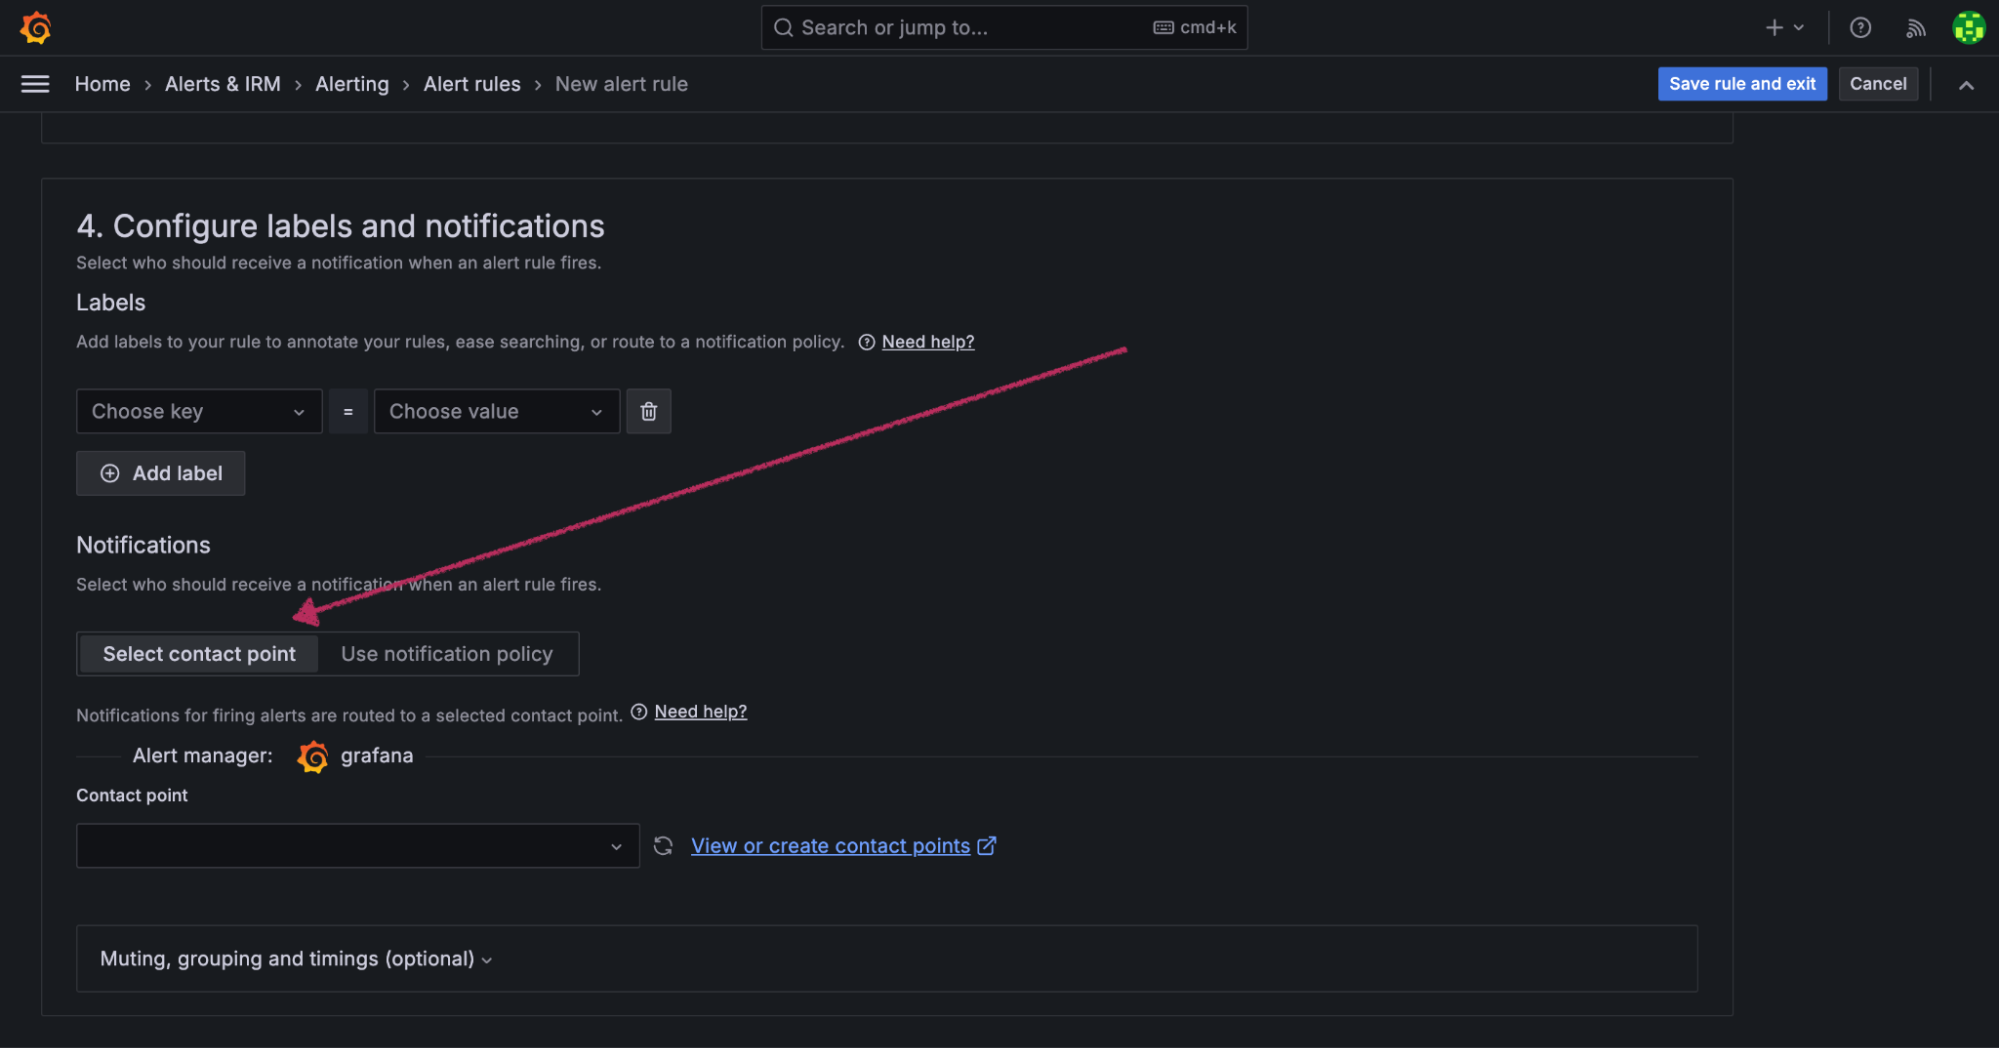
Next, choose the contact point from your existing options. You can configure the routing directly from this form and all notifications will be routed directly to this contact point. You don’t need to do anything else.
If you want to add a new endpoint, click on the View or create contact point link next to the drop-down menu. If you have proper RBAC permissions, you can create the new contact point there directly.
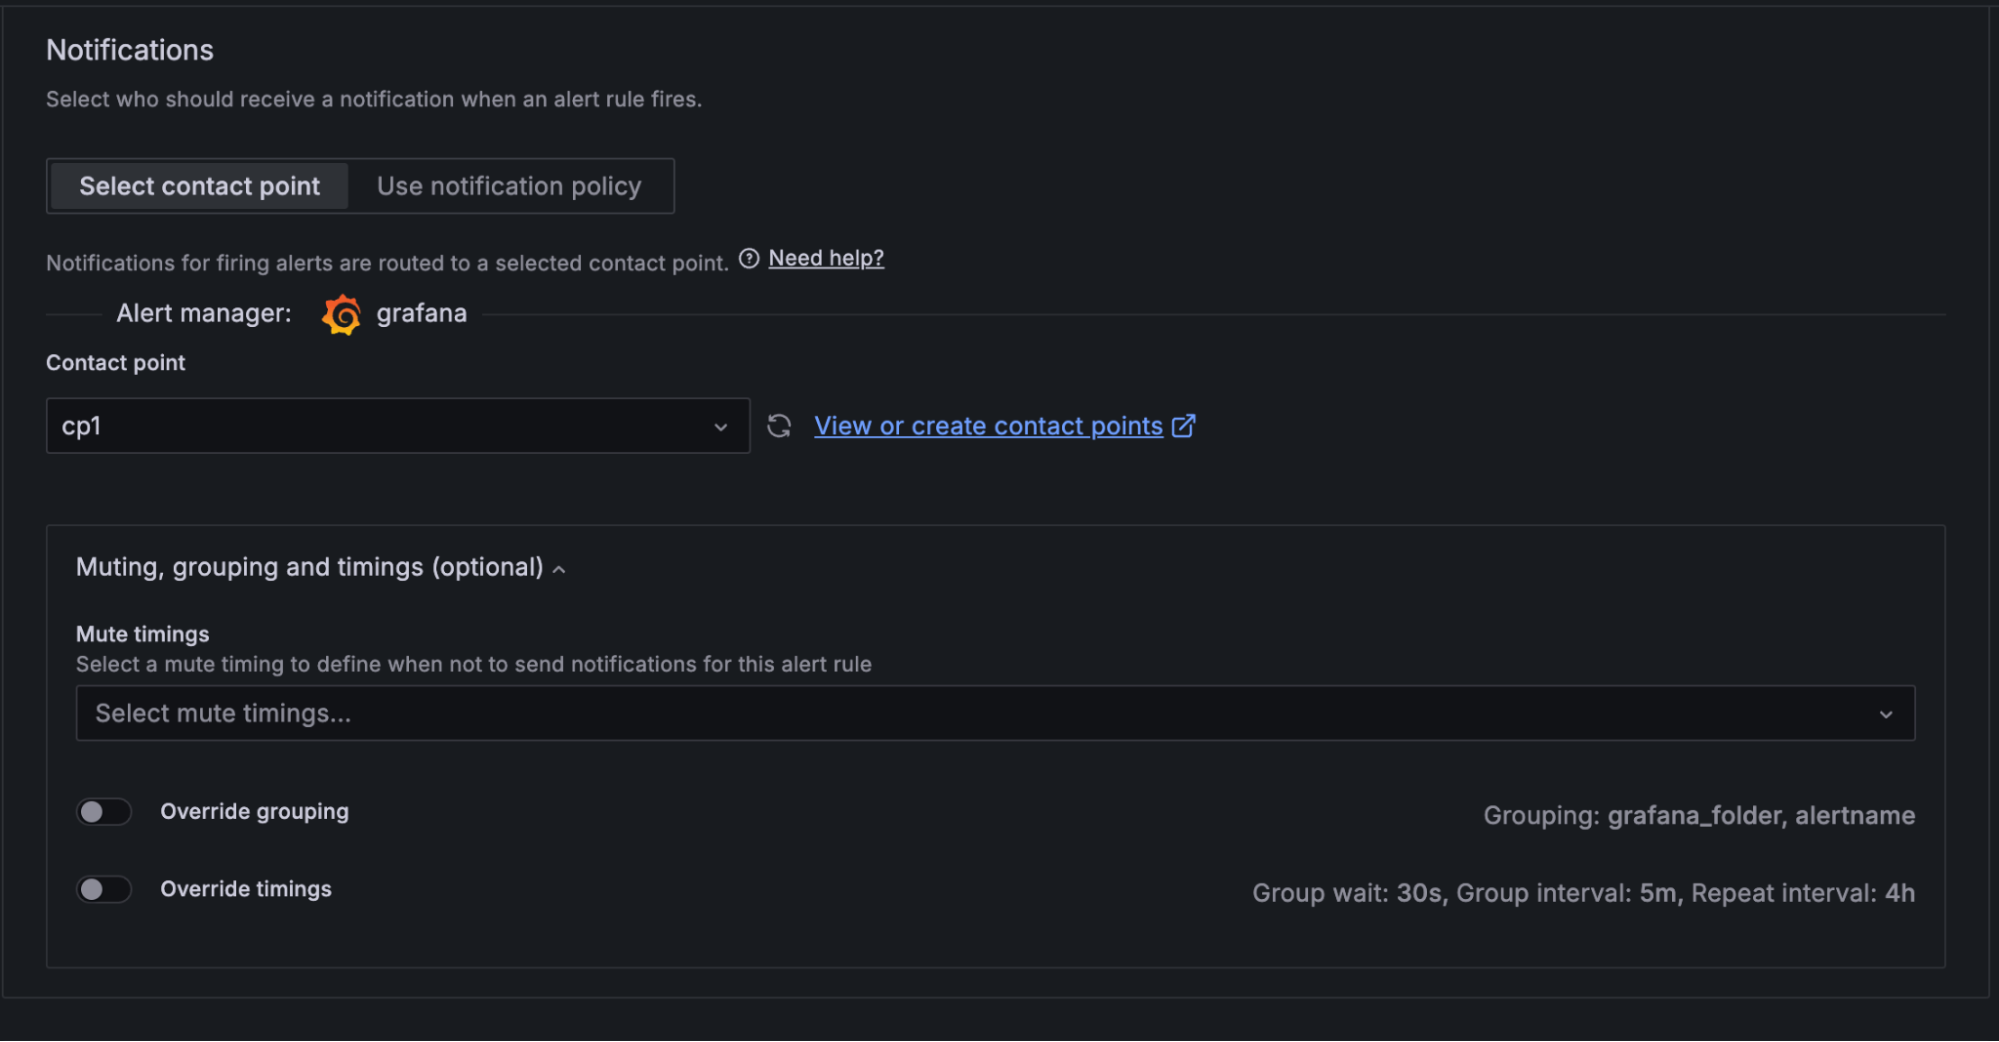
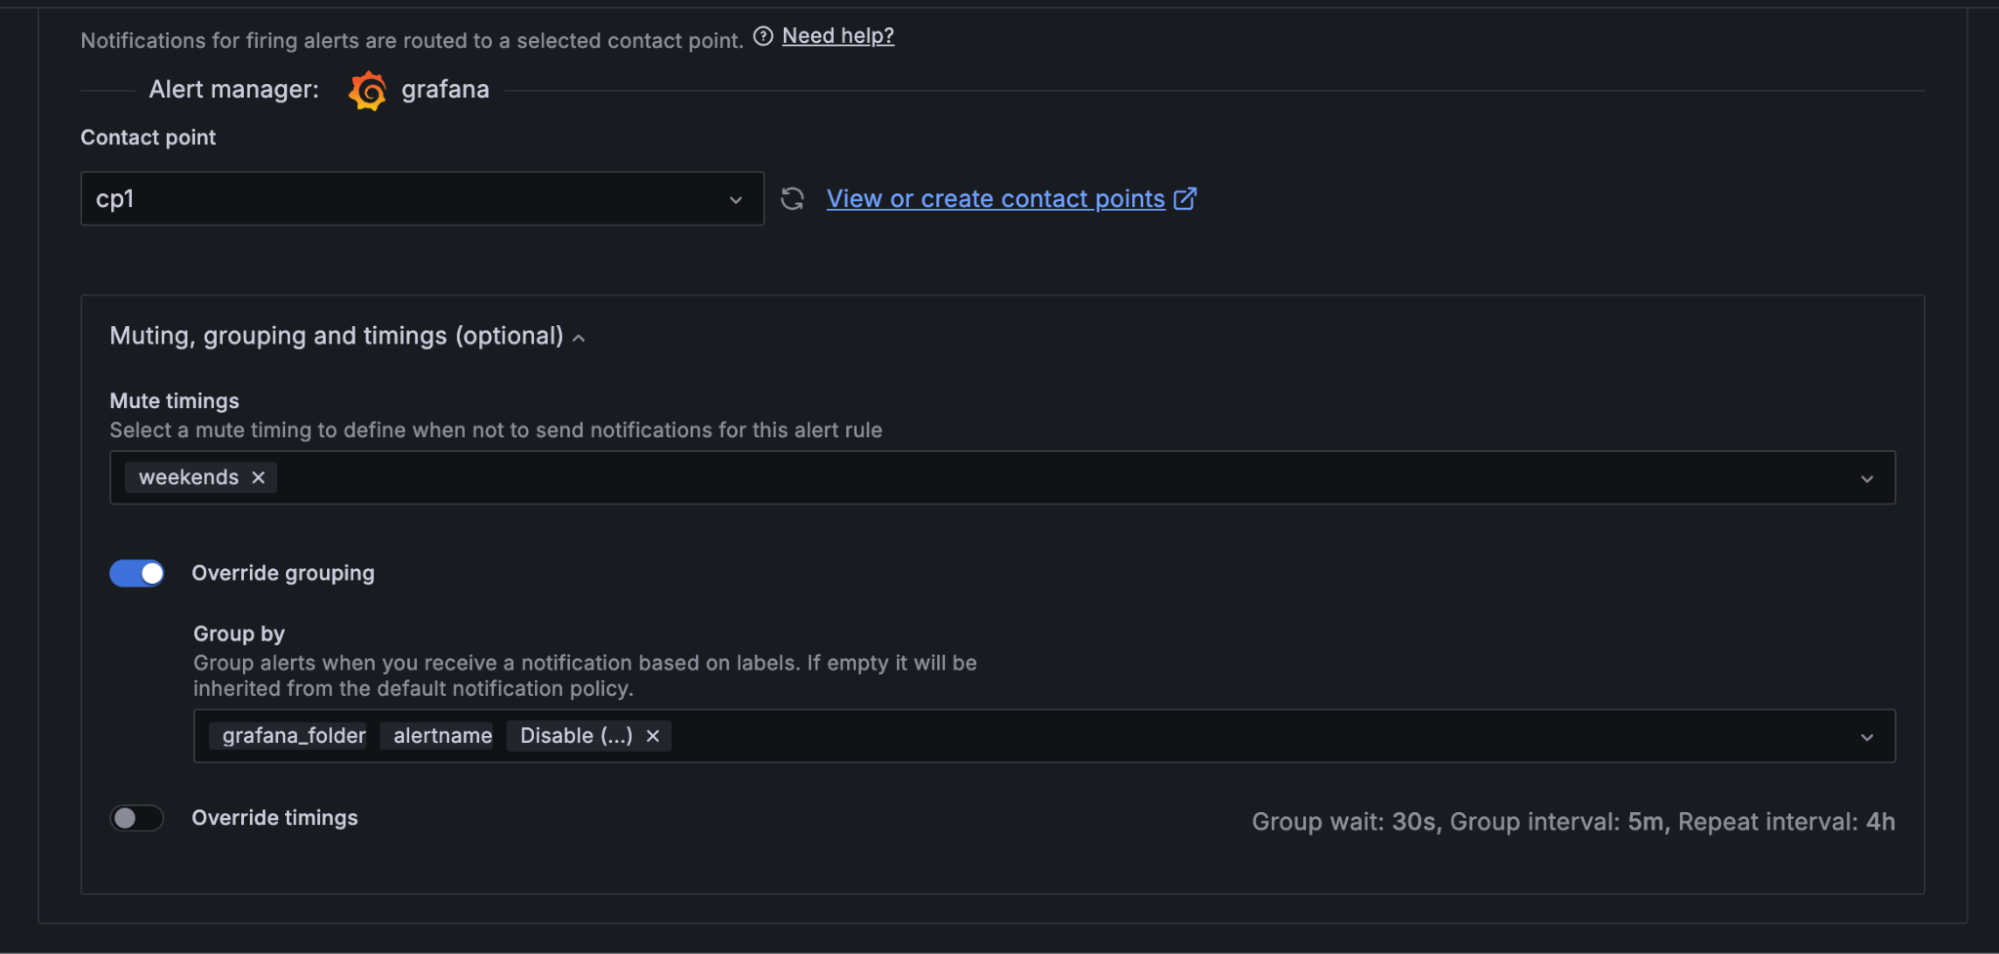
There is also the option to configure route settings, like mute timings, override groups, or override timings.
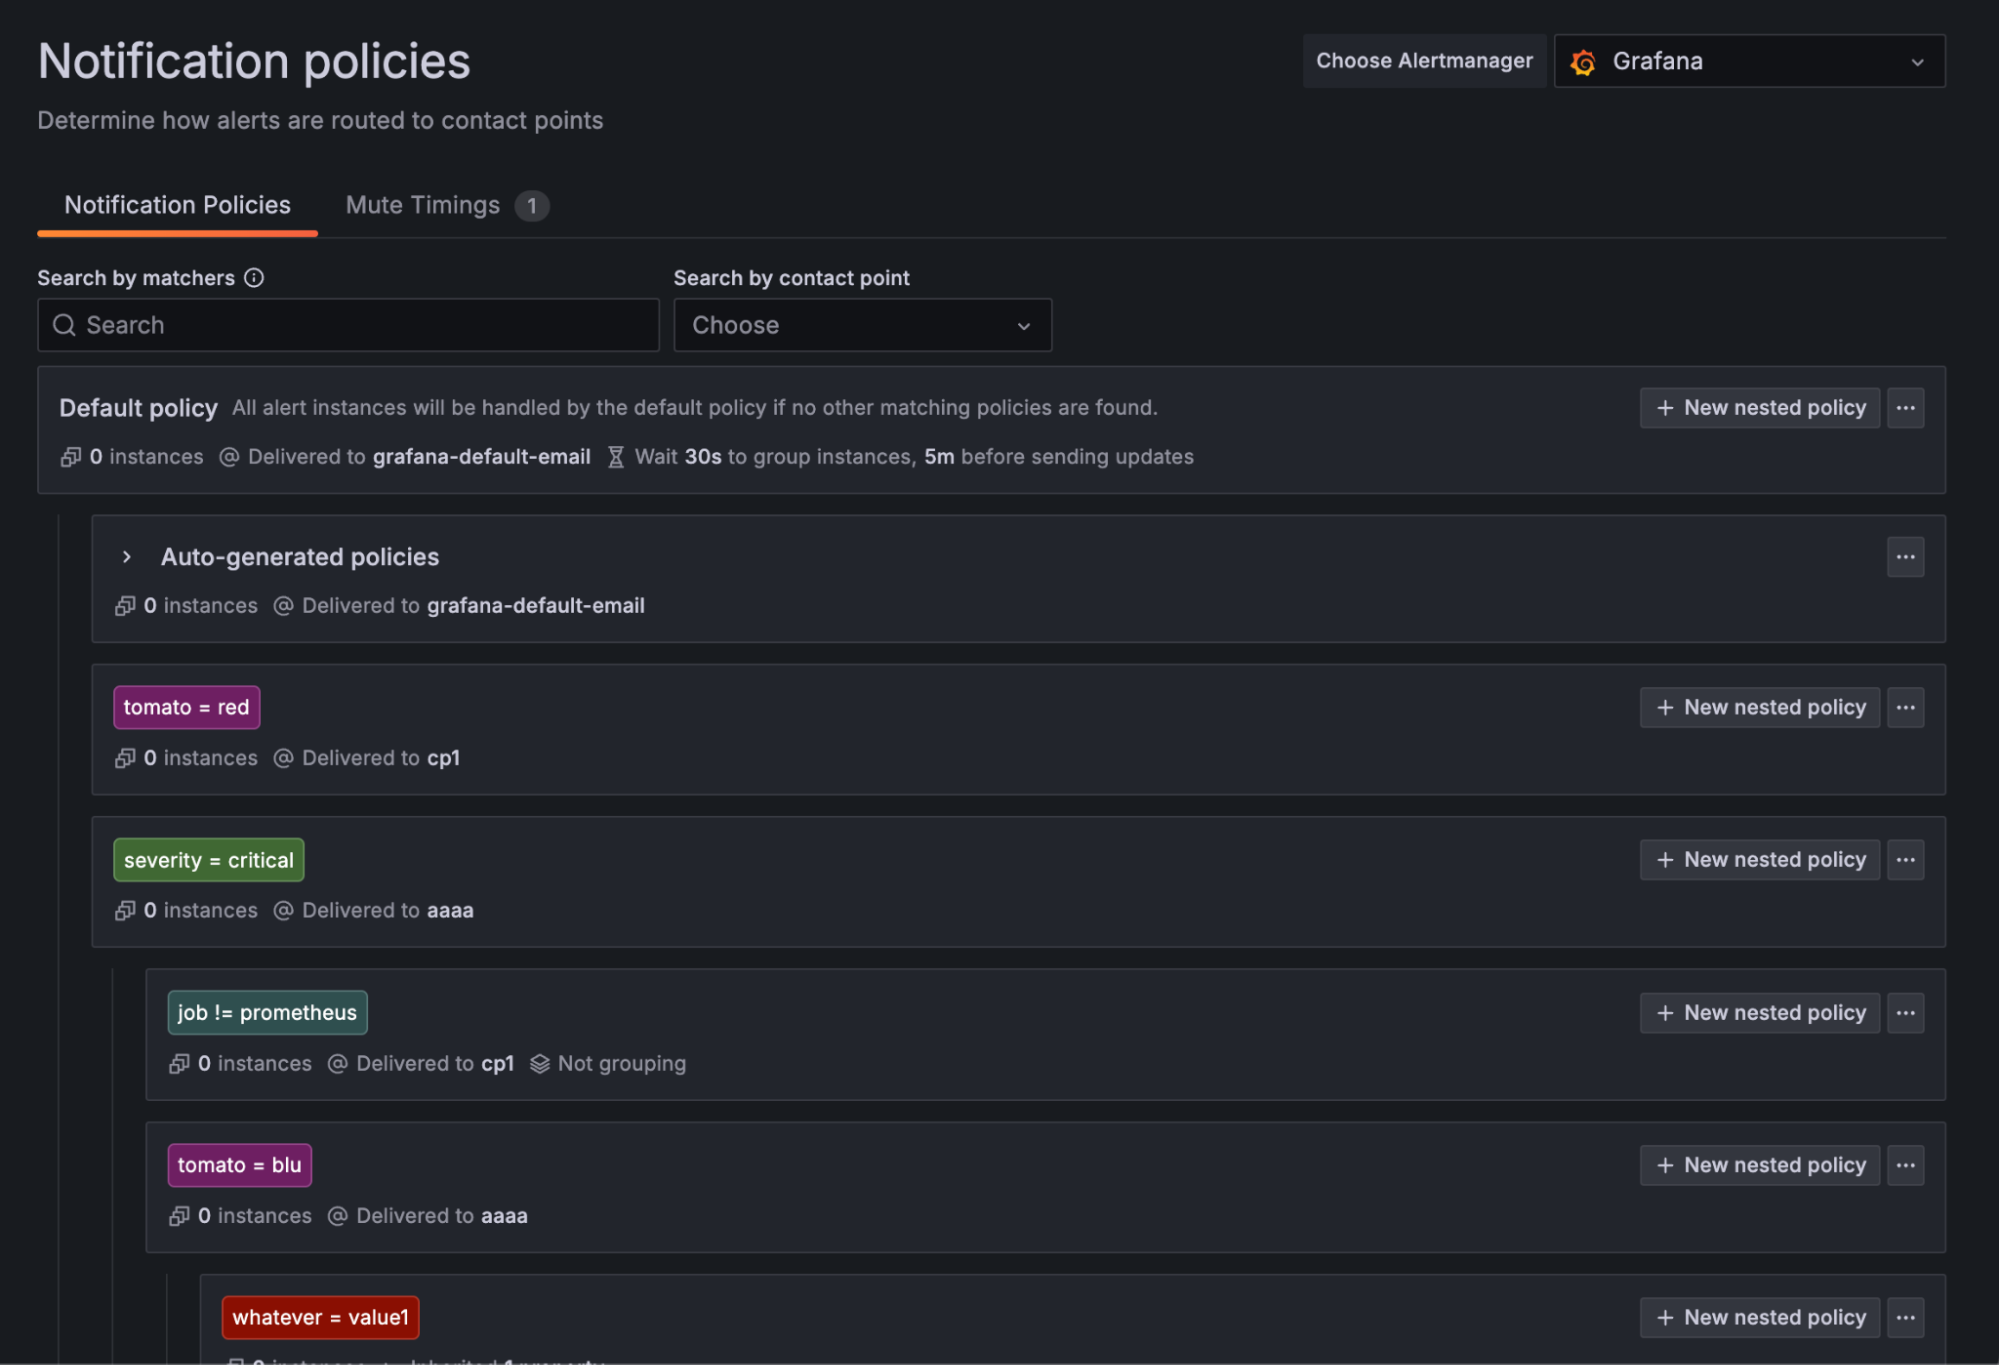
Auto-generated policies: only visible to admin users
In simplified routing, alerting auto-generates special policies below a new node in the policy tree. This new node is collapsed by default and only admins will see it.
Below this new node, we generate one policy for each contact point. In case an alert rule is saved with different route settings from the defaults, we generate a new nested policy for the contact point with a hash of the routing settings of the alert rule.
As you can see below, there is one instance routed to the purple node with cp1, and there is another instance that has been sent to the blue node — for this one, we are using the hash.
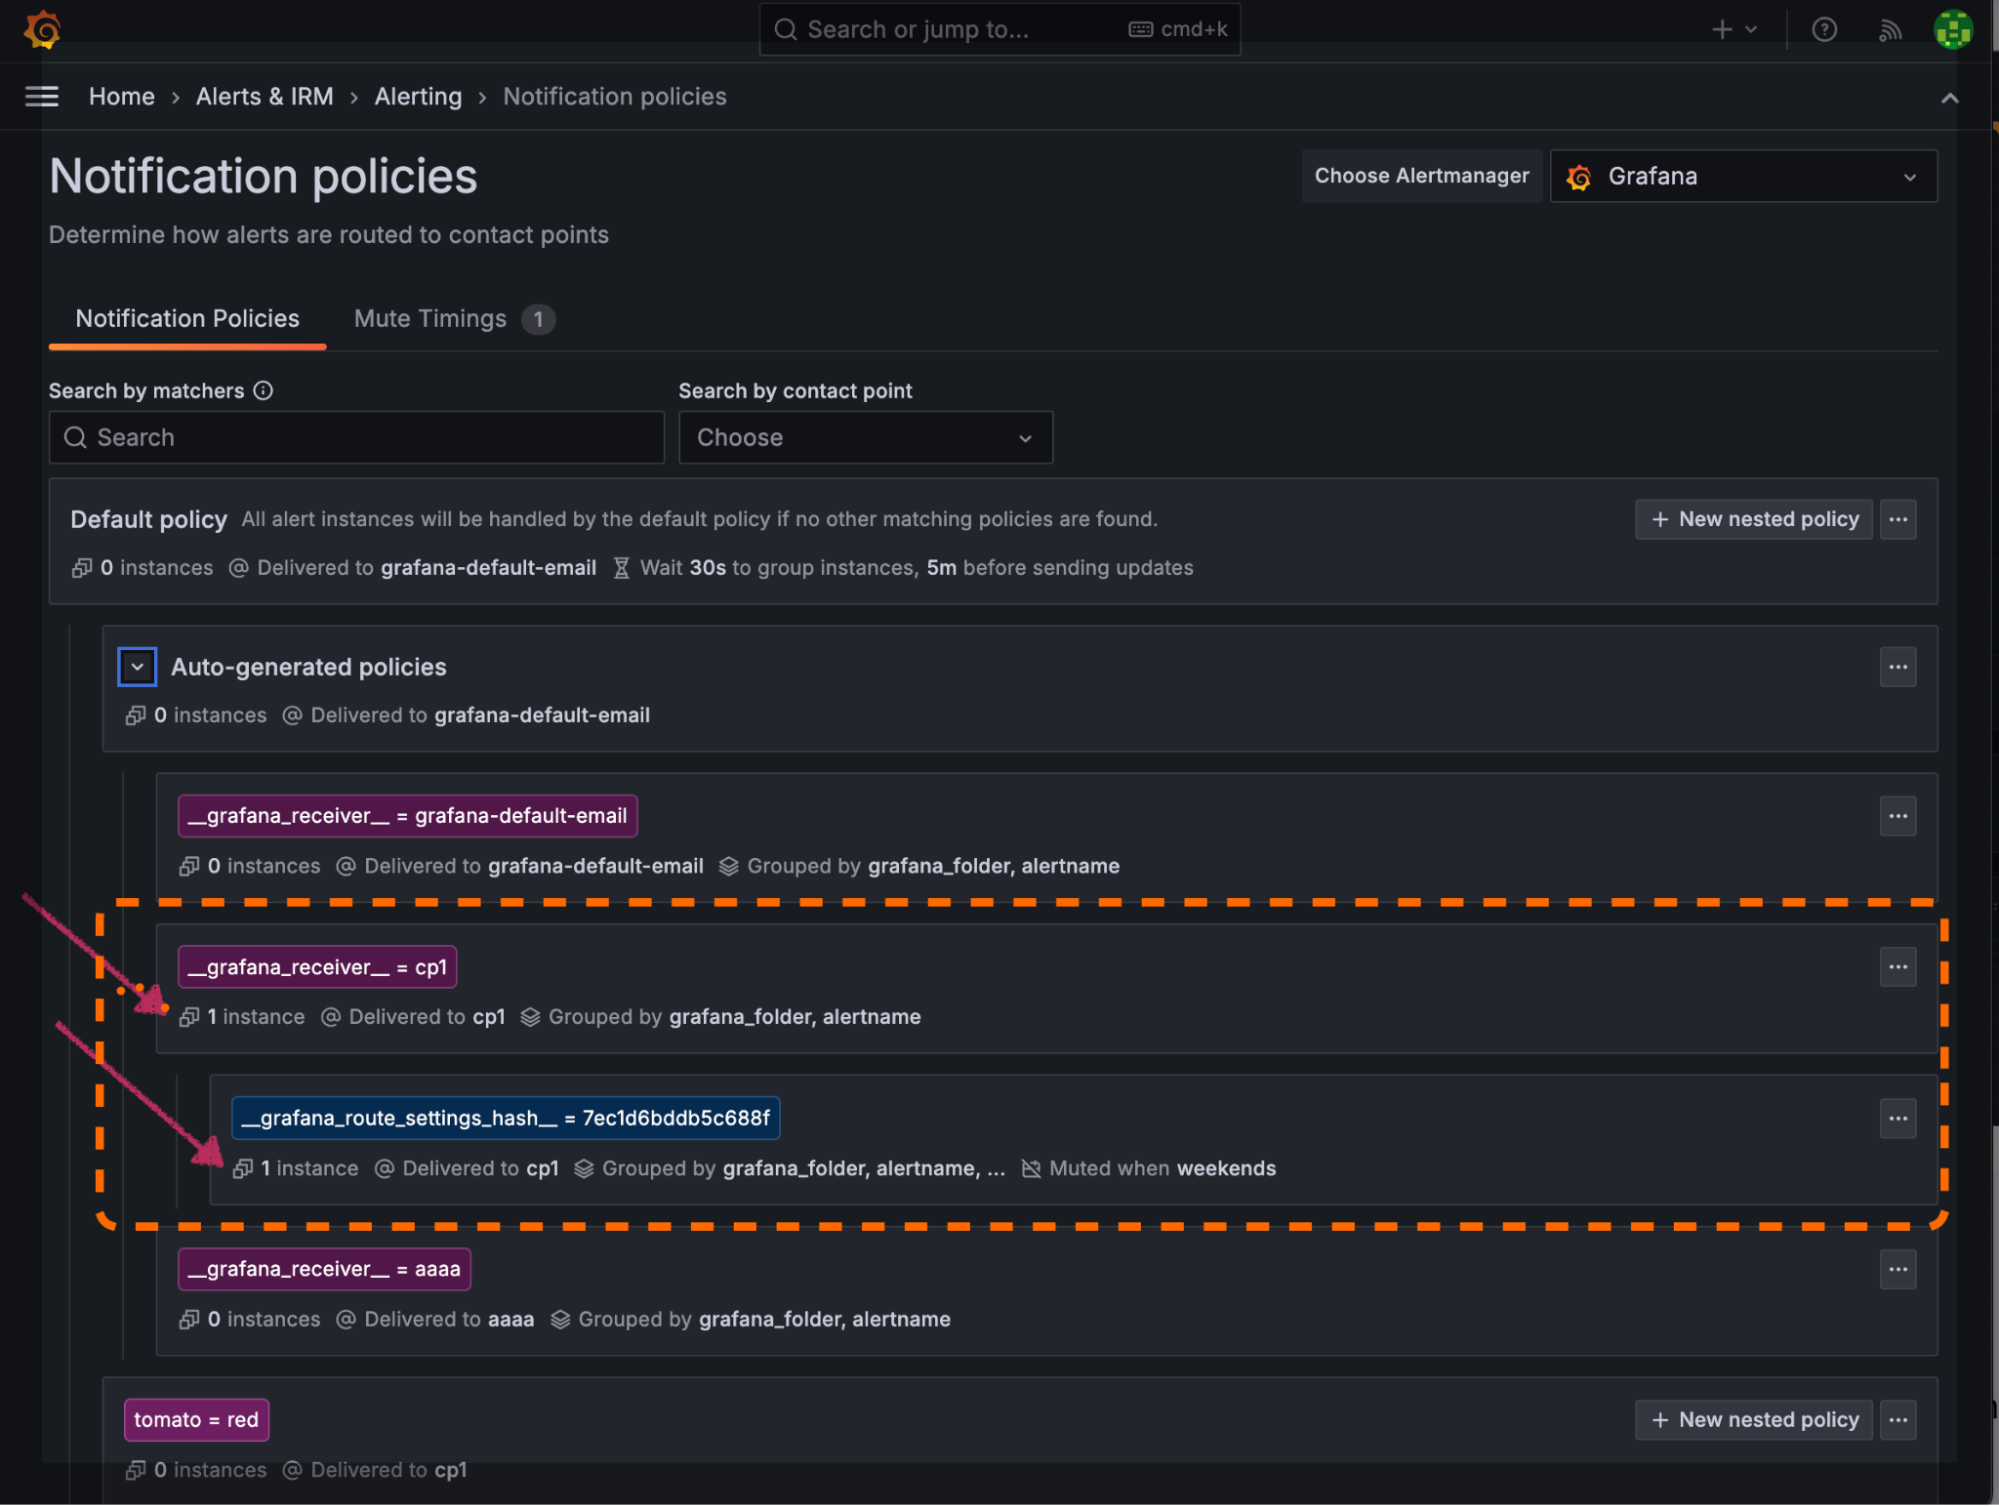
Again, this is only shown for admin users.
It’s important to note that all these auto-generated policies are read only. If the admin wants to update something, they will have to go to the alert rule form and update routing fields in there.
To learn more about Grafana Alerting, you can check out our technical documentation and other recent blog posts.

