
Timing is Everything. Writing the Clock Panel Plugin for Grafana 3.0
People have been asking for a Clock Panel in Grafana so I thought I’d give it a try and at the same time show how to build plugins for Grafana.
Grafana 3.0 introduces a new plugin system architecture and these plugins can be shared with everyone through Grafana.net.
TL;DR
- If you just want a clock panel for Grafana then the finished Clock Panel plugin is here.
- Check out the current version of the code on GitHub here.
Introduction
There are four different plugin types for Grafana:
- Datasources
- Apps
- Panels
- Dashboards
All datasources and panels are plugins and Grafana comes with a lot of built-in plugins as well as some external ones. Check out the Grafana documentation for more about them.
I’m going to focus on the panel plugin. A panel in Grafana is how data is displayed on a dashboard. The main panel in Grafana is the graph panel. They can have a datasource like Graphite providing them with data but they don’t have to have one. The clock panel is going to use the current time as its only input. We don’t need a datasource for that as we can use JavaScript to fetch the date and time.
We’re going to start simple. Version one of our clock plugin will not be configurable. It just shows the current time.
Setup Grafana
You can develop Grafana plugins using the official optimized Grafana release packages or running a locally built Grafana development server. It does not really matter unless your plugin needs to reference Grafana style variables or you want better exception call stacks when troubleshooting plugin issues. Follow the instructions here to learn how to build Grafana. General instructions for plugin development can be found here.
Getting started
This may sound strange but the easiest way to develop a new plugin is to create it directly in Grafana’s plugin directory. If you are running Grafana from a local development build then the default plugins directory is <grafana_repo_dir>/data/plugins. If you have grafana installed from a .deb or .rpm package then the default plugins directory is /var/lib/grafana/plugins.
After you have created your plugin directory and your plugin.json (more on what that is below) you need to restart grafana-server and the new plugin will be automatically found and registered. When making changes to javascript files you do not need to restart grafana-server, that is only required when you make changes to the plugin definition file (plugin.json).
You can can clone one of the example plugins to get started or make one from scratch. If you are used to JavaScript development and have your own set of tools then it’s worth doing it yourself, otherwise I’d recommend cloning one of the plugins that is similar to one you want to make.
Technology Choices
Grafana is built with Angular and the plugins interact with Angular too so that choice is already made. I will be writing it in the latest ES6 syntax so I need Babel to transpile that to ES5 JavaScript. I choose Grunt for the build script.
5 Simple Steps
The steps to create a simple plugin are:
- Set up the boilerplate files (most of these are the same for any JavaScript project)
- Get a simple buildscript running
- Write some plugin JavaScript
- Style the plugin
- Publish the plugin
1. Plugin Boilerplate
For Grafana plugins there are two mandatory files: plugin.json and module.js.
Plugin json is the same concept as the package.json file for an npm package. Grafana looks for plugin.json files when scanning the plugins directory.
The important fields are the first three, especially the id. The convention for the id is [github username/org]-[plugin name]-[plugin type] and it has to be unique.
Minimal plugin.json:
{
  "type": "panel",
  "name": "Clock",
  "id": "grafana-clock-panel",

  "info": {
    "description": "Clock panel for grafana",
    "author": {
      "name": "Raintank Inc.",
      "url": "http://raintank.io"
    },
    "keywords": ["clock", "panel"],
    "version": "1.0.0",
    "updated": "2015-03-24"
  },

  "dependencies": {
    "grafanaVersion": "3.x.x",
    "plugins": [ ]
  }
}
The module.js file is the starting point for your plugin and the interface to Grafana. The Grafana SDK is quite small so far and can be found here:
The SDK contains three different plugin classes for us to use: PanelCtrl, MetricsPanelCtrl and QueryCtrl. In our case, the module.js file should export one of these. Our clock plugin does not have any metric queries so we only need to inherit from PanelCtrl.
2. Get a simple buildscript running
I’m preparing for a grunt build at a later stage so the module.js file is placed in the src subfolder and later on we will have a dist folder. Grafana has a convention that it loads the code from the dist folder if it exists and will then ignore our src folder.
Setting up grunt with babel
Create a git repo with git init and create a .gitignore file.
Add a license, I’m using MIT.
Create a README.md file.
Create a package.json using npm init so we can install npm packages.
npm install with the following dev dependencies or something similar:
"devDependencies": {
  "grunt": "~0.4.5",
  "babel": "~6.5.1",
  "grunt-babel": "~6.0.0",
  "grunt-contrib-copy": "~0.8.2",
  "grunt-contrib-watch": "^0.6.1",
  "grunt-contrib-uglify": "~0.11.0",
  "grunt-systemjs-builder": "^0.2.5",
  "load-grunt-tasks": "~3.2.0",
  "grunt-execute": "~0.2.2",
  "grunt-contrib-clean": "~0.6.0",
  "babel-plugin-transform-es2015-modules-systemjs": "^6.5.0",
  "babel-preset-es2015": "^6.5.0"
}
I am using Lodash and Moment JS. Both of these are already included in Grafana so an npm install is all that is needed so I can build locally. If I want to use an external library that is not included in Grafana then I need to add it to the source code. This is how I installed them:
npm install moment --save
npm install lodash --save
Lodash is a useful utility library. Moment js is excellent for formatting dates and times. Exactly what we need!
Setup grunt. I am using the following Gruntfile.
module.exports = function(grunt) {

  require('load-grunt-tasks')(grunt);

  grunt.loadNpmTasks('grunt-execute');
  grunt.loadNpmTasks('grunt-contrib-clean');

  grunt.initConfig({

    clean: ["dist"],

    copy: {
      src_to_dist: {
        cwd: 'src',
        expand: true,
        src: ['**/*', '!**/*.js', '!**/*.scss'],
        dest: 'dist'
      },
      pluginDef: {
        expand: true,
        src: [ 'plugin.json', 'README.md' ],
        dest: 'dist',
      }
    },

    watch: {
      rebuild_all: {
        files: ['src/**/*', 'plugin.json'],
        tasks: ['default'],
        options: {spawn: false}
      },
    },

    babel: {
      options: {
        sourceMap: true,
        presets:  ["es2015"],
        plugins: ['transform-es2015-modules-systemjs', "transform-es2015-for-of"],
      },
      dist: {
        files: [{
          cwd: 'src',
          expand: true,
          src: ['*.js'],
          dest: 'dist',
          ext:'.js'
        }]
      },
    },

  });

  grunt.registerTask('default', ['clean', 'copy:src_to_dist', 'copy:pluginDef', 'babel']);
};
If you don’t know Grunt then you can learn all about it here on their site. Feel free to write your own Gulp (or whatever’s trendy) build script.
3. Write some plugin JavaScript
Create a clock_ctrl.js file that will hold most of our plugin’s code. This ctrl file is imported into module.js and exported as PanelCtrl. The module.js is very simple and looks like this:
import {ClockCtrl} from './clock_ctrl';

export {
  ClockCtrl as PanelCtrl
};
Write a little bit of code in the Clock controller to show the current time (we’ll add date later). I am using Moment.js to be able to format dates properly. $timeout is the Angular version of setTimeout. It updates the view every second.
import {PanelCtrl} from 'app/plugins/sdk';
import moment from 'moment';

export class ClockCtrl extends PanelCtrl {
  constructor($scope, $injector) {
    super($scope, $injector);
    this.updateClock();
  }

  updateClock() {
    this.time = moment().format('hh:mm:ss');
    this.$timeout(() => { this.updateClock(); }, 1000);
  }
}

ClockCtrl.templateUrl = 'module.html';
I am using a template file named module.html and it is a standard Angular template. It is really simple at this stage:
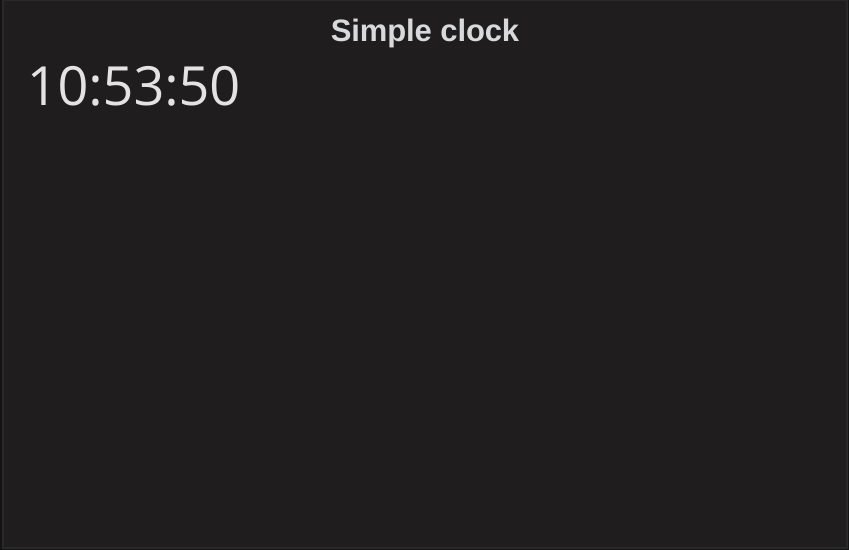
<h2>{{ctrl.time}}</h2>And that’s the first commit! A working, albeit very basic panel plugin for Grafana.
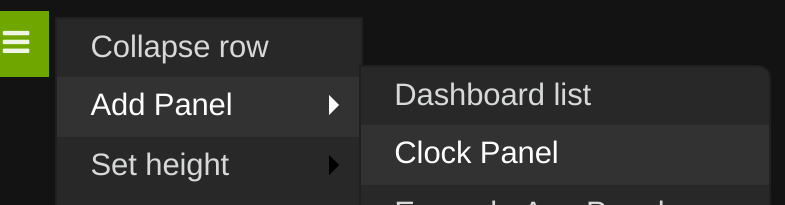
Run grunt to get everything compiled and copied over to the dist folder. Then refresh Grafana and try to add a new panel. The new Clock Panel should be available in the list.
But we’re not finished yet. It looks very plain and off center at the moment. We need to style it.
4. Style the plugin
There are two ways to to style a plugin:
- Use Grafana’s css.
- Import your own css.
We will import our own css. How you do this depends on your level of ambition. If you are not changing any colors then we just do a normal import. However if you want to add your own colors then it would be best to create two versions, one for the dark theme and one for the light theme. Check out the worldPing app for an example of using Sass to create the two themes.
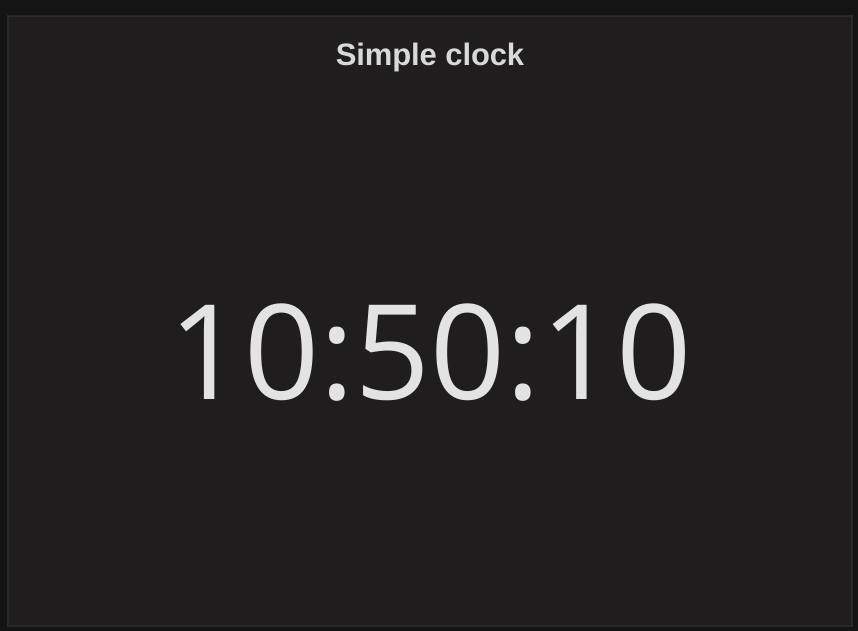
import './css/clock-panel.css!';You can get the panel height from the ctrl object and use that to set the height for the clock panel outer div in the template by setting:
style="height: {{ctrl.height}}px;"Now the first version of the clock panel plugin is finished and preparations made to take it further. Check out the code on GitHub if you want to contribute or make your own plugin.
5. Publish the plugin
If you want to share your plugin with others then you can publish it on Grafana.net. This means it can be installed with the Grafana CLI tool like this:
grafana-cli plugins install grafana-clock-panelTo publish a plugin, create an account on Grafana.net and then talk to the Grafana developers on Slack who will help you with the last step. Instructions for publishing can be found on Grafana.net.
In the next post, we will look at how to make the clock customizable. I want to be able to choose date and time format, 12/24 hour clock, customizable colors, font sizes and more. It should be easy to make it do countdowns too.
References:
I used the following plugins for inspiration: